Just Like 1936 - Carving

Thomas McCollum took up carving after he saw a decoy-carving contest at an outdoors show in Harrisburg, Pennsylvania, in the late 1970s. Since his first attempt at a mallard, he’s carved hundreds of decoys and won many ribbons and best of shows. He lives in Shamokin, Pennsylvania, with his wife, Sandra, their dog, Santana, and cat, Kiwi.
As my carving progressed through the years, I came to know and appreciate the beautiful carvings of Lem and Steve Ward of Crisfield, Maryland. Sometime around 1915 these two brothers began carving decoys together, and their work eventually became prized by both hunters and collectors. Although the Ward brothers are no longer with us, their legacy lives on. I love the Wards’ carving and painting techniques and try to replicate them to the best of my ability. I use photographs of their work as the basis for mine. I also make occasional visits to the Ward Museum of Wildfowl Art in Salisbury, Maryland, where I can see the masterful work of these brothers up close and in person.
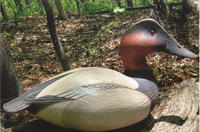
There is a power in simplicity which is why I chose to paint a famous Ward decoy, the 1936 canvasback. It is a simple decoy; I will demonstrate my carving and painting techniques so that anyone should be able to make one. I use pine for the body and basswood for the head, and I paint with Grumbacher Pre-Tested oil paints thinned ever so slightly with Liquin medium. Good luck with your own Ward canvasback!
This article was featured in the Wildfowl Carving Magazine Fall 2014 issue.
Carving Step-by-Step
-
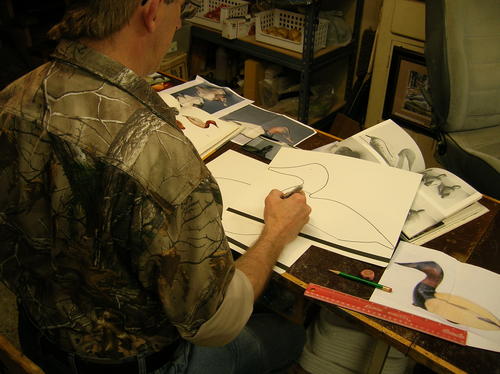
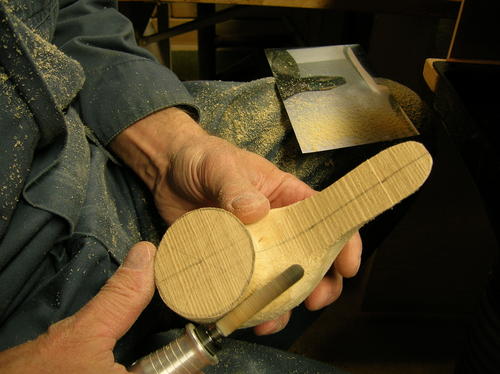
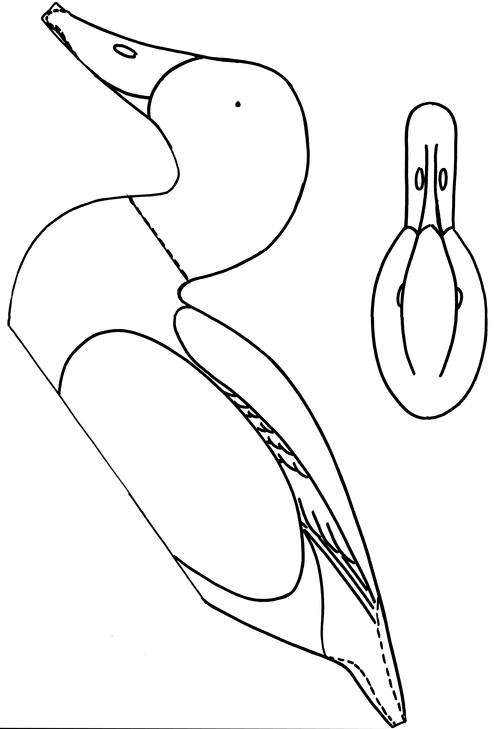
To develop my pattern, I found a lot of pictures in books, magazines, and on the Internet. I also had several photographs I took on my visits to the Ward Museum. Basically, you need a good side view and a good top view of the decoy.
-
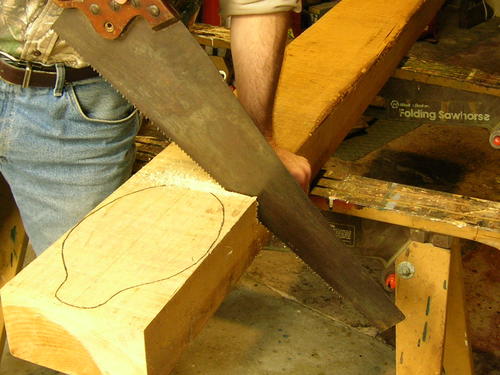
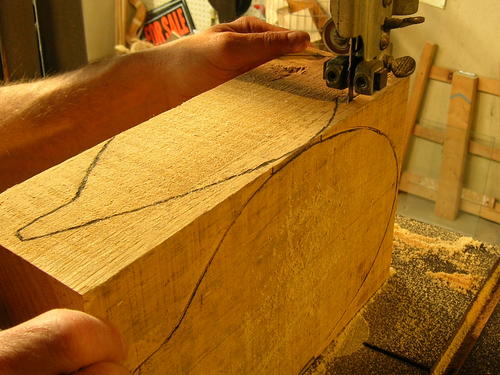
I drew my top and side views onto a piece of pine board, cut it to length, and moved to the band saw.
-
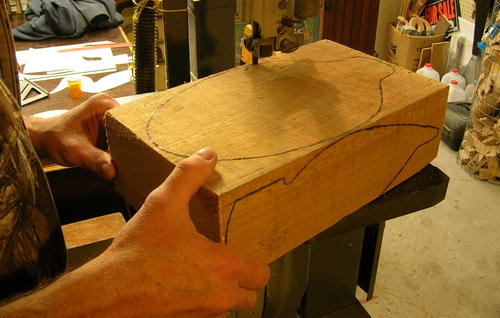
I cut out the top view, letting a little piece of 4 from the block. wood remain on both sides so I could flip the block on its side for the next step.
-
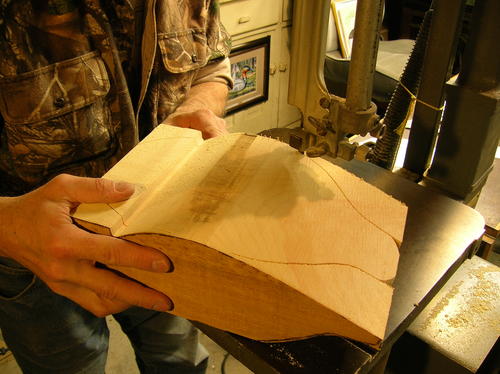
Continue to cut the entire profile I cut out the top view, letting a little piece of from the block.
-
Finish by cutting off the unwanted waste. If you have the patience, you can do these last few steps with a handsaw and perhaps a 5" disk grinder on an electric drill.
-
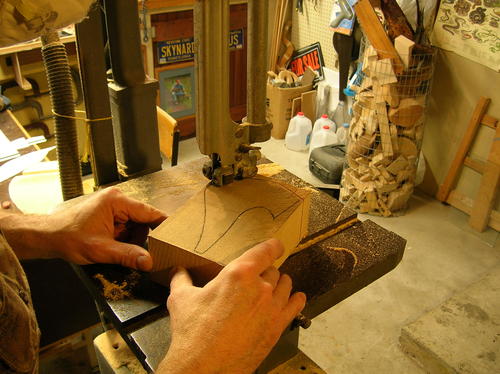
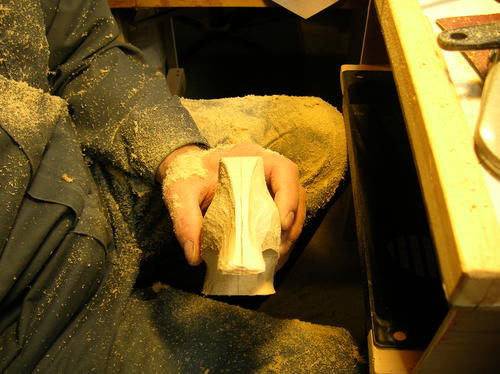
Cut the head profile. I’m using basswood.
-
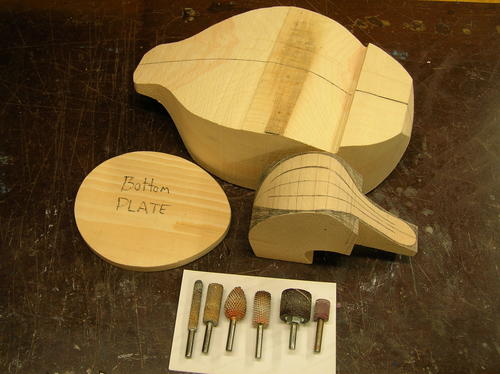
Since I will hollow the decoy, I cut a plate to use when the hollowing is complete. I also sketch in a top view on the head and bill to help guide me through the carving. I will use these Kutzall and Saburr Tooth bits in my Foredom grinder to do most of the carving.
-
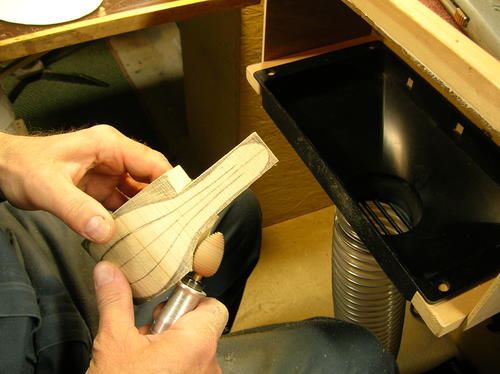
When carving the head, I always establish the top view first. The teardropshaped Saburr Tooth conforms perfectly to my layout lines.
-
I clean up any irregularities with a cylinder shaped Saburr Tooth bit.
-
Sketch a line running through the eye and continuing through the bill. Using a 1" Saburr Tooth ball, rough in the eye channel and form the cheeks at the same time.
-
I switch to a cylinder shaped Kutzall and continue to carve the neck down to its final shape.
-
Here’s a front view of the head once it’s been roughed out. Keep the top of the head flat.
-
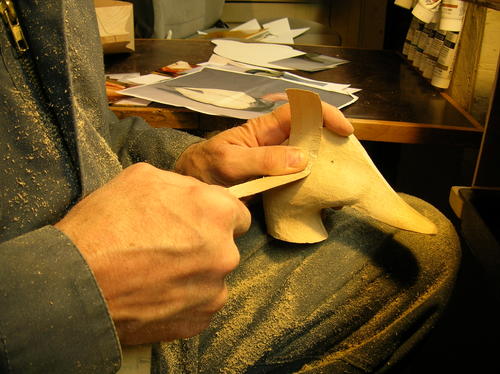
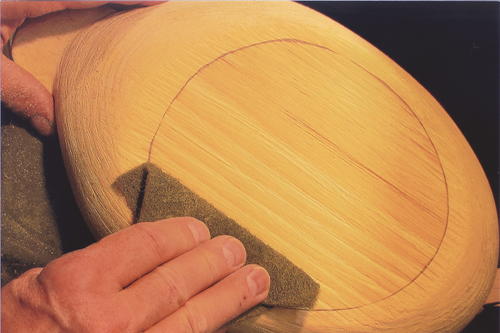
I like to strop the head to its final shape. You can really move wood this way. Trap the sandpaper with your left thumb and pull it through with your right hand. Once you mastered this technique, you will love how quickly the sanding goes.
-
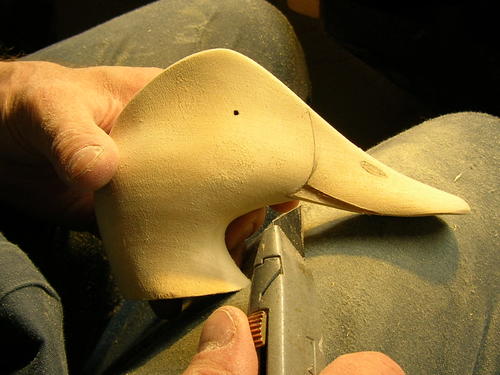
The sanding is finished for now. Using a utility knife, I cut in the lower mandible.
-
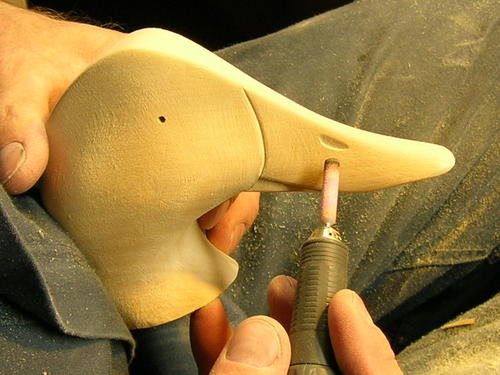
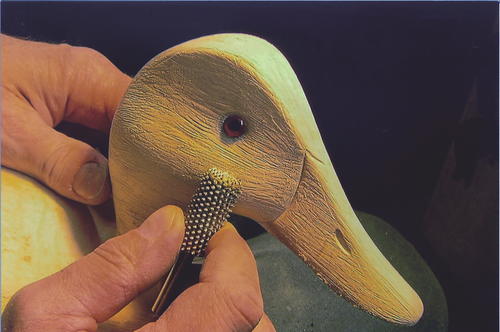
I use a cylinder-type stone to define where the bill meets the head. Then, using the same stone, I quickly add the indication of a nostril.
-
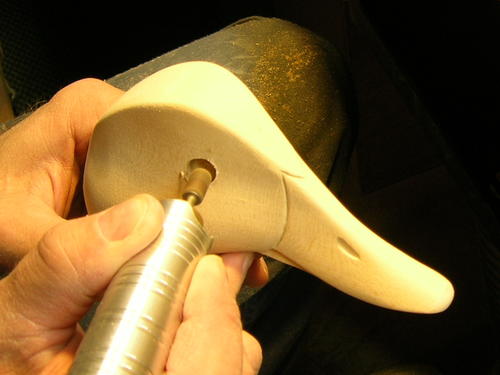
Using a small cylinder shaped Kutzall grinder, I create a hole for a 10 mm red eye.
-
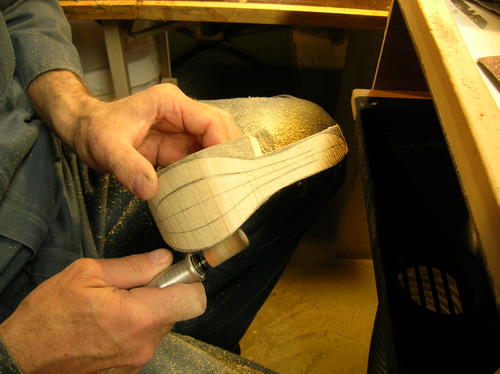
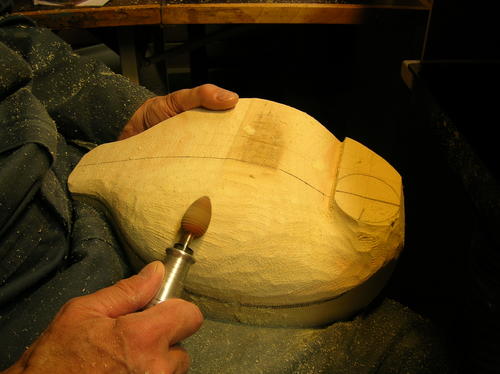
Now it’s on to the body. I start with the teardrop-shaped Saburr Tooth bit and start rounding. Keep in mind that you want to make the body round, not blocky.
-
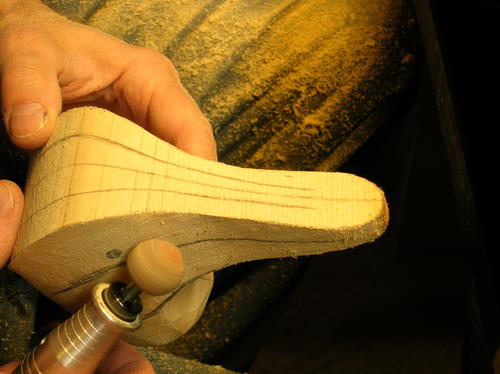
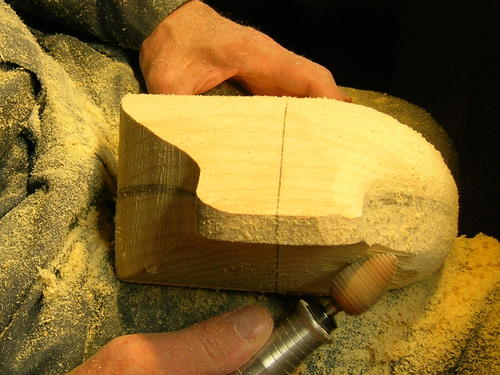
Here I am working the wood away near the tail. Note how I’m developing the roundness.
-
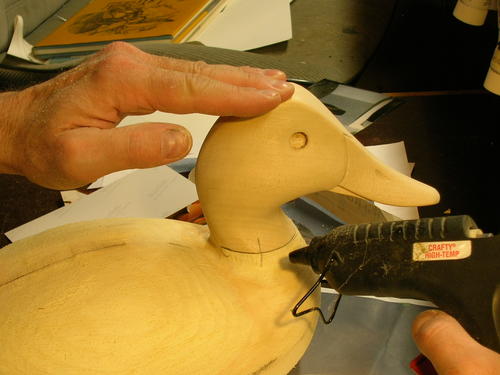
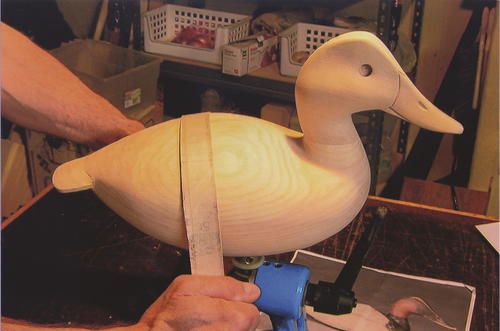
I am temporarily attaching the head to the body using a hot-glue gun. When I am satisfied with the transition of the head to the body and the decoy’s overall appearance, I will twist off the head to start hollowing.
-
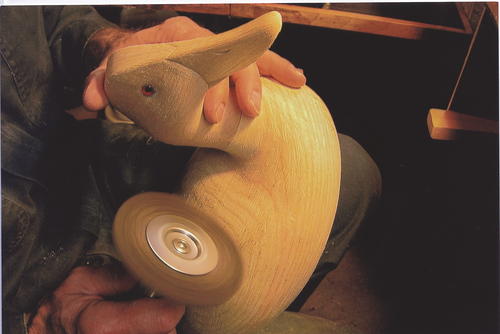
I use a Jerry Rig and a strop I made from sandpaper to give the bird a vigorous sanding workout. I want to sand the bird to the round.
-
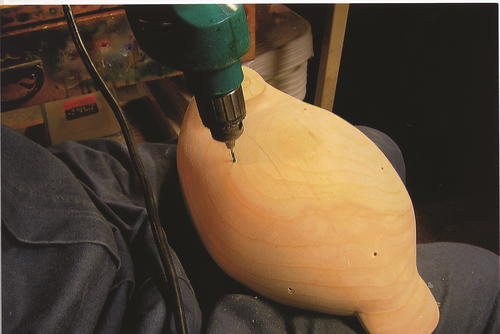
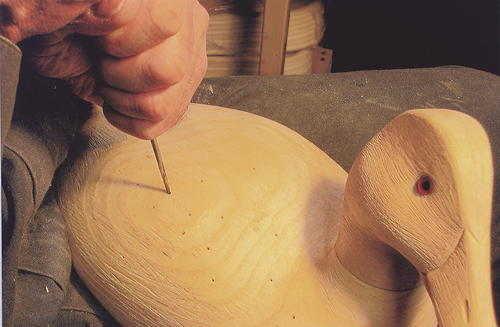
With a very small drill bit sticking out of the chuck about a half inch, I drill several holes into the duck. These will eventually become destination points I will want to meet with my various bits when I hollow.
-
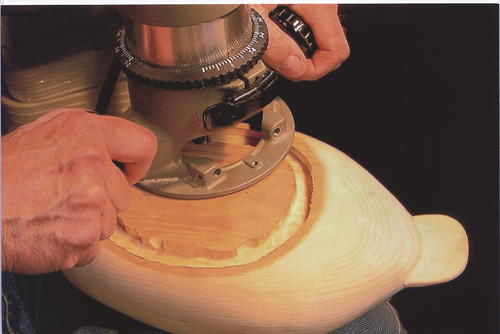
I trace the location of my bottom plate onto the bottom of decoy. Then I use a router to carefully route a groove along the entire inside of the line I traced, to the same thickness as the bottom plate.
-
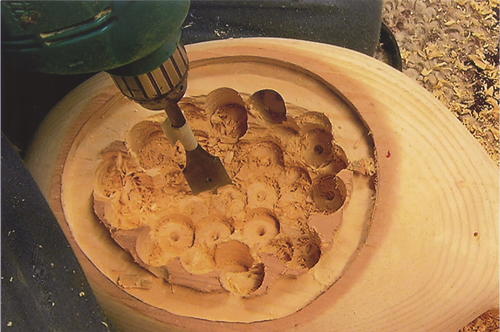
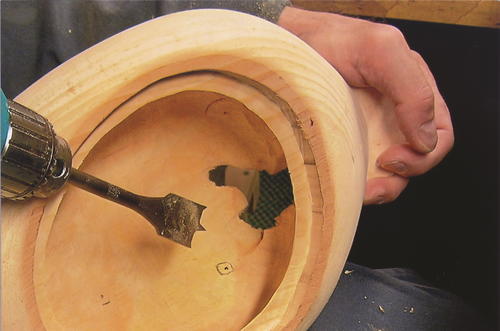
Using a speed bore bit, I bulk out a lot of the inside of the decoy, leaving a lip for an epoxy seal.
-
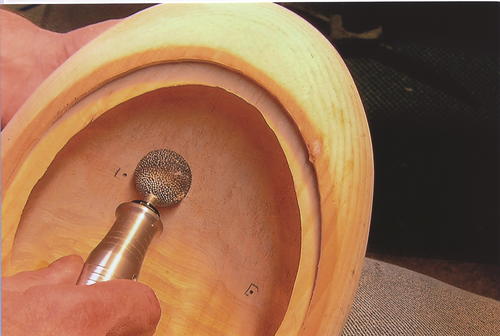
I am using a 1 1/8" Kutzall ball to smooth the inside of the hollowed area. You can see the reference holes I drilled in from the top. As soon as I reach a hole, I pencil around it so I don’t break through.
-
Well, the plan was not to break through. But I have a speed bore bit that cuts just a little too easily, so I accidentally blasted right on through to the other side of the rump area. The breast and tail areas can be tough to grind away because of the danger of this happening. Use extreme care here.
-
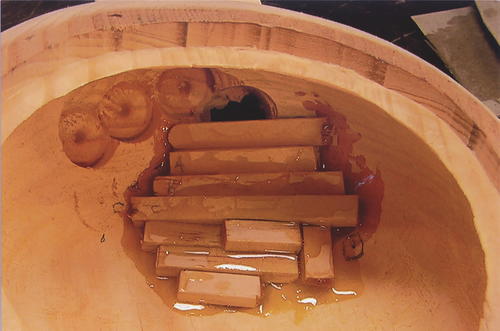
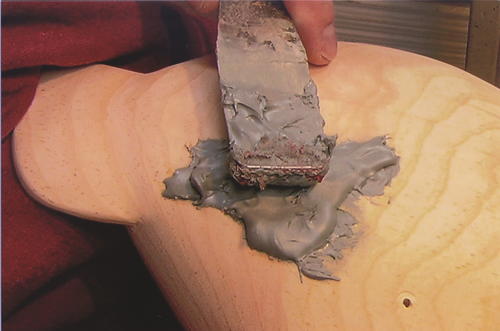
I definitely did not want this extra work, but now I need to deal with it. It can be fixed. I take several lengths of wooden sticks and glue them in place, using epoxy to create a backing for my body filler.
-
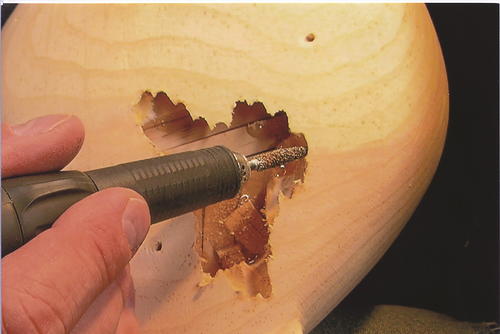
Using a Kutzall bit, I create a taper on the inside edge of the hole. This will help make the fix invisible.
-
I pack the hole full of body filler and sand it smooth. Also, I plug the holes I had drilled, using glue and tapered wood, sort of like a wedge. The deeper I pound, the tighter the hold.
-
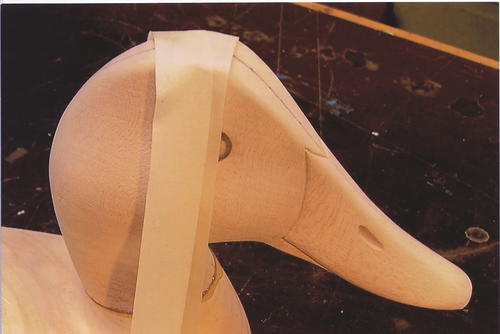
In this final step I permanently attach the head with epoxy and set the eyes with Apoxie Sculpt.
-
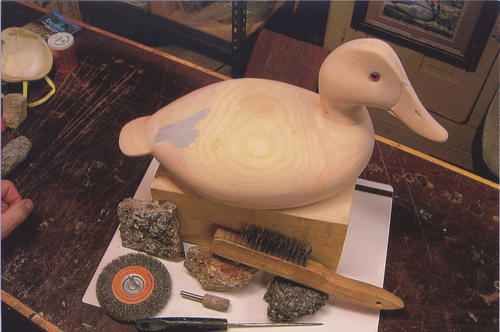
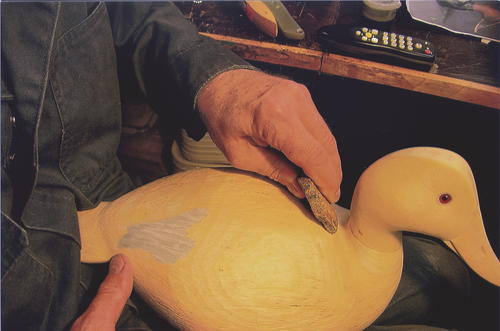
Now I want to distress the wood to make the decoy look old. I’ll use rocks, a wire brush, an ice pick, and one of my Saburr Tooth bits as distressing tools.
-
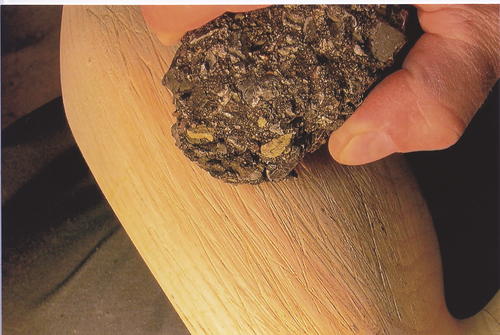
First I scratch the wood aggressively with a piece of rock.
-
I use a smaller rock to get behind the head.
-
A fast-spinning wire brush works really well to raise the grain a little. Caution! Use eye protection for this step. Little pieces of wire tend to want to fly off and hit you in the face.
-
By dragging a Saburr Tooth bit across the wood, I create scratches and distressed texture.
-
A few holes from an ice pick resemble damage from lead shot or termites.
-
I go over the entire decoy with a piece of defuzzing material or steel wool to remove some of the fuzz I created during the distressing process.
-
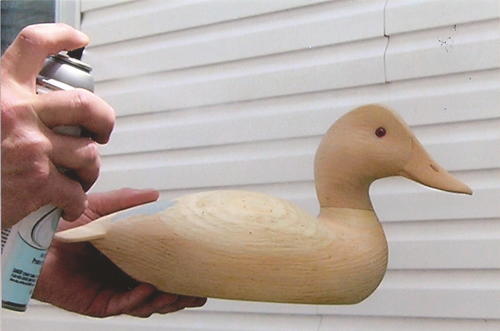
Finally, I spray Krylon matte finish on the decoy to seal it. I am now ready to start painting!
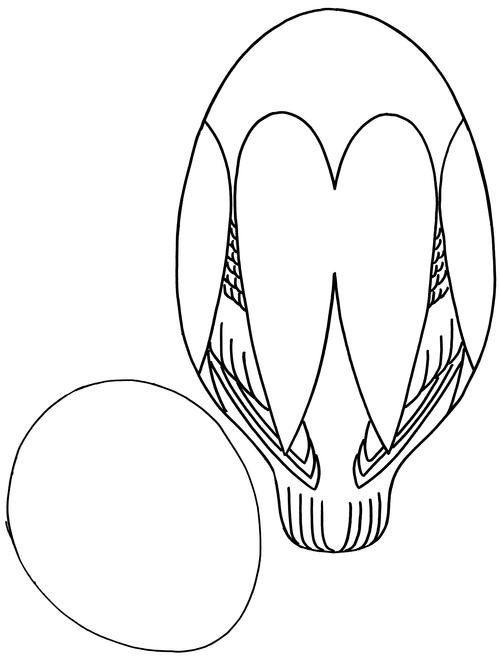
Pattern
Read NextNorthern Cardinal, Part One