
A Carolina Classic
Carving and constructing a Canvas and Wire Decoy.
Charles Holloman resides in Greenville, North Carolina, and is the loving husband to a beautiful wife and father to three great kids. Keith Hendrickson is a freelance writer/artist/ photographer who also works for the North Carolina Wildlife Resources Commission. He has been carving rough working decoys for around 30 years and won best of show at the Ward Museum’s Chesapeake Challenge.
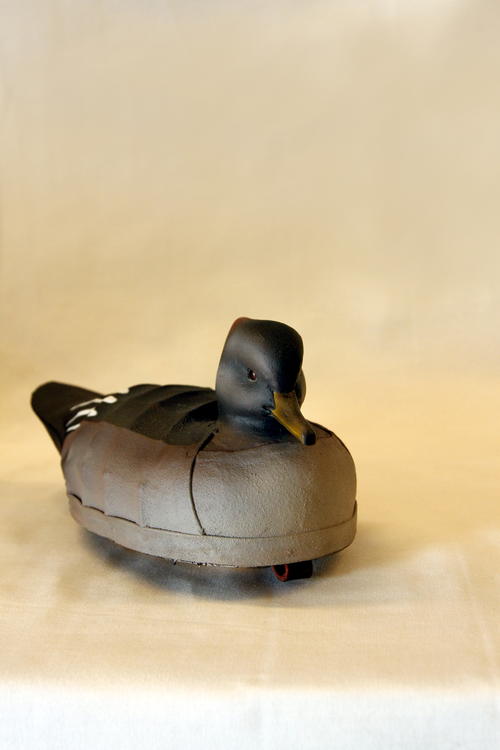
You can trace the history of the canvas decoy back to the turn of the twentieth century and the coasts of North Carolina and Virginia. Carvers often made these decoys from scraps they found in the shipyards of lumber, sail canvas, and wire salvaged from shipwrecks. These birds were lighter than traditional wooden decoys. And, because canvas decoys did not require a large solid piece of wood, their craftsmen could economically construct large birds such as geese and swans. The Carolina birds traditionally needed only to resemble the fowl they were trying to fool, so their paint patterns tended to be very basic and the decoys lacked eyes.
The canvas-and-wire bodies were fairly delicate, so very few early canvas decoys remain today, but their significance in the history of the waterfowl decoy makes them desirable in any collection.
I discovered canvas decoys when I was taking a carving class and noticed Charles Holloman working in another section of the shop on a really nice hooded merganser hen. It attracted my attention because it was a canvas decoy. By the time my bird was ready to be primed, I was doomed. I just had to talk to Charles and pick his brain to learn as much as possible about carving and constructing a canvas decoy.
Charles is an award-winning, self-taught carver who started about eight years ago after attending the East Coast Wildfowler’s Show. He watched judges float some birds, became interested, and started buying up carving supplies. He learned mostly through trial and error, but somewhere along the line he took a class from the late Chuck May on constructing canvas birds. He has been hooked on the process ever since.
The supplies and tools you need for a canvas bird are fairly basic. Many carvers probably have all the items in the shop already. The one thing Charles and about every serious carver with whom I have talked emphasize is that you need a good pattern. So that is the first thing on the list.
Read the complete article in Wildfowl Carving Magazine's Winter 2013 issue.
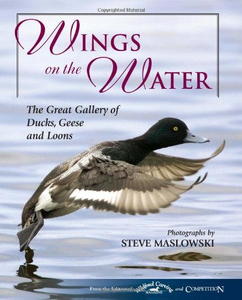
If you enjoyed this carving, be sure to check out more incredible ducks in Wings on the Water. Wings on the Water combines the best reference articles from the pages of Wildfowl Carving Magazine with a new collection of images. It provides a wealth of information about more than two dozen aquatic birds and is an in-depth look at a variety of ducks and geese for carvers and waterfowl enthusiasts alike, described in vivid prose from the magazine's best writers. Wings on the Water contains detailed, intoxicating images by Steve Maslowski, one of the stalwart veterans of wildlife photography.
Click here to purchase your copy! Wings on the Water
Materials List
- Band saw
- Small tack hammer
- Japanese back saw or triangular riffler
- Single-edged razor blades
- Cigarette lighter
- Scissors
- Portable drill and 1/16" drill bit
- Staple gun and stainless-steel staples
- Foredom flexshaft tool and micro motor
- Carving burrs
- Heavy lineman’s pliers
- Needle nose pliers
- Staple remover
- ¾" northern white pine shelving board
- Breast block of tupelo or equivalent
- Wood for head
- #10 cotton canvas or striped cotton pillow ticking
- ¾" brass canoe tacks
- 9 penny nails
- #6 drywall screws
- 2" round toothpicks
- 12-gauge galvanized wire
- Gorilla glue/Titebond III/5-minute epoxy
- Waxed cord
- Spar urethane
- Preferred paint
Wildfowl Carving Demonstration
For a closer look at each step, please click on the image to enlarge.
Step-by-step Instructions
-
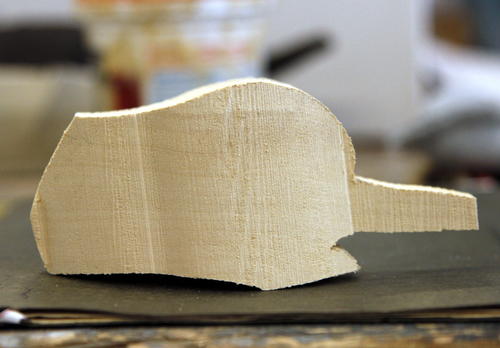
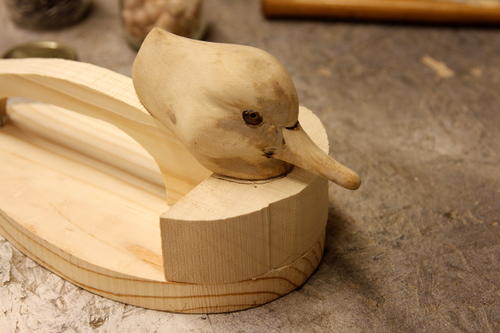
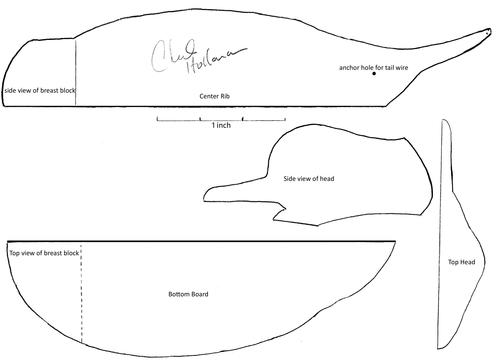
Cut out the head, breast block, bottom board, and center rib using a band saw. The head and breast block material is tupelo, and the center rib and bottom board material is pine shelving board.
-
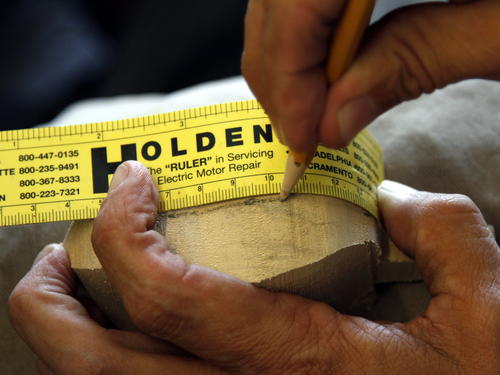
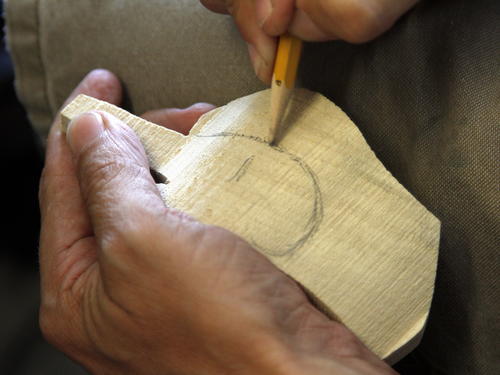
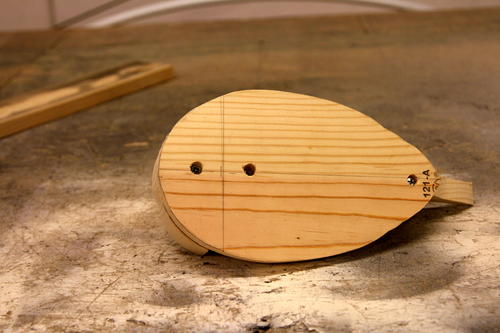
Measure and draw in the centerline. You will want to keep this on the head throughout the carving process as it provides the basis for other measurements and makes it easier to eye the head’s uniformity throughout.
-
Draw in the three planes of the head— (1) the width of the head from the top view, (2) the width of the cheekbones, and (3) the width of the widest point of the neck.
-
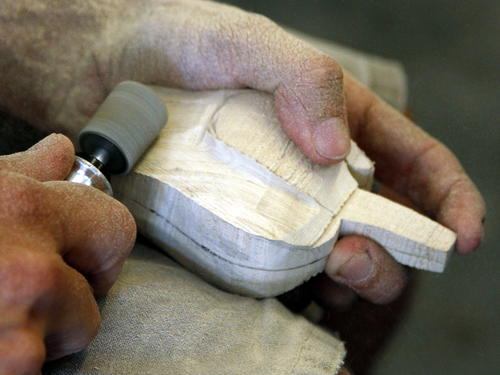
Carve down to your rough marks, starting at the lines you laid in on the top of the head and working down to the cheekbones.
-
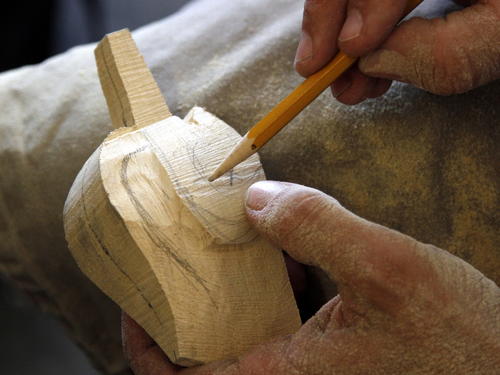
Draw in your high points on the brow and on the cheeks.
-
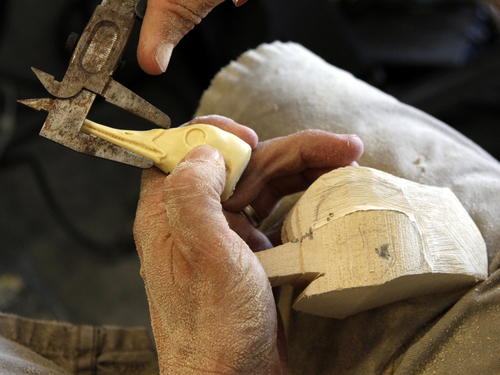
Using a study bill, mark in all measurements accurately. Make sure you indicate the peak of the bill from the top view and all other corners and angles. If you are making a gunner, you can add some thickness in the bill for strength.
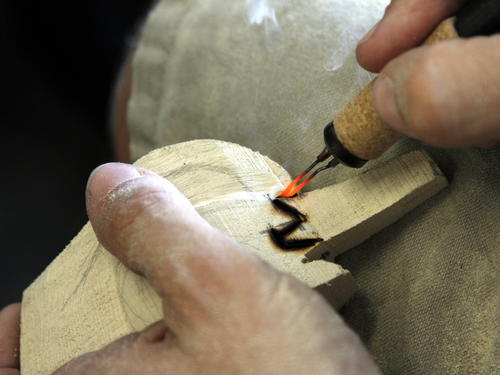
-
Burn in your bill definition lines. With some practice, you can burn down close to the depth needed to get the correct bill width.
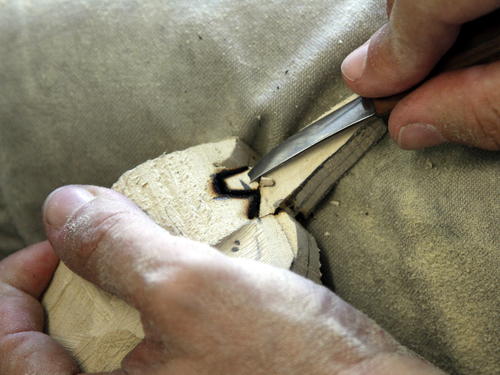
-
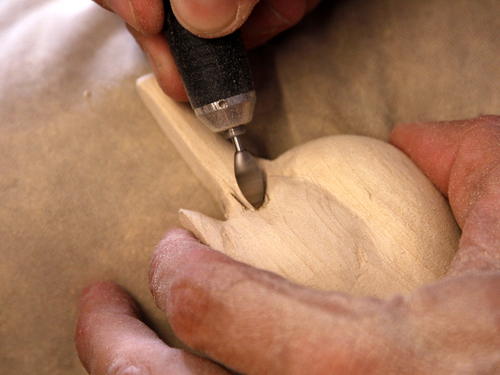
Use your knife or a detail bit on a micromotor and carve in the width of the bill and other bill details.
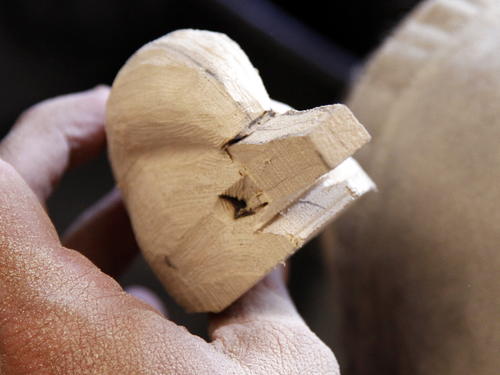
-
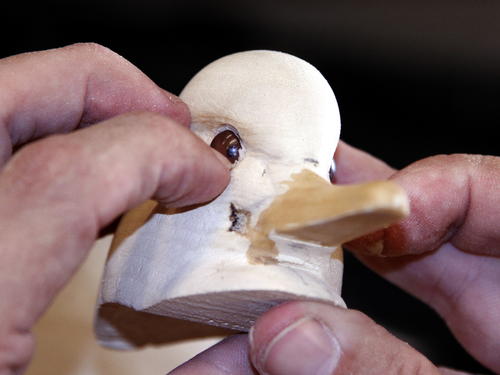
Start rounding out the head and cheeks. Cut in the eye channel and let it run into the top corners of the bill.
-
Continue carving and rounding until the head looks the way you want it and is symmetrical to your center line. Don’t cut in too far on the width of the neck. In this low head pattern, the neck is as wide as the cheek.
-
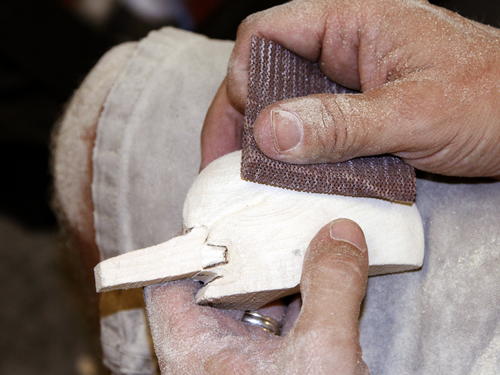
Start sanding and see where you are and where the head may need more work. Remember that you can actually do a good bit of carving with that piece of sandpaper.
-
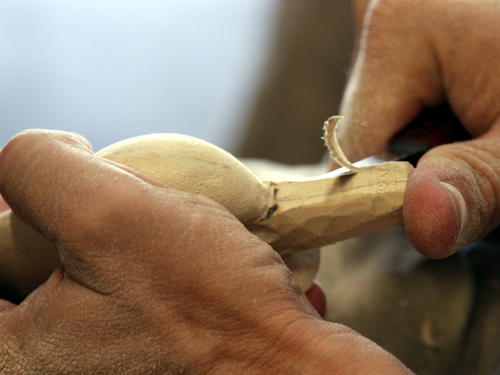
With your knife or micromotor, carve the bill keeping your measurements and bill thickness accurate. Don’t remove too much if the bird will be a gunner.
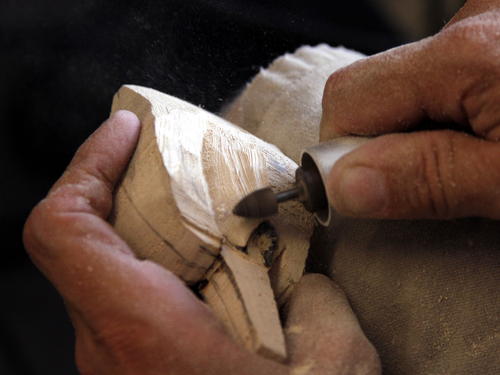
-
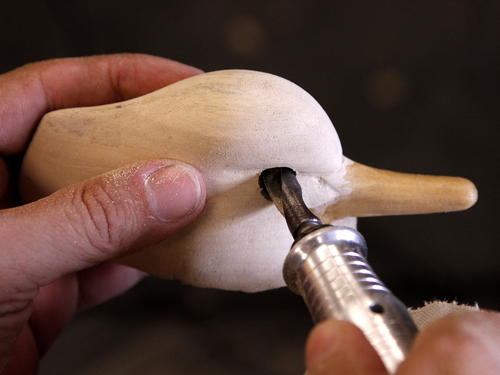
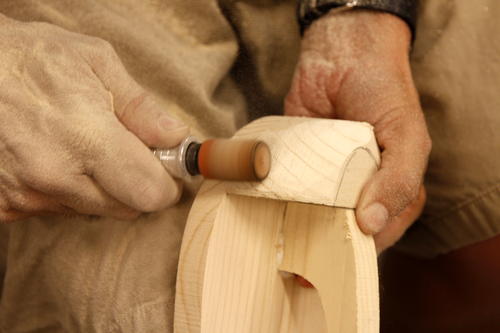
Use the micromotor to round out where the cheeks meet the bill. At this point, work the head up to where you like it, carving in any feather detail or groups you may want on the head. With a merganser, don’t get too much into the back of the head because this is where the crest is. Sand it once again. If you are going to hunt this bird and you used tupelo, coat the bill with liquid super glue at this point. The glue will soak into the wood pores and harden up, strengthening the bill tremendously. Let it set up before you do any more so it won’t get glued to your hand.
-
Time to set the eyes. Go again to your study bill and mark the center of your eye on both sides of the head. Look at your points from both the top and front to make sure they are set symmetrically. Measuring off of the bill makes a difference. Use an eye bit to cut in a hole on both sides, angling the bit slightly down and slightly forward.
-
Mix up a small amount of Quickwood epoxy putty and use it fill in the eye sockets.
-
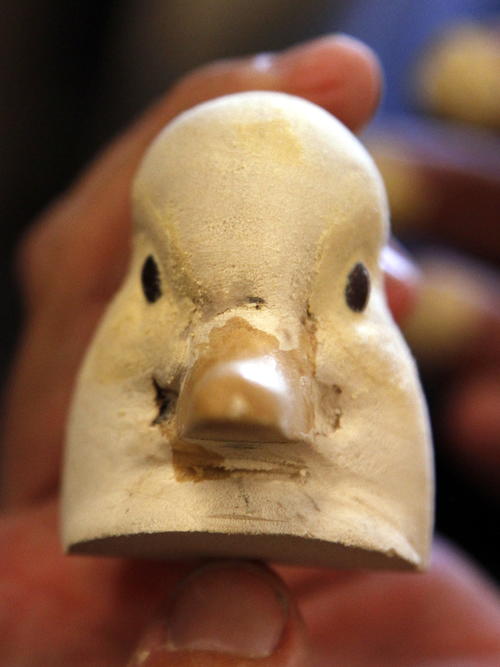
Set in the eye by pressing in the front and bottom slightly. You want the eye to appear as though it is looking at the end of the bill. Set both sides and view from both the top and front to make sure they are symmetrical. You should be able to see the pupil from the front. Don’t set them too deep, and don’t leave them bug-eyed.
-
Let the Quickwood Set. Put a dab of Elmer’s Wood Filler on your finger and wipe some over the eye to fill any voids around the socket, then quickly wipe it off with another finger in the opposite direction…wipe on, wipe off. Repeat several times and your eye set will look nearly perfect. Check the eyes from the top and front once again to make sure your filler is even. If you want to do any detailed cleaning, you can do it now, but you can clean the filler with a toothpick or sculpting tool even after it has dried.
-
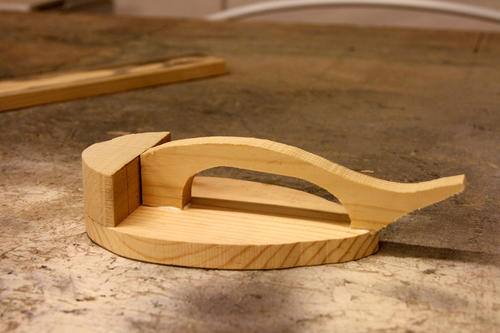
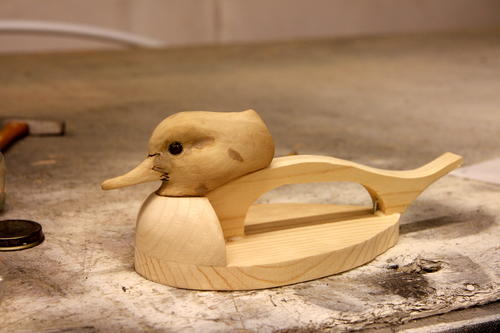
Draw a centerline down the bottom board and another line to mark the back of the breast block. Place some Titebond III or Gorilla Glue where the center rib and breast block will attach to the bottom board. Attach the center rib and breast block.
-
Take the 2" drywall screws and run them through the bottom board and into the center rib and breast block. You can countersink the screw holes if you want and also fill the holes with wooden plugs. Allow the glue to set up.
-
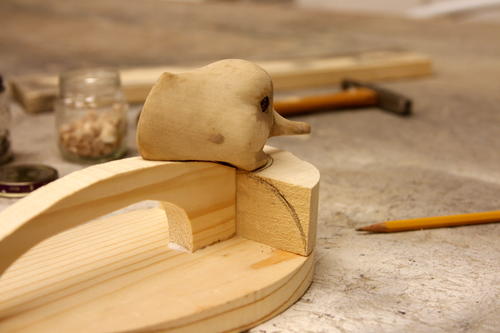
Place the finished head on the breast block and use a pencil to outline the neck joint on the block.
-
On the back side of the breast block, draw in the curvature of the breast you will carve.
-
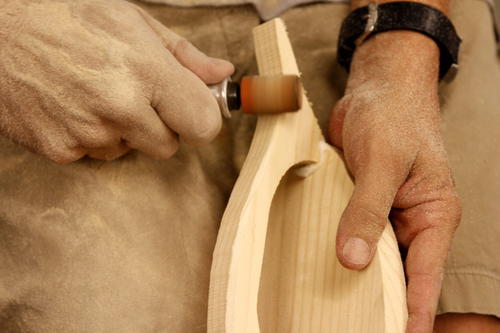
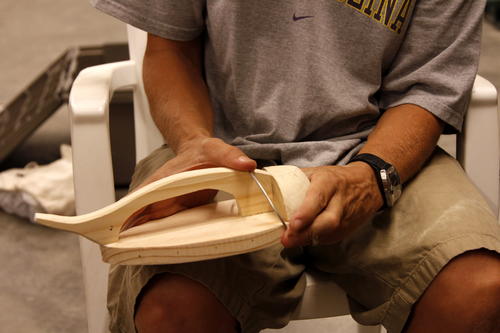
Carve/round down the breast block, but don’t get into the head shelf. Make sure the joint where the breast block meets the bottom board is smooth.
-
Round off the edges on both sides of the center rib. This will prevent a defined line from showing through once you’ve stretched the canvas.
-
Check the head and neck joint to the body. You may have to trim the underside of the head to fit the body and center rib properly.
-
The tools you will need to set the wire ribs are a power drill, Japanese back saw or triangular riffler, 1/16" drill bit, heavy lineman’s pliers, needle nose pliers, and some 12-gauge galvanized wire.
-
On the bottom board just below the breast block, mark a point with your pencil every inch and a half down both sides. This pattern uses five ribs and a tail wire. Drill a hole about an inch deep at each point using your 1/16" drill bit. Also drill a hole all the way through the center rib where you will insert the anchor points of the tail wire.
-
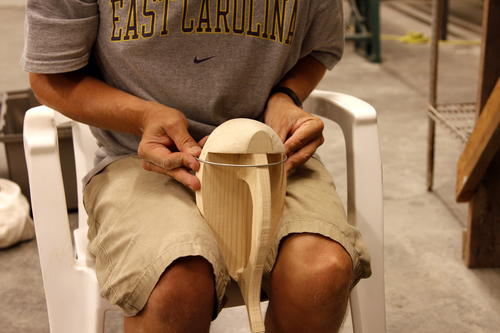
Cut six pieces of wire about 18 inches long. Working from the front rib on back, bend a piece of wire until it is half round. Work it over the decoy, rounding from the center rib on down to the bottom board. Use your fingers or a marker to note the point on the wire rib where it meets the anchor hole you drilled earlier.
-
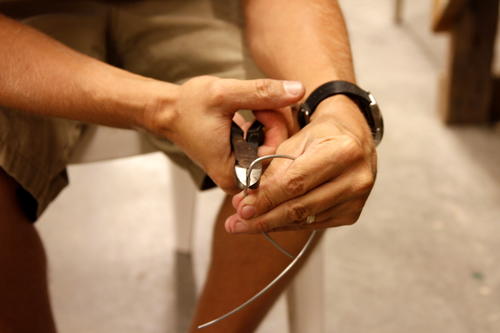
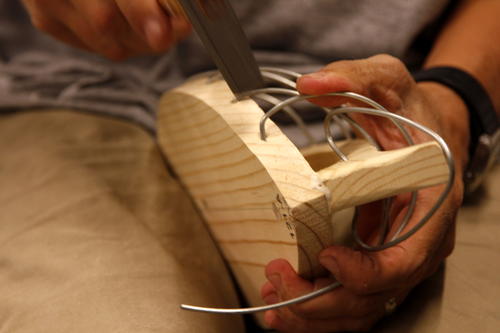
Use your lineman pliers to make a 90-degree inward bend in the wire. Take the wire cutters and cut the wire, leaving a ½- to ¾-inch tag end of wire to be inserted into the hole in the bottom board.
-
With a tack hammer, tap in the tag end of the wire rib into the first hole. Tap it in until it is flush against the wood. Now lay the wire rib back in place against the center rib and measure the other side. Repeat the steps on this side, bending and cutting the wire, then insert it into the hole on that side and tap it in with the hammer. Push the wire rib flat against the center rib; it is okay to have the wire rib lay backwards some. In fact, many carvers plan this into their design for aesthetics.
-
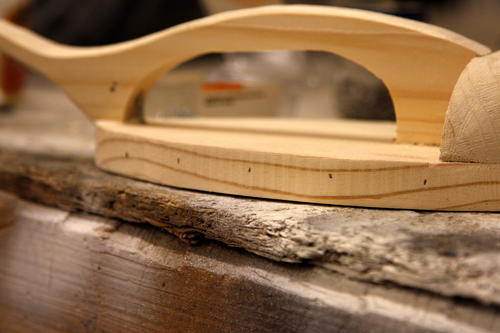
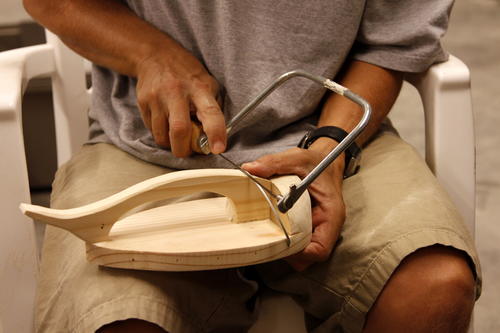
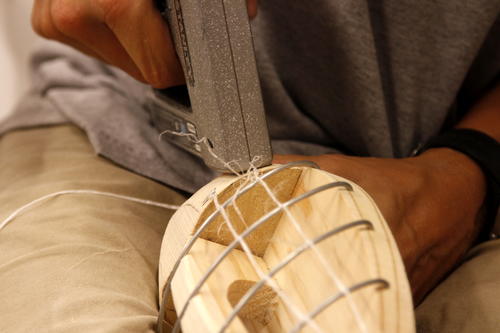
Use your saw or riffler to cut in a slight groove just behind the wire rib by making two cuts that form an angled channel all the way across the center rib. This groove is just a slight indent that will hold the wire rib once you push it into the groove. You don’t want the groove to be so deep the wire rib lays flat with the top of the center rib. The wire needs to stick up some to hold the stretched canvas off the center rib. Push the wire rib into the groove. It should hold in place. The stretched canvas will also help keep wire in place in the groove. Now repeat this step on back for the other remaining wire ribs, except for the last one.
-
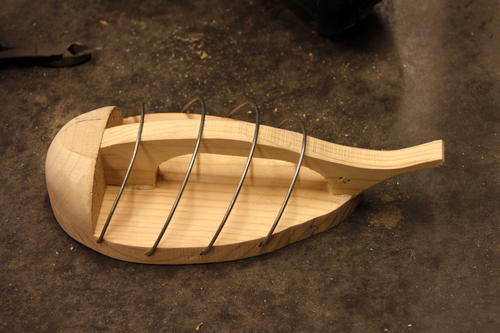
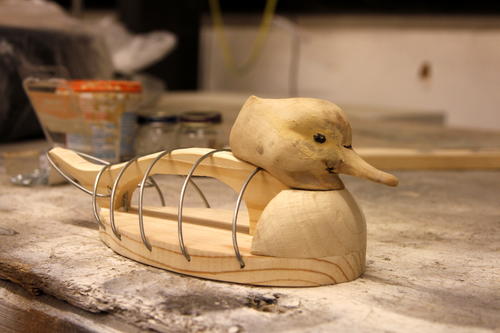
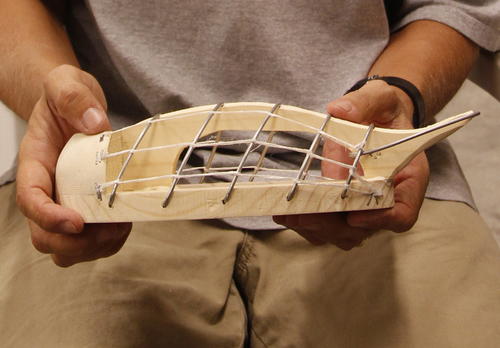
With a little practice, you will be able to set all the ribs so they have close to the same angle of lay-back. This is what your body should look like once all the ribs except the last are in place.
-
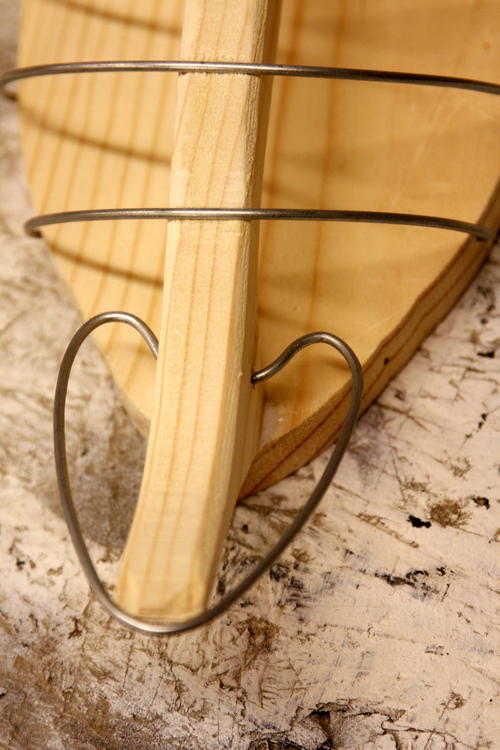
Take your saw or riffler and cut another groove in the very tip of the tail, running the full width of the center rib. Take another piece of wire and lay it into the groove you just cut and bend evenly on both sides to form your tail wire. Basically bend the wire into a heart shape for this pattern, leaving a ½-inch tag end on both sides that you will insert into the tail holes you drilled earlier. This top view shows the tail wire with the tag ends set into anchor holes in the center rib. Note how the back end of the tail wire fits into the groove you cut earlier.
-
Now place the final wire rib in place as you did with the other wire ribs. This rib will fit over the tail wire and lock into another groove you cut in the center rib just as you did with the other wire ribs.
-
Once again check the head fit. At this point, you should have to trim a bit on the bottom side of the head to allow a flush fit against the wire ribs that slightly protrude up over the center rib.
-
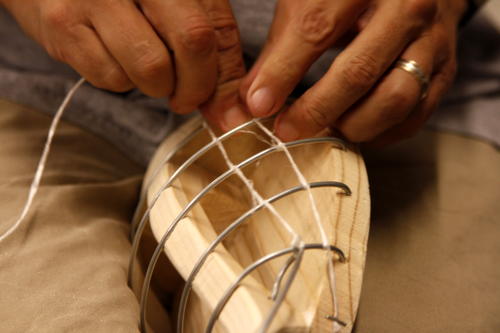
Use waxed cord to secure the tail wire to the last wire rib where they intersect. Tie a decent knot, and then work your way forward by wrapping a loop of cord around each wire rib, keeping the cord taunt. Secure the end of this cord to the edge of the breast block with a stainless staple from your staple gun. Pull the string back 180 degrees back towards the tail and staple back over the cord and trim the cord. Repeat on the other side. Secure the cord at the back of the bottom board behind the last wire rib again using the staple gun. Wrap the cord around all the wire ribs as you did before, working from the back to the front.
-
Again secure the cord to the breast block as you did before. Repeat on the other side then place one last stringer cord near the bottom on both sides.
-
This is the body once all the stringer cords have been placed, securing all the wire ribs. In larger decoys, you can add a fourth stringer cord above the first cord. Now the decoy is ready for the canvas. We’ll pick up there in the second half of this demonstration.


Wildfowl Carving Pattern
85% life-size low-head hoodie hen
Read NextAlexander and Maria

