
The Great Horned Owl in Miniature - Painting
Part Two: Painting
Al Jordan lives in Rochester, New York, where he is a master falconer. He was the North American shorebird champion in 2008 and the IWCA Shorebird Champion in 2010. Al is also an instructor and judge and the author of WILDFOWL CARVING MAGAZINE’S Half-Size Osprey Workbench Project. Learn about Al’s classes and one-on-one instruction at (585) 227-2235, www.ajordanbirds.com.
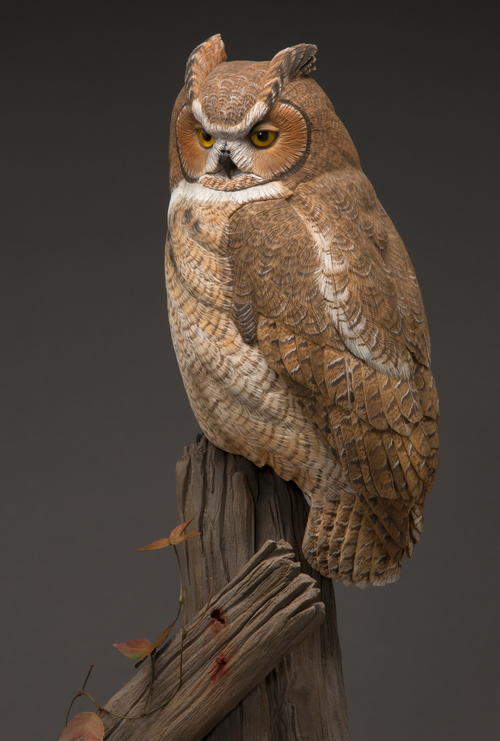
Painting the great horned owl seems like a daunting task. So take a deep breath and let’s think this through. Great horned owls come in many color variations. They can be very, very dark, almost black, and—on the other end of the spectrum— they can be almost white, with little to no barring. The typical great horned owl in the Northeast is a medium to dark brown, with flashes of a sienna-orange color and several areas of white. The browns occur as barring and cryptic patterns of dots and slashes on a backdrop of the orange and whites. This colorful Northeastern bird is what we’ll be painting in this article. The paints I’ll be using are a fairly new brand: Atelier, a free-flow artists’ acrylic paint. It is a high-end artists’ paint that has a very rich pigment and color. I have found it available through Jaymes Company. It is very compatible with the airbrush and paintbrush.
You can find the carving portion of this project here.
Paint Colors
I typically do not gesso prior to painting. I seal my birds with Deft Sanding Sealer. I brush it on in a very heavy coat, giving it a few minutes to be absorbed by the wood, and then brush any excess off.
My base painting strategy is to lay down a base of whites, followed by a base of sienna orange. I then put on the brown barring and cryptic patterns, and finish by adding lots and lots of detailing.
-
Titanium white
-
Burnt sienna
-
Raw sienna
-
Burnt umber
-
Raw umber
-
Black
-
Matte medium
-
Gloss medium
Painting
Click the photos to view an enlarged version.
-
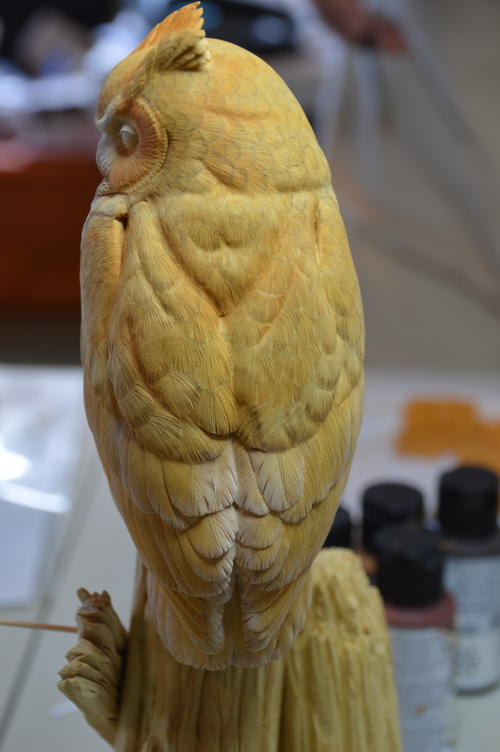
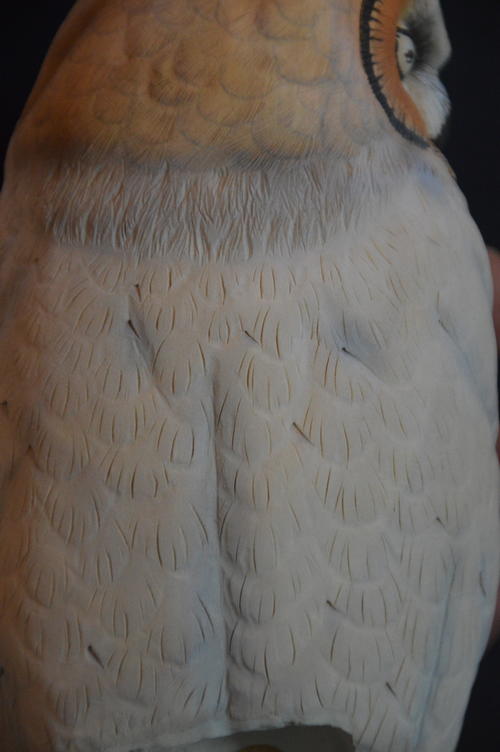
These photos show the base coating of whites and oranges. Check any reference you are working with prior to painting. For these steps, I used an airbrush. I put the colors on very lightly, not totally covering any area. I let the wood color show through, using the wood color to my advantage. As for the paint colors, the white mix is a blend of 90% titanium white, 5% raw sienna, and 5% raw umber. I am not overly concerned about an exact color; I am just after a dirty white. The intensity and brightness of white can be adjusted by the quantity and concentration of paint in one area. As for the orange mix, the blend is about 75% raw sienna and 25% burnt sienna.
-
The next series of photos shows the darkening or shadowing of areas. I especially like to hit the valleys and creases that I’ve carved into the bird. The color used for this is a dark brown. Again, I am not concerned about an exact color. The mix I used was a blend of 70% raw umber and 30% burnt umber. This is achieved with the airbrush.
-
Here we can see how I started adding the barring and cryptic patterns of the bird. I achieved this patterning with a paintbrush. The color is the same dark brown used in the shadowing stage. Rather than paint it on with smooth strokes, it is more a series of dabbing. You’ll find this to be a very slow and tedious process. There is no exactness to any of the cryptic patterning. Check your reference and use your own artistic license.
-
Next step is to tone down the whites and oranges. I do it with washes of browns, using the same brown mix. I purposely leave some areas lighter than others. This will give a more eye-appealing look when finished.
-
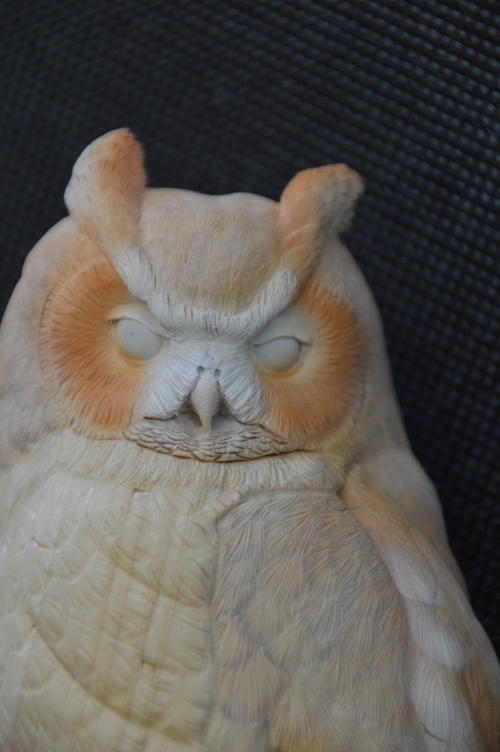
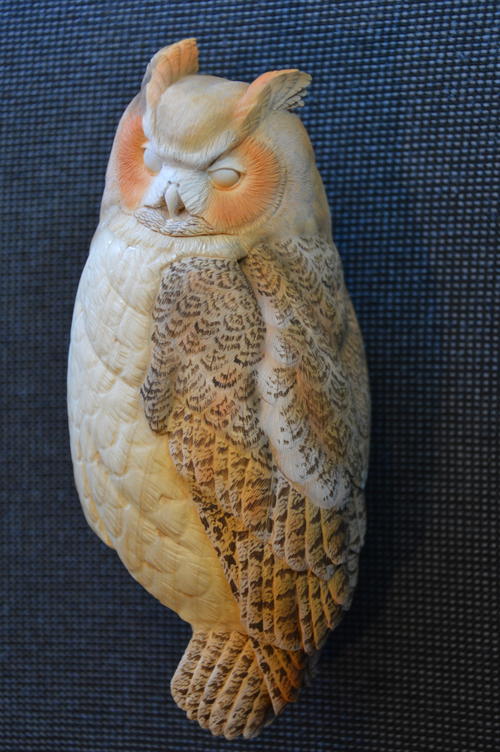
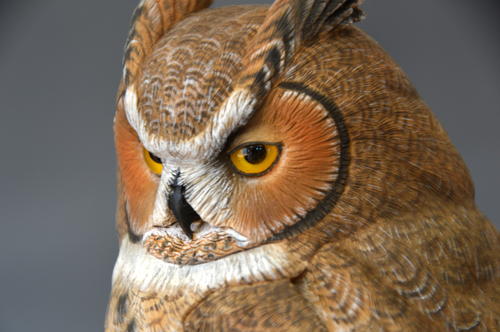
I now move on to the face. The white and orange is the base coat from earlier. I now add the black areas. The color mix I use here is a blend of 60% raw umber and 40% black; this will give me a nice warm black. I now hand brush the outer row of the facial disc and the beak. I then lightly airbrush the under area of the brow. Next, I airbrush –very, very lightly—the beak area that lies underneath his moustache.
-
Using a brush, I paint the eye rings and break up the orange edge of the facial disc.
-
Now I begin to detail the face. I get the white of the moustache with individual brush strokes, and I have painted the outer half of the ear tufts with the base brown, as well as barring the inner half of the ear tufts. The tiny feathers under the bleak have been painted as well. I first base coated them by airbrush with the orange mix, then hand brushed the warm black through the center of the feathers and edged them with white.
-
I now move on to the throat patch, chest, and belly. This area is completely base coated with the base dirty white.
-
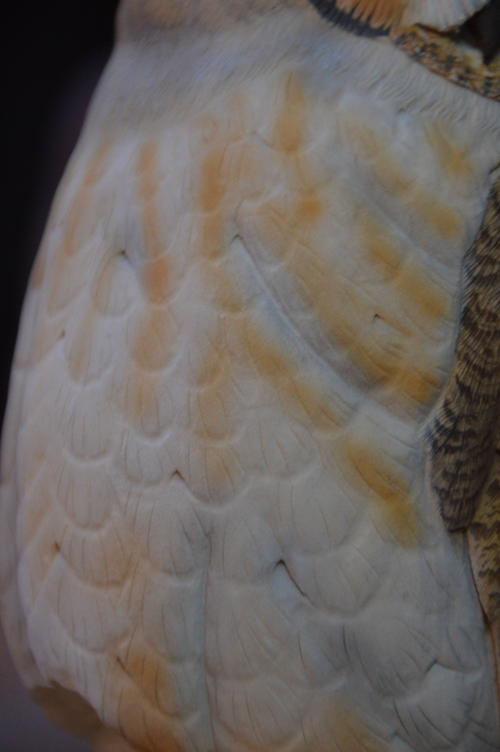
I now use the base orange. Checking my reference, I lightly air brush the center of the feathers,
-
The chest and belly area is now ready to be detailed. I begin by painting the dark markings. Check your reference: these markings are almost straight across, with very little curvature from side to side. The color is slightly lighter than our base brown: a mix of 90% raw umber and 10% burnt umber. You can put in the dark quill markings in at this time as well. Once I’ve painted the dark markings, I move on to white, painting many individual thin lines on the lower portion of the feathers. Don’t be afraid to run these fringes into lower or neighboring feathers.
-
Going back to the original white mix, I paint a white edge on the top of the brown barring. I don’t paint every feather in this manner; I hopscotch around. I do, however, paint a fine white line above each split.
-
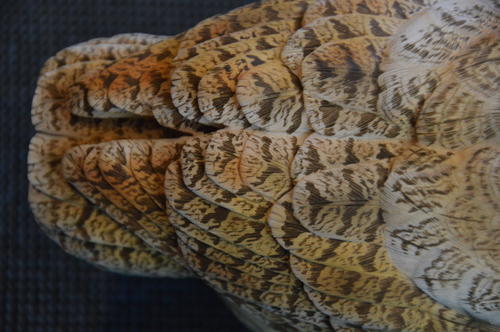
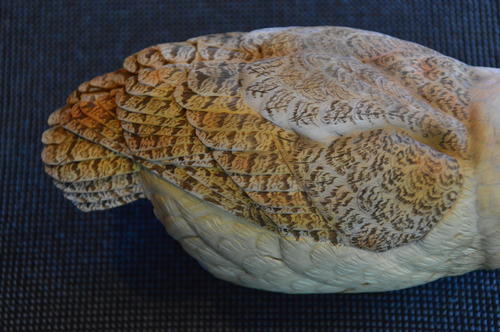
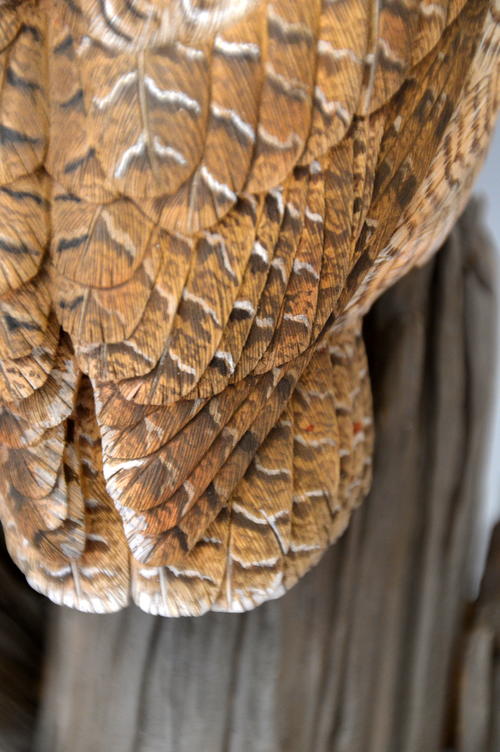
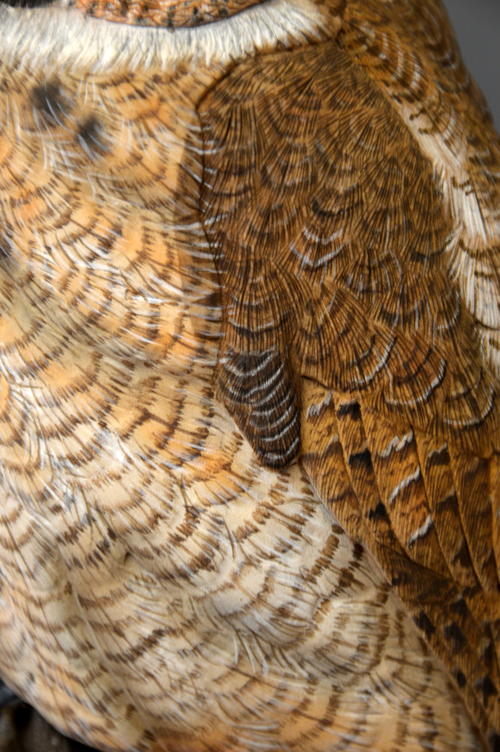
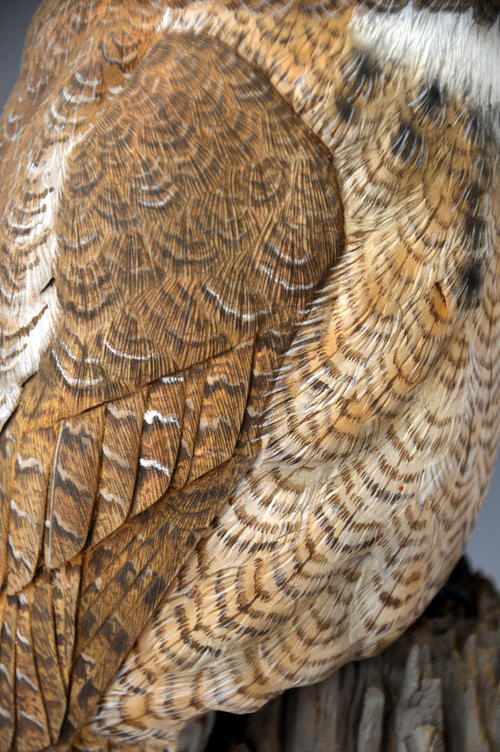
I now brighten the white on the outer scapular feathers. Don’t be afraid to overlap feathers with these thin strokes. I also have begun to paint the shafts. I used the dark brown mix. I also painted a thin tan-colored line on the inner portion of the shafts of the major flight feathers.
-
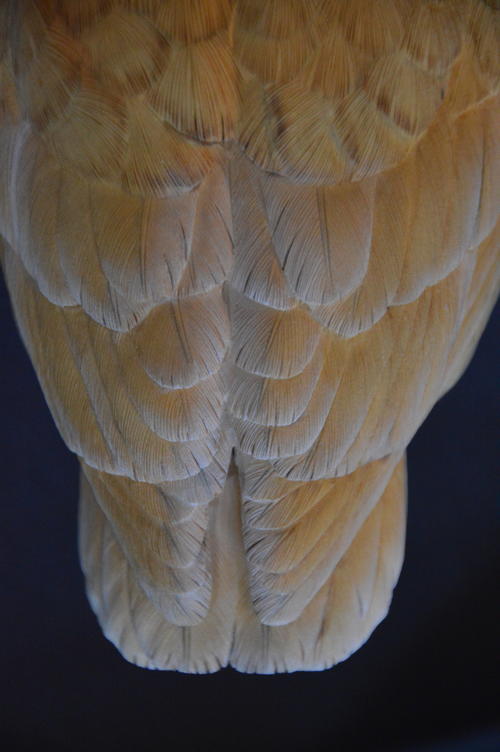
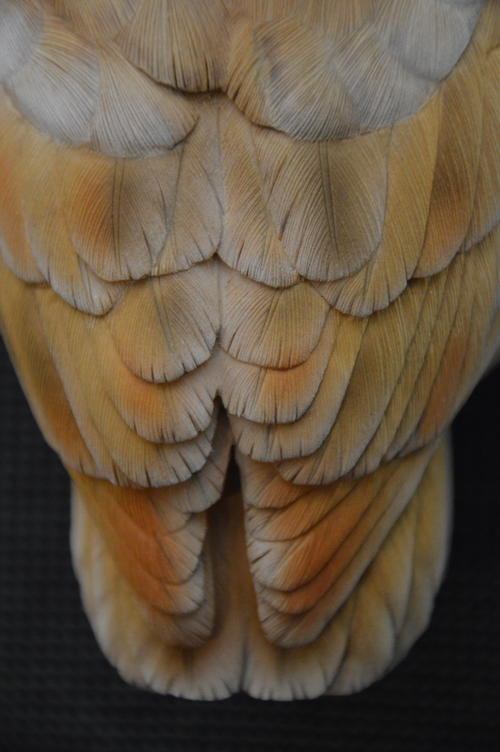
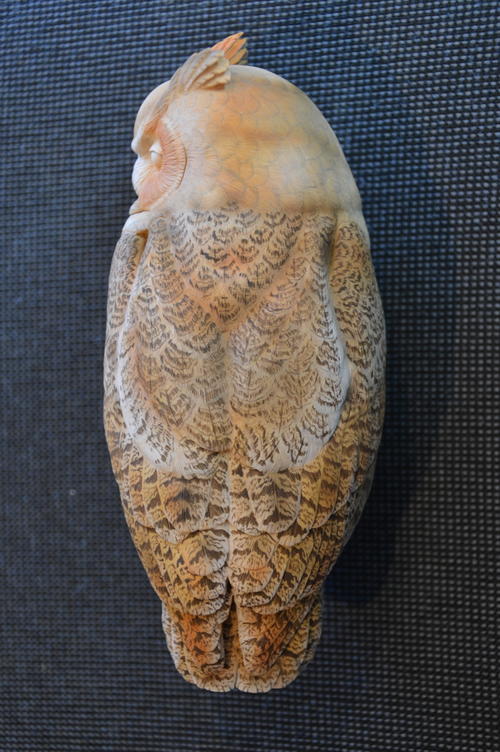
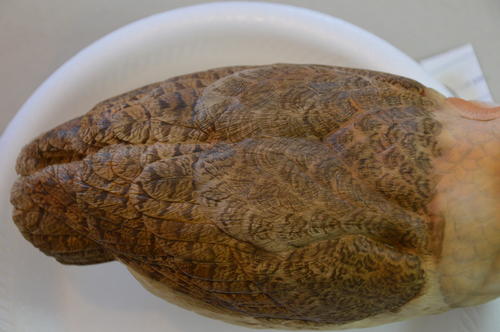
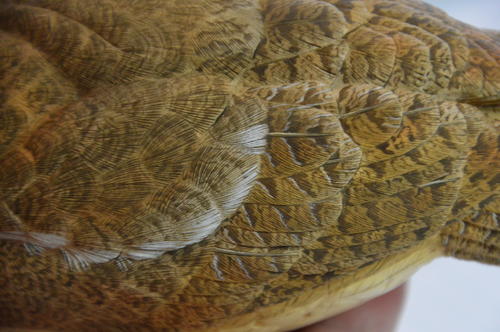
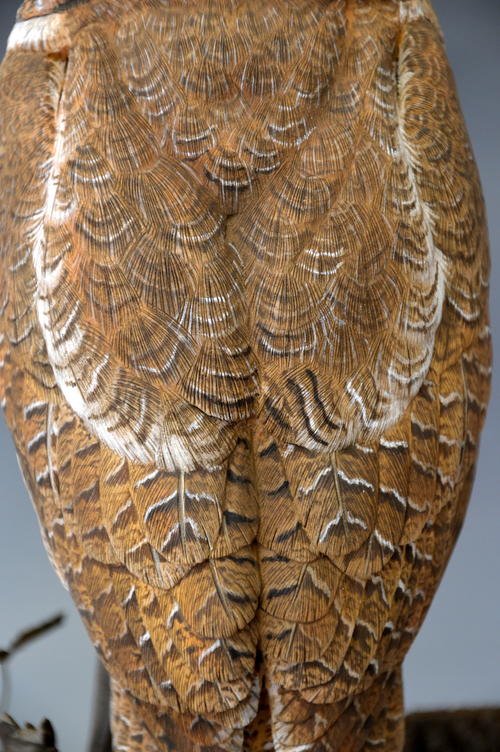
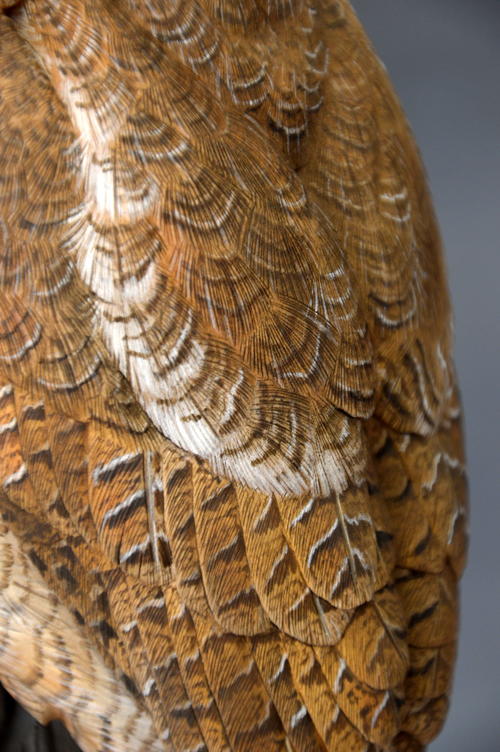
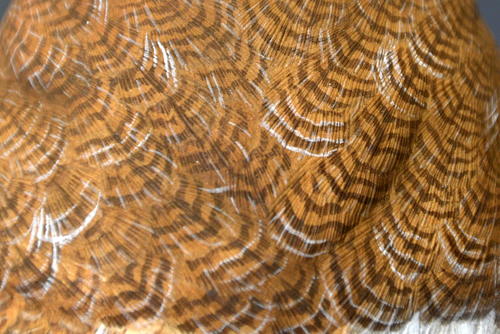
This series of photos shows the finished back areas of the bird. I have spent many hours individually stroking whites as well as browns to get here. Notice the many soft values of browns, oranges, and whites. This is a slow, tedious process, but the end result is well worth the effort.
-
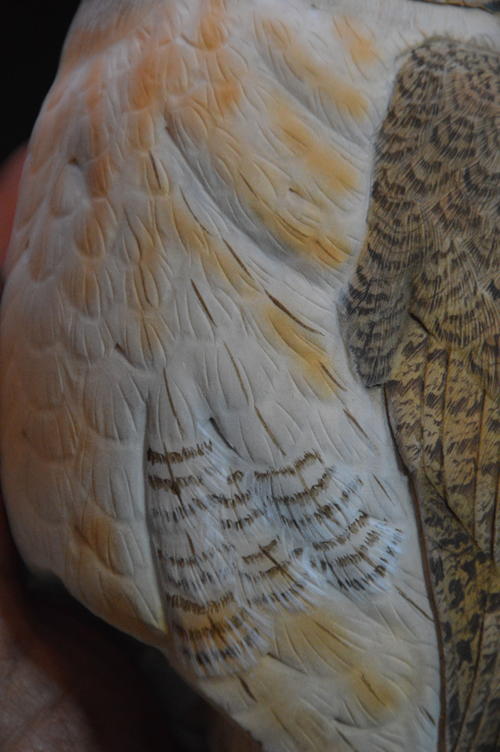
This series shows the details of the finished breast and belly area. Once again, it took me many hours of painstaking work with single brush strokes of whites and browns. On the throat area, I applied a base coat of medium gray (a blend of white and black) with the airbrush. Then, many strokes of titanium white over the gray created the translucent effect.
-
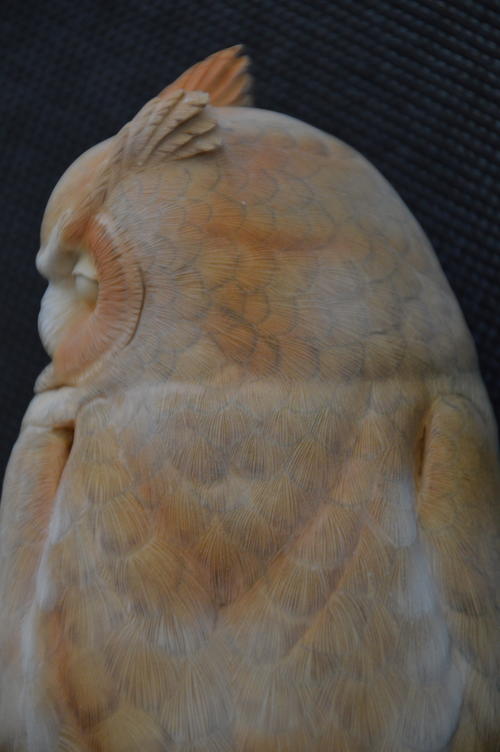
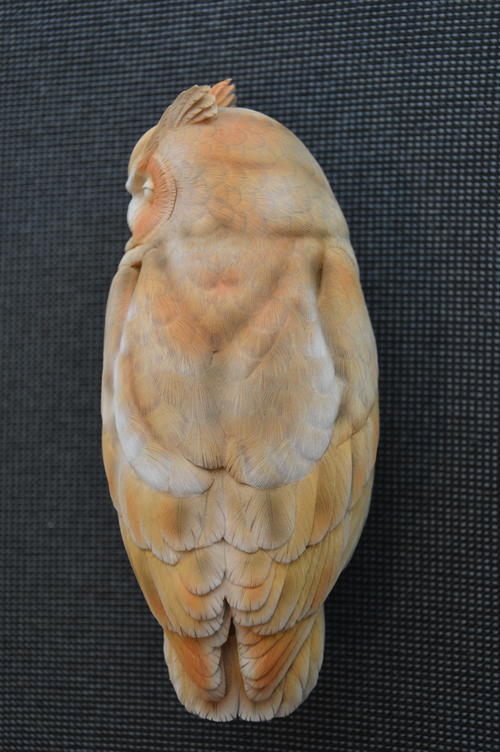
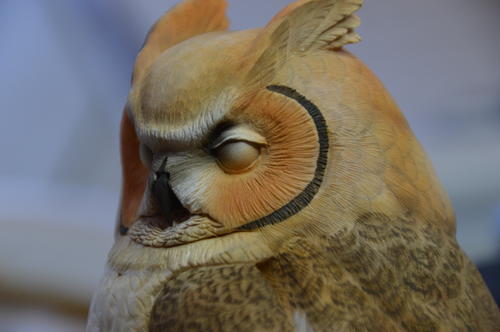
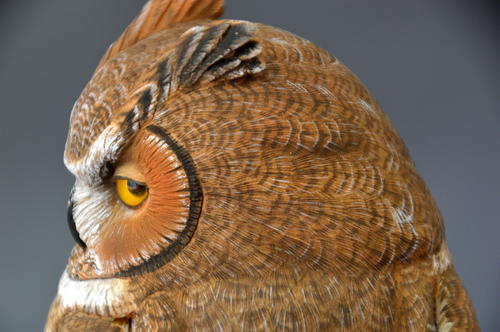
A close-up of the back of the head, painted in the exact same process as the entire back area.
-
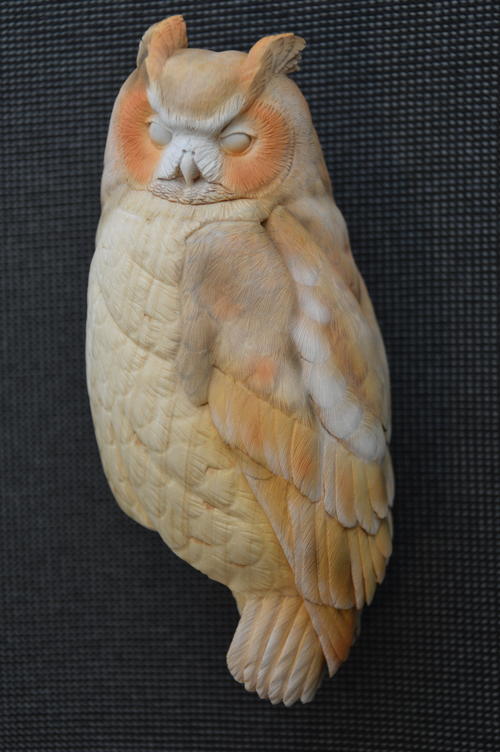
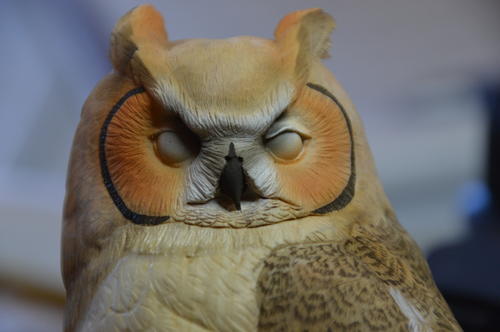
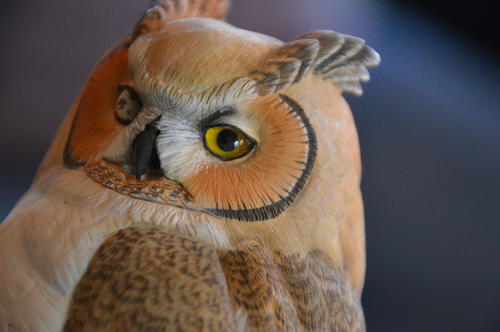
These close-ups of the head show some of the detail.


Read NextThe Littlest Falcon
Share This Article

YOUR RECENTLY VIEWED ARTICLES

Free tutorials, expert tips, exclusive partner offers, and more straight to your inbox!
Thanks for your comment. Don't forget to share!
Crafter 3654675
Oct 08, 2017
Great tutorial. I read it and it seems like something I would really enjoy making. Thank you very much Al Jordan for taking the time to put all of this on here for us to see and learn. God Bless you and your family. Keep up the good work.
Report Inappropriate Comment
Are you sure you would like to report this comment? It will be flagged for our moderators to take action.
Thank you for taking the time to improve the content on our site.
