Hunting Partner
Al Jordan takes on the task of recreating a specific red-tailed hawk for its former owner.

Al Jordan lives in Rochester, New York, where he is a master falconer. He was the North American shorebird champion in 2008 and the IWCA Shorebird Champion in 2010. Al is also an instructor and judge and the author of Wildfowl Carving Magazine's Half-Size Osprey Workbench Project. Learn about Al’s classes and one-on-one instruction at (585) 227-2235, www.ajordanbirds.com.
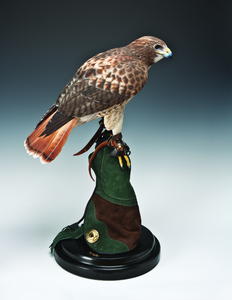
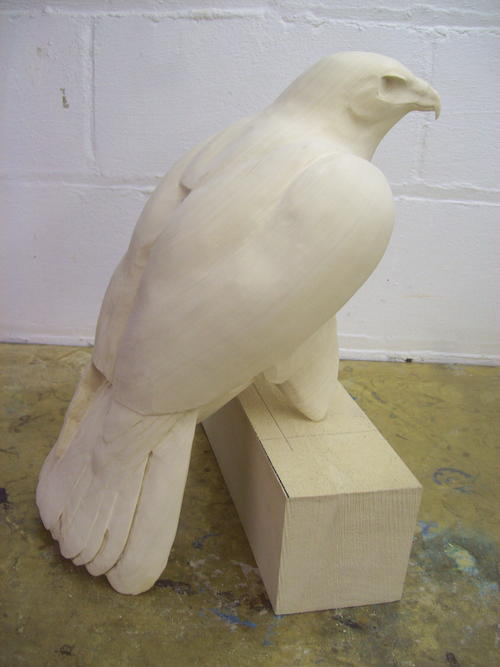
My fascination with the red-tailed hawk began during my apprentice years as a falconer. Up close and personal, this magnificent creature never fails to amaze me. The red-tailed hawk gets little respect in the raptor world, yet it has a tremendous amount of power, beauty, and grace. I created the piece in this article for a fellow falconer. It is a life-size replica of his former hawk (Catch). After several years of hunting with his feathered partner, the owner released the bird back into the wild. The carving brings back fond memories of this graceful hunter.
To develop the pattern, I spent several sessions photographing the bird from every angle, and I used the photos to come up with the patterns. All this reference was necessary for this project since I wanted to capture a specific bird and not carve just a general example of the species.
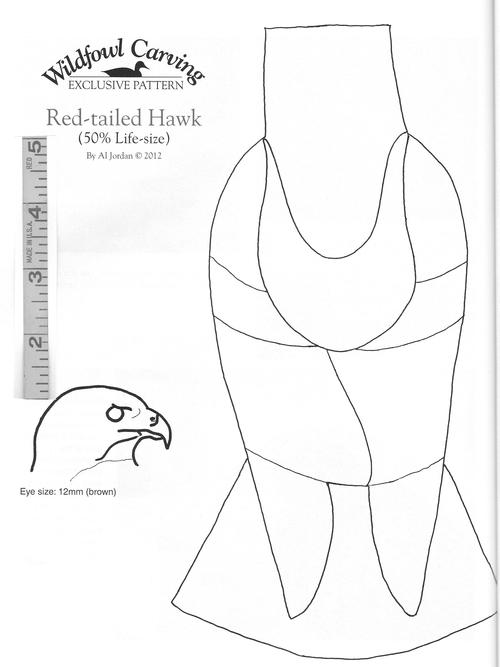
The patterns included with the article are approximately half life-size. I say "approximately" because the sizes of red-tailed hawks vary widely. The length can range from 18 inches to as much as two feet, and their weight can go from 720 grams (about 25 ounces) up to 1,450 grams (a little more than three pounds).
This article is from the Winter 2012 issue. For more information on our issues, check out our issues page.
Red-tailed Hawk Demonstration
For a closer look at each step, please click on the image to enlarge.
Step-by-step carving
-
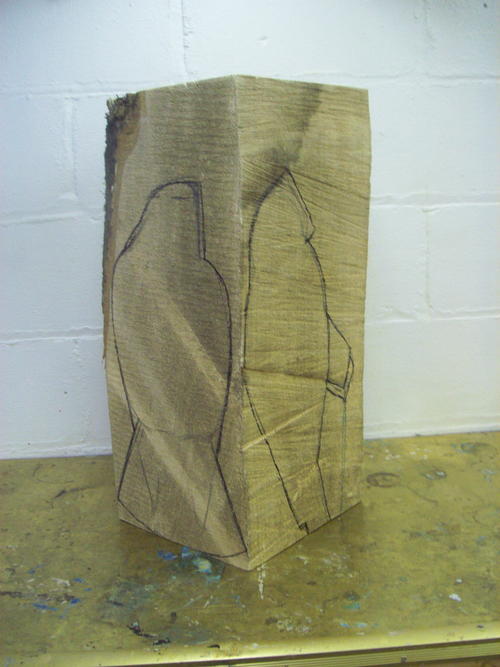
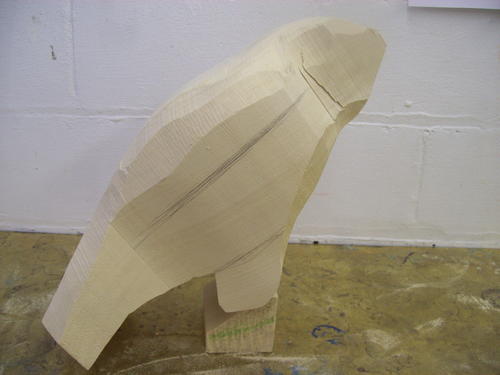
Here you can see the pattern layout on the rough block of tupelo. I don’t see any point in having a nicely planed surface at this stage.
-
After a session with the bandsaw, the block begins to look a little more like a hawk.
-
During a second session with the bandsaw, I round off the corners. You need to take great care here handing the wood and the saw. Be sure to wear safety glasses.
-
I do more rounding with a course sanding mandrel. I use sanding mandrels with changeable sandpaper for serious wood removal and later for resurfacing. (For more about the tools I use, see “Saw-whet Owl” in the Winter 2011 issue of Wildfowl Carving Magazine.)
-
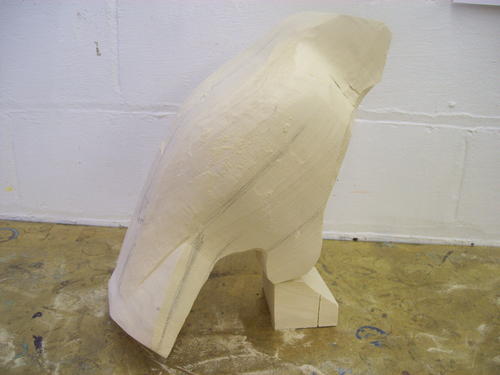
After even more rounding, I sketch on the wings, scapulars, and head. I find that constant drawing and sketching on the wood helps me visualize where I’m going with a project. You can always erase your sketching if you don’t like the way it looks.
-
Still using the sanding mandrel, I begin to add definition of the major feather groups.
-
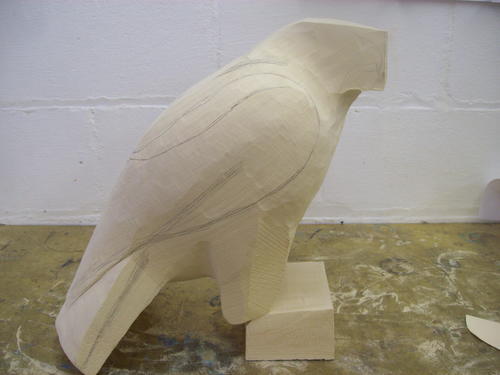
Now I begin to round the major feather groups. Basically, I round from the center of one feather group down to its seam, or edge.
-
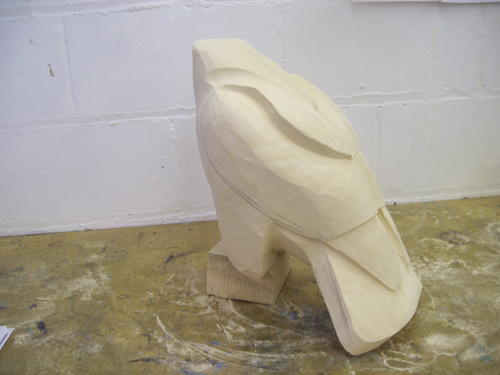
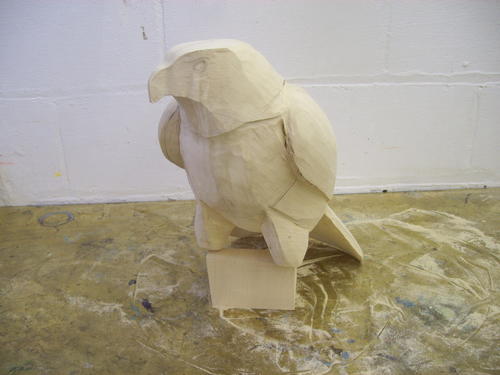
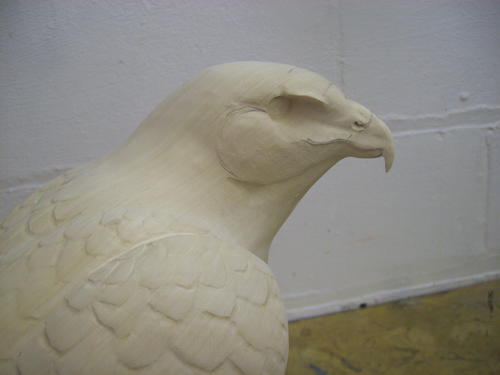
I’ve rounded and cleaned up the feather groups. I did this step with the same sanding mandrel but used finer grit sandpaper. I’ve also roughed out the head at this stage. You can see that I continue to maintain the drawing and sketching as I go along. I’ve also done the tail and face at this stage.
-
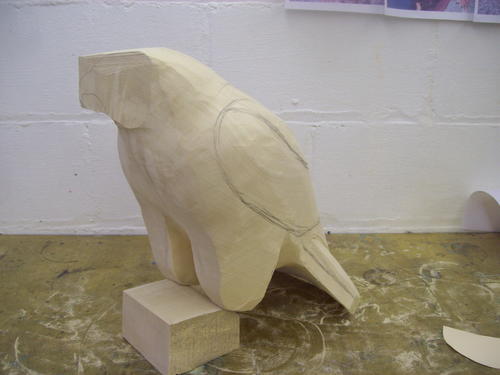
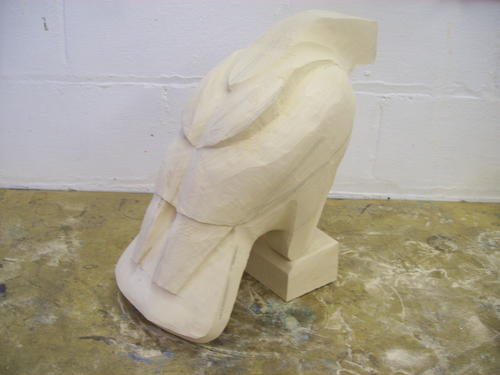
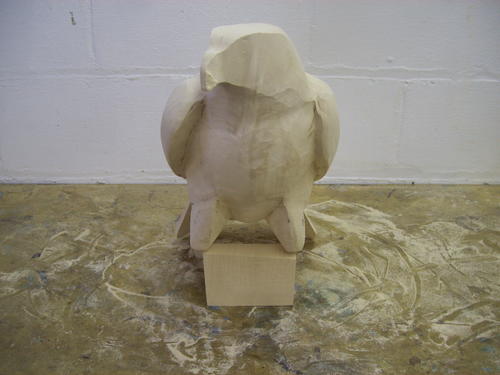
This front view shows the various roughed-in groups, including the legs, flanks, belly, chest, and the neck and head areas.
-
These are the same front feather groupings after I’ve done some further rounding and cleaning with the sanding mandrel and a finer grit paper.
-
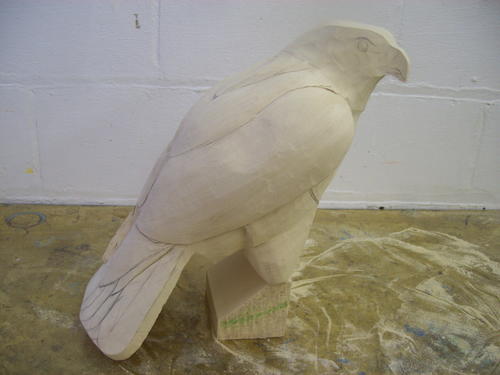
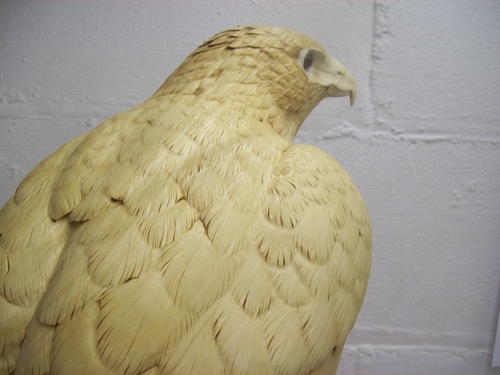
At this point, I’ve sanded the bird down with 220- grit sandpaper. It’s ready for individual feather definitions.
-
In the previous photo, you could see how I cut in the tail feathers. By this step, I used a burner to create some spacing between them. I’ve also carved in the head. It is of the utmost importance that you have excellent reference material for the face.
-
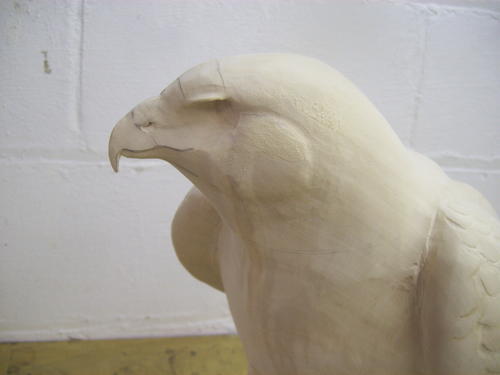
I have now carved in individual feathers within the feather groups, and I’ve undercut the separations between the primaries, the secondaries, and the secondary coverts. In the upper marginal and scapular areas, I just do some light rounding without undercutting. You can also see some subtle waves within the tail, primaries, secondaries, and secondary coverts. I added these using a fine diamond ball.
-
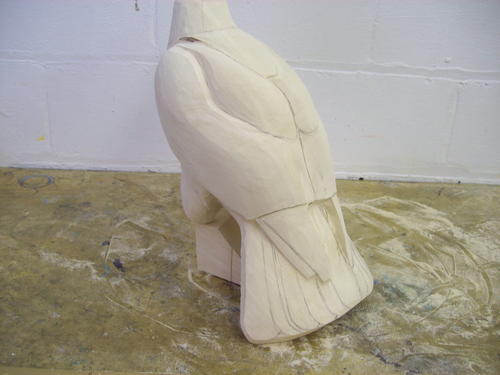
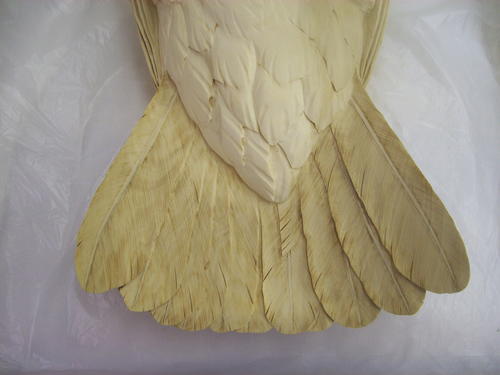
In this photo, you can see the under-tail coverts and the undertail. Notice the fluffiness and airiness I’ve created within the coverts. I round each feather and then add the waves with the fine diamond ball. Within the feather groups I then undercut individual feathers. Don’t undercut every feather. Pick and choose the areas that will enhance the fluffiness. Avoid the monotony of symmetry at all costs.
-
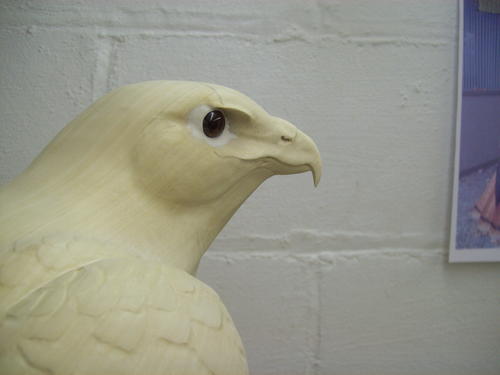
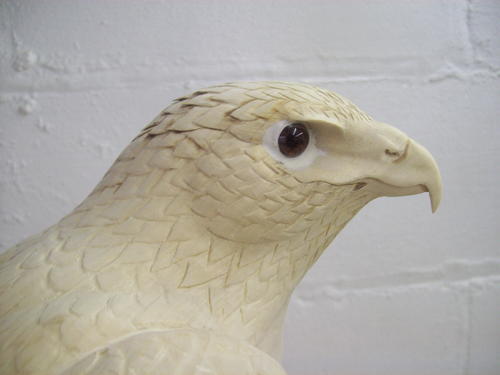
This close-up of the head area shows the importance of the “eyebrow” or orbital ridge over the front half of the eye. Check your reference when you do this. Also note the shape of the nostril.
-
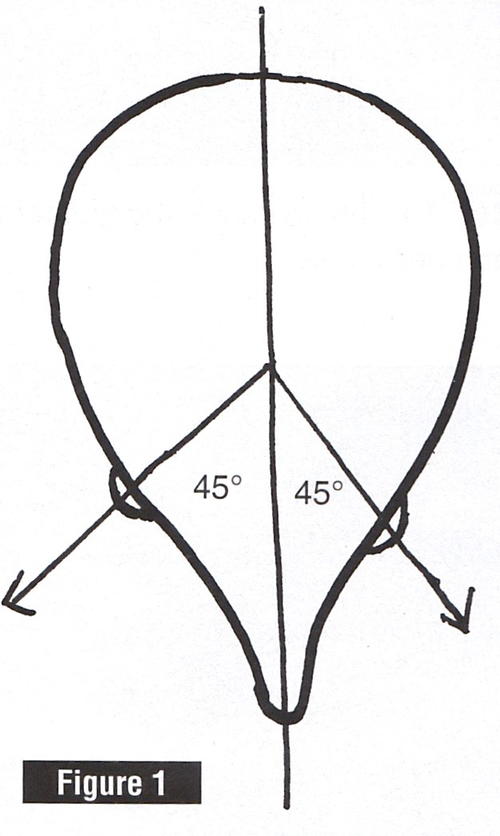
I’ve inserted the 12 mm brown eyes. Since this is a predator, it’s important that you get the eye angle right. The eyes face forward at a 45-degree angle to the head’s centerline. See Figure 1.
-
You can now see how I’ve added the head feathers. I did this using the back end of a burner and then rounded off the edges with sandpaper. Take note of the feather flow.
-
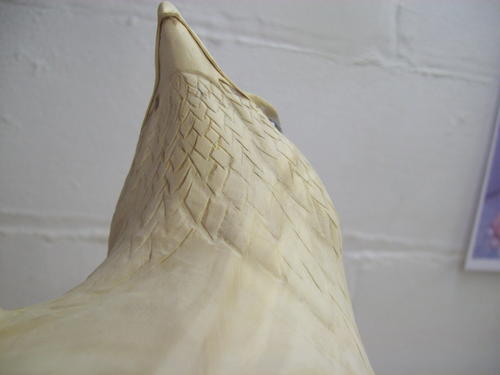
This photo shows the feather flow under the chin and neck area.
-
I’ve started to lift some of the crest feathers. I also did this with the burner. Be sure to round over the edges as in step 17, using sandpaper.
-
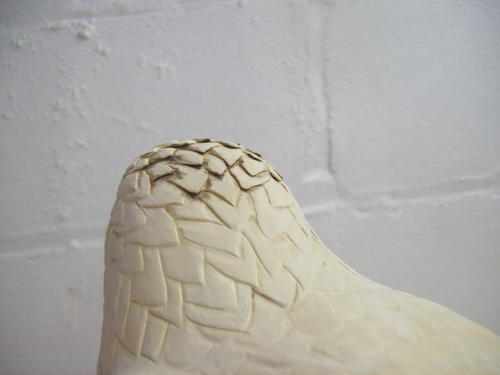
Here I’ve rounded the crest feathers with sandpaper.
-
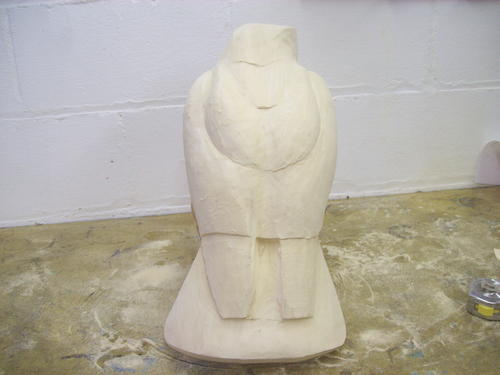
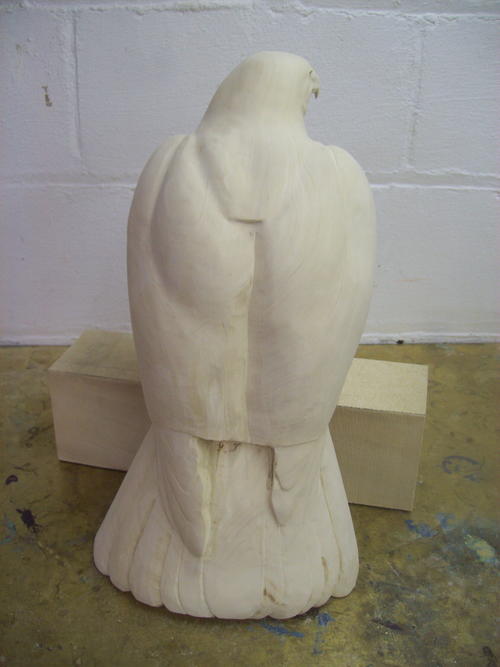
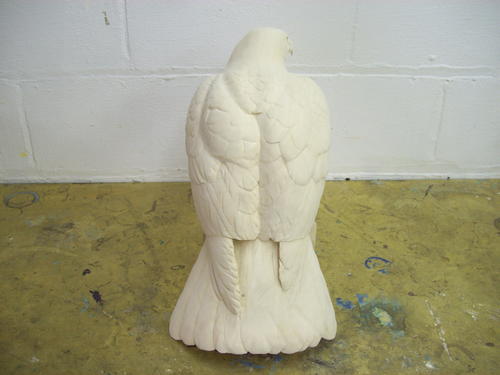
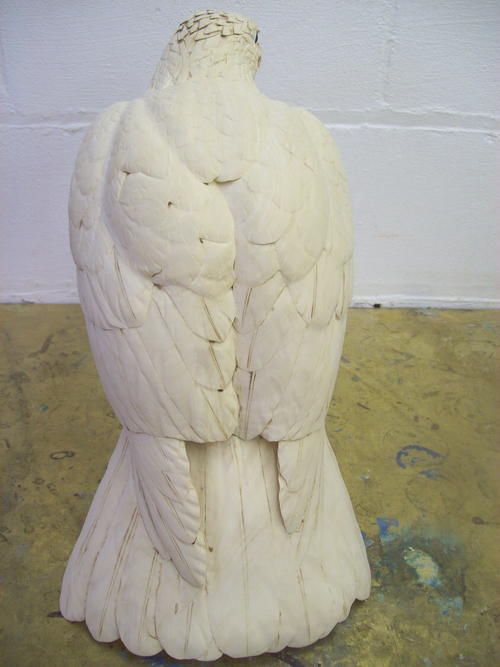
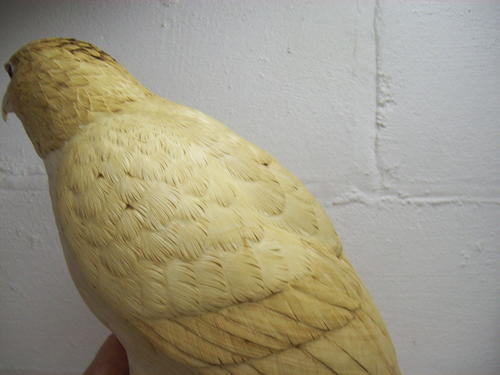
This back view shows how the bird looks after I’ve done fine sanding and shaping. I’ve added the quills of the major feather groups. I used a flat (Guge) burner and then sanded them.
-
You can get an idea of the feather flow on the chest and belly area in this photo.
-
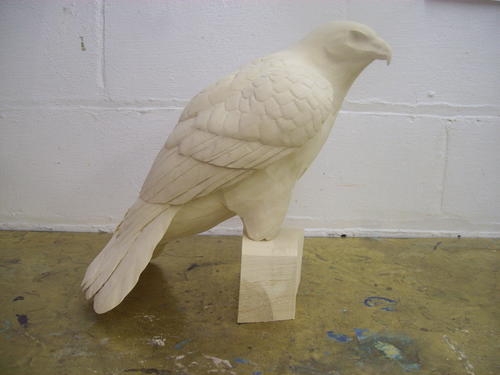
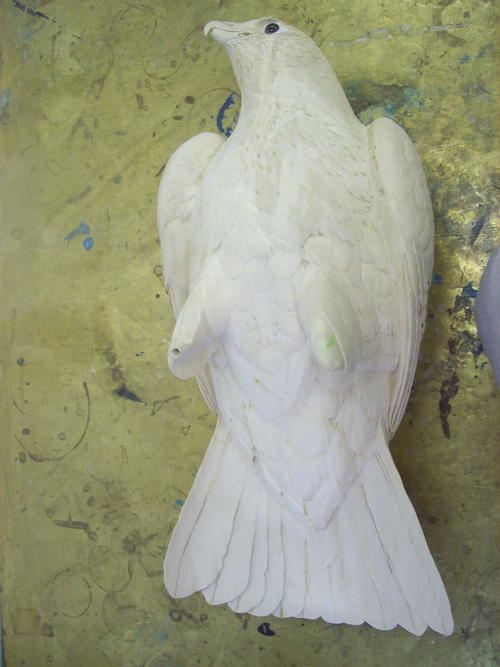
The bird is now ready to be finished. Notice how clean and well-sanded the surface is in preparation for the final stages of carving.
-
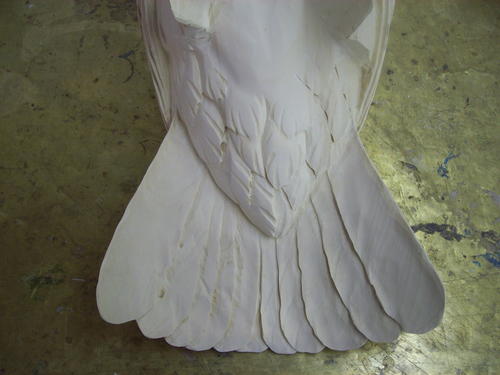
I’ve burned the undertail. I like to burn at a very low temperature. This allows me to keep my burn lines close together. Notice how I’ve burned in subtle and varied splits into each feather. Again, avoid symmetry. You want these splits to appear random.
-
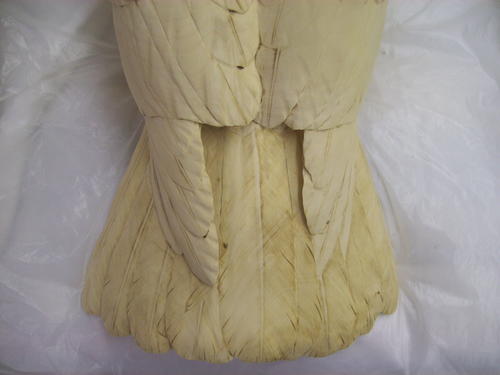
Here’s the top of the tail after burning. You can see how the right primaries are tucked within the tail feathers.
-
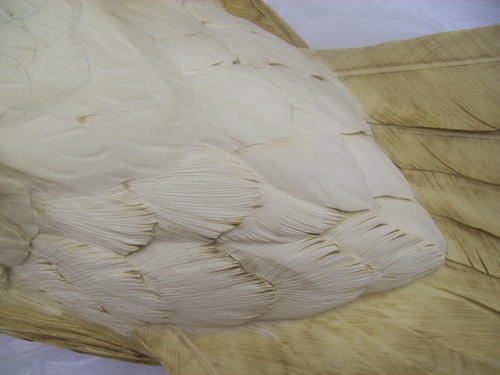
I first stone the under-tail coverts with a ceramic stick, and then I randomly burn the edges. This adds to the sense of fluffiness and airiness.
-
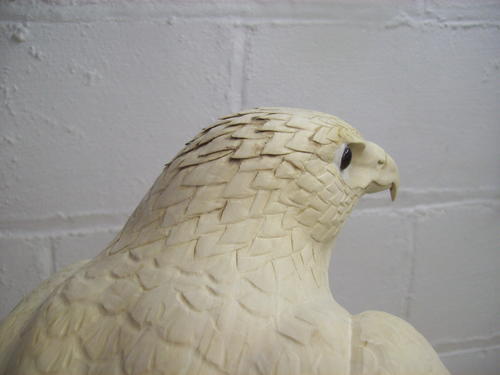
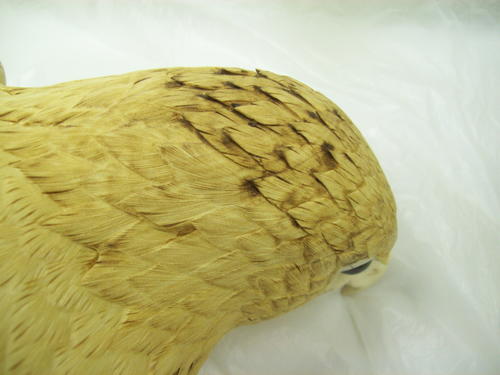
The back and crest of the head is now finished. I’ve burned, lifted, and added splits.
-
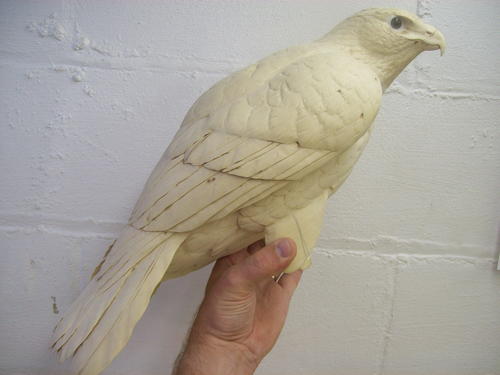
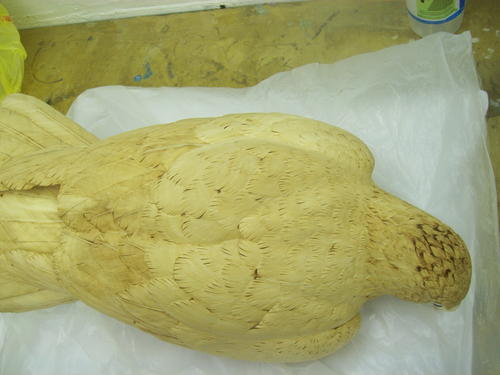
The bird is now ready for paint. I’ve stoned, burned, and sealed it with Deft Sanding Sealer.
-
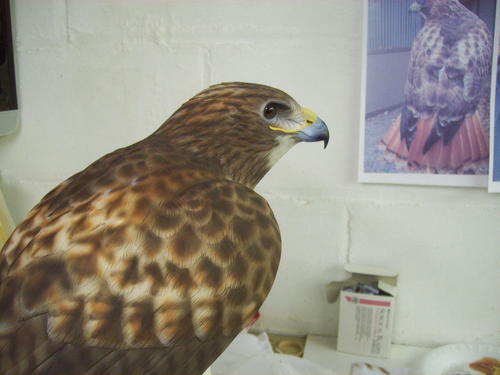
This is a preview of the finished bird. The photo in the background was one of the photos I took at the beginning when I started this project. We’ll continue with the red-tailed hawk next issue. In the next part, I’ll tackle the painting of a miniature of this species.


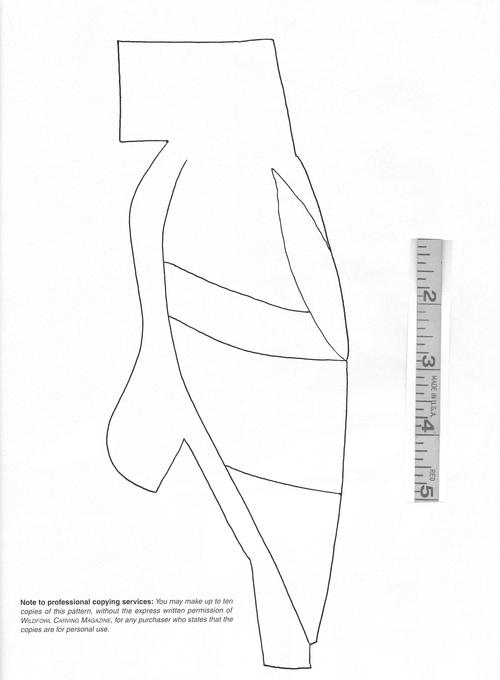
Wildfowl Carving Exclusive Pattern
This pattern is a 50% life-size red-tailed hawk.