
A Sectional Swan
When youre making a bird as big as this trumpeter swan, you might want to take a different approach.
The trumpeter swan has an 11-foot wingspan, making it the world’s largest waterfowl. It is also the heaviest animal capable of flight in North America. Males of this once near-extinct species can measure up to six feet in length and weigh as much as 28 pounds.
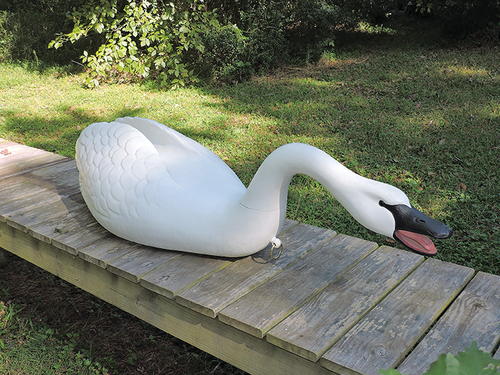
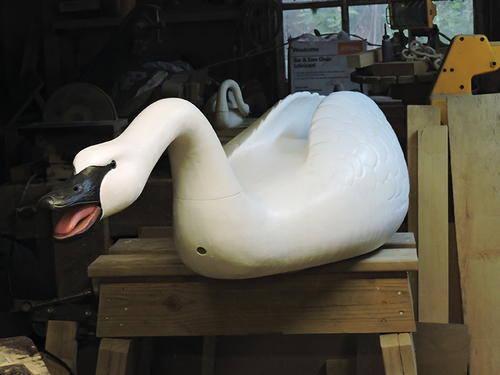
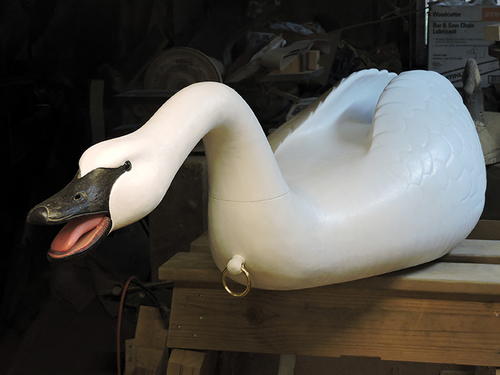
That means that Jim Brockman’s life-size trumpeter swan is a big bird. His hollow-body hissing swan measures a very true-to-life size of 641⁄2 inches long, 183⁄4 inches wide, and 151⁄4 inches tall. It weighs 43 pounds, wood being heavier than feathers.
The hissing pose is quite natural for this species, as they’re very territorial. Other species entering their realm are quickly persuaded to vacate the area.
Given the extraordinary amount of wood involved, Jim’s process for making this decoy was different than that for a normal-size duck decoy, which would have made it too heavy for practical use and too prone to checking. As you’ll see, Jim’s construction of his swan was not a traditional build by any means.
Rod Taylor retired ten years ago after a 37-year career in marketing. He has published more than 250 articles on hunting and fishing collectibles. Rod and his extensive collections live on Minnesota’s Lake Minnetonka with his wife, Anne. He can be reached at rst72badger@gmail.com.
Jim Brockman is a carver of all trades who makes everything from stair balustrades to furniture restoration for the Jamestown Plantation, and decoys to life-size crucifixes for churches. A resident of Virginia Beach, Virginia, Jim can be reached at (757) 721-3049.
Instructions
-
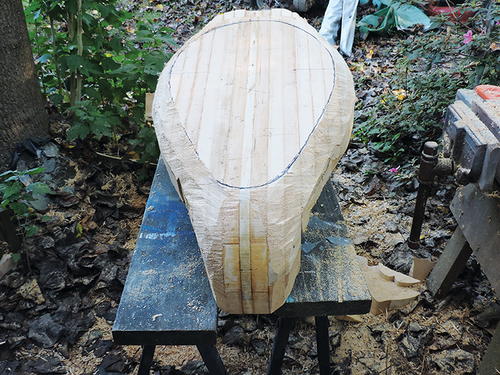
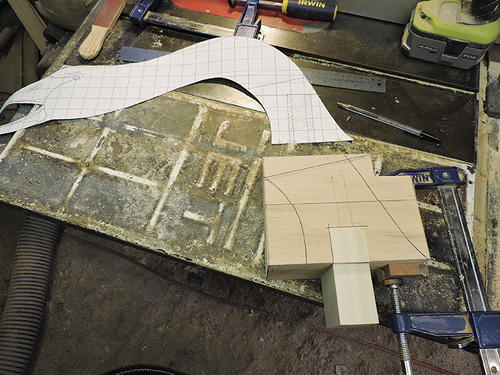
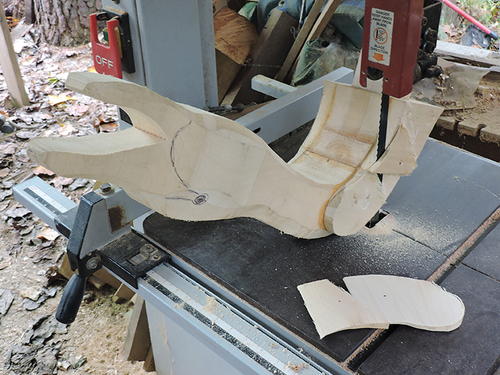
Jim will make the swan from basswood. He starts with two 6"-wide x 11⁄2"-thick planks he edge-glued with the center cut out to reduce weight. Pencil marks indicate the head shelf and tail of the swan. He needed two planks of wood due to the height of the swan.
-
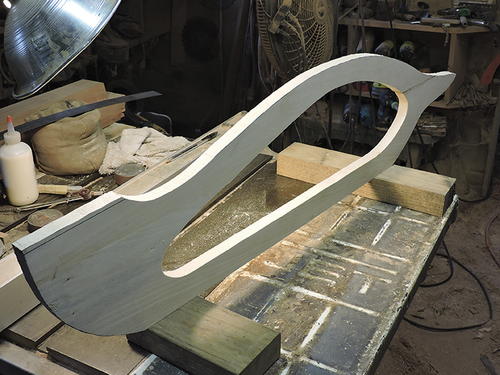
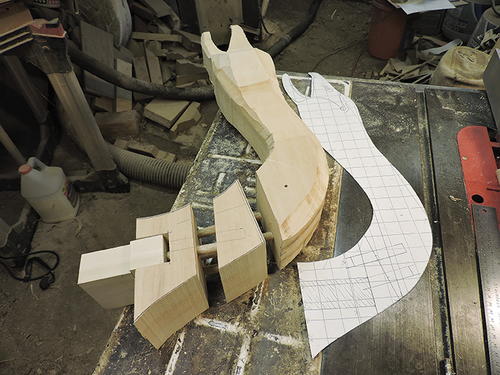
This is the fully cut out center section of the decoy, showing basic shape aand hollow center area between the upraised wings. Each section is two planks of basswood glued horizontally. This section is 39 inches long
-
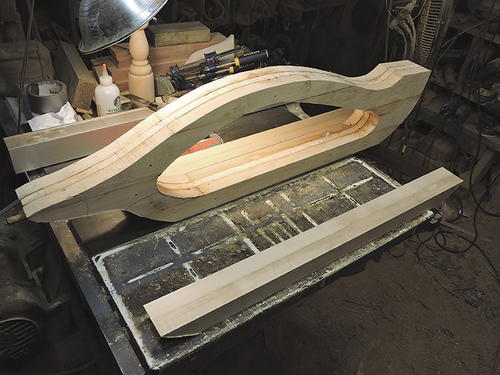
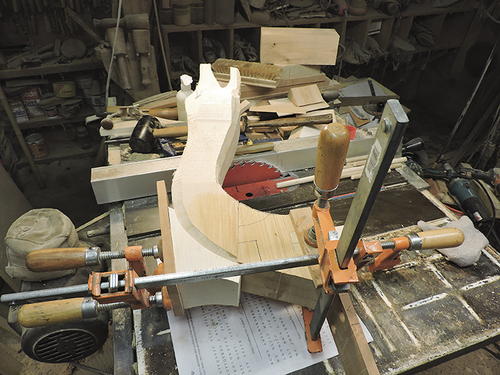
Two glued-up planks of the same thickness (11⁄2") have been laminated to the center board after being cut out on a band saw. You can also see the bottom boards for the swan’s belly.
-
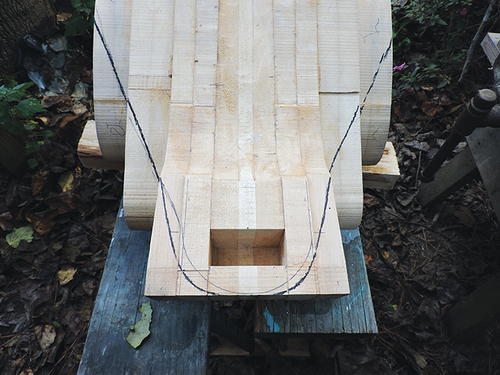
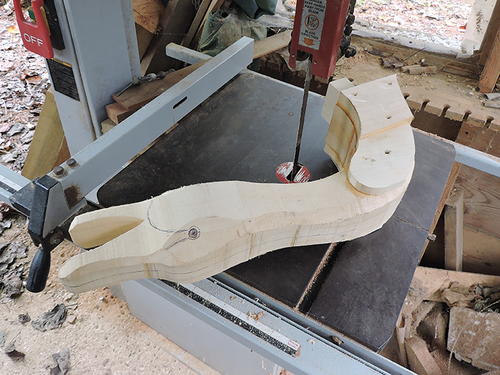
Jim has made a cutout for the head shelf and added a temporary T-shaped tenon for the head and neck.
-
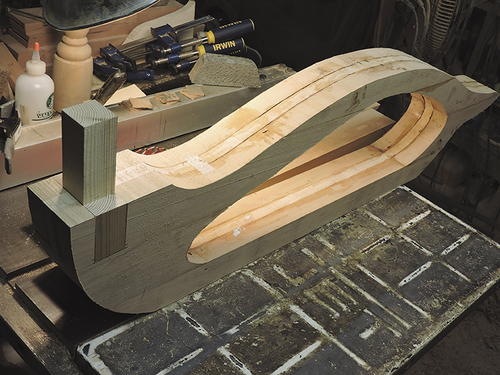
Two more bottom board layers have been added to the side of the base.
-
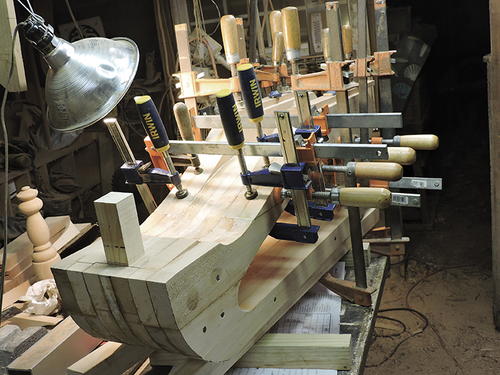
Here you can see seven layers of the body being glued up. The screws keep the boards from shifting when being glued, but Jim will remove them once the glue dries.
-
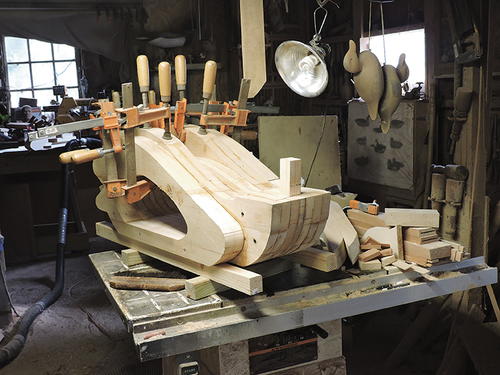
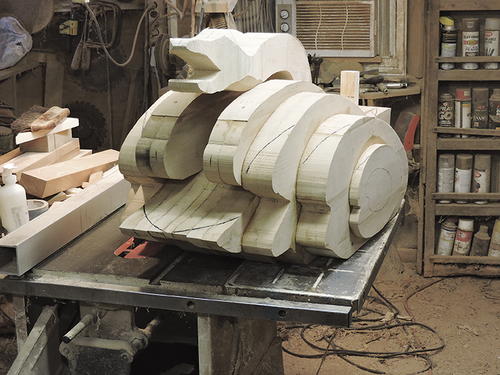
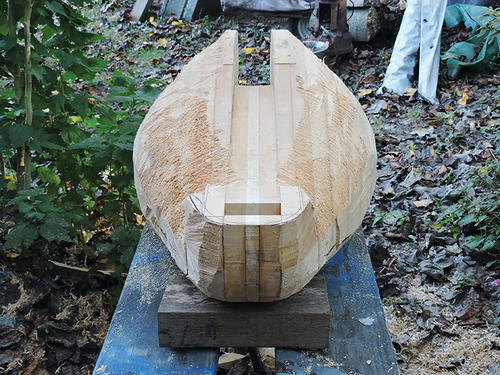
The view on the left shows the tail and the upraised wings, with the open center between the two wings. There are 11 layers here. The front view shows the space between the wings and the tenon.
-
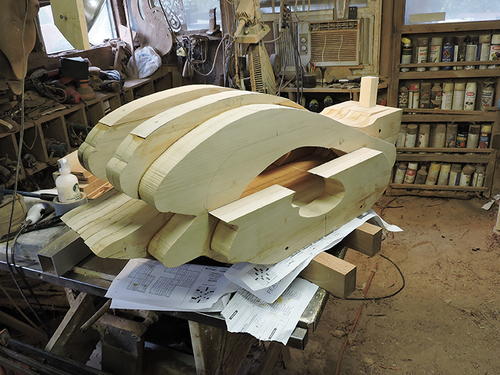
Each side has now received the next two layers of the body except for the top of the wing area.
-
The final layer for each side is ready to be glued up. The swan will be 19 inches wide when the last piece is added. It is 13 inches high, and consists of 17 layers of wood glued vertically.
-
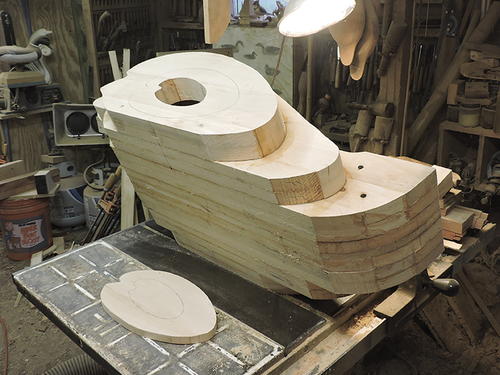
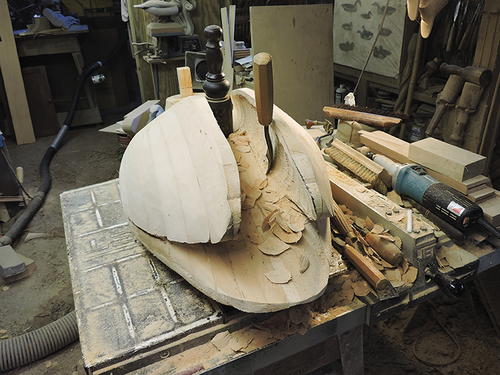
This is the final rough-up of the body, with the head on for position only. The dark lines indicate where Jim will remove excess wood with an electric chainsaw.
-
The lines here in the head area show where Jim will use the chainsaw to remove excess wood, and the mortise for the head.
-
Vertical cuts are in progress. The blue painter’s tape on the tail is to keep oil from the chainsaw out of the mortise.
-
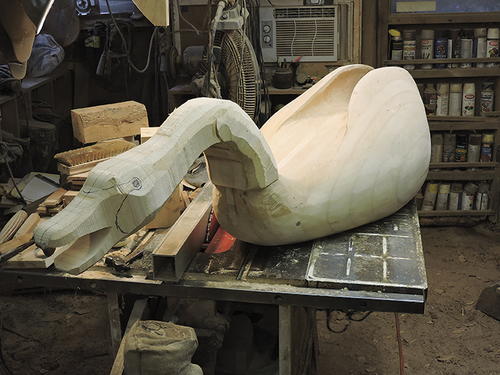
After some chainsawing, the work is starting to look like a swan!
-
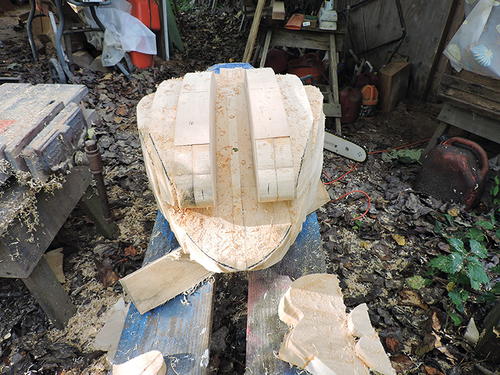
This bottom view shows the side shaping Jim has done with the electric chainsaw.
-
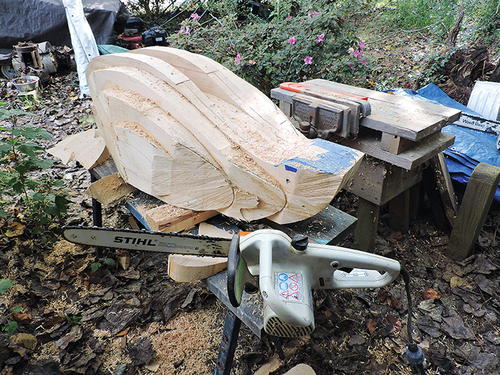
The chainsaw work has been completed.
-
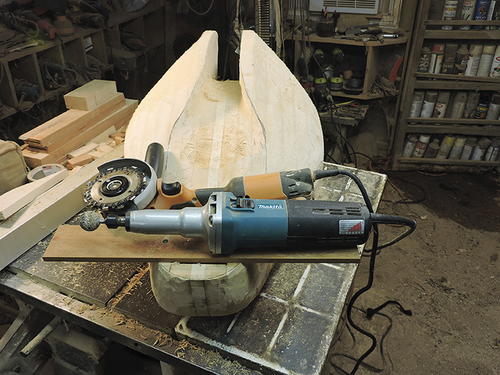
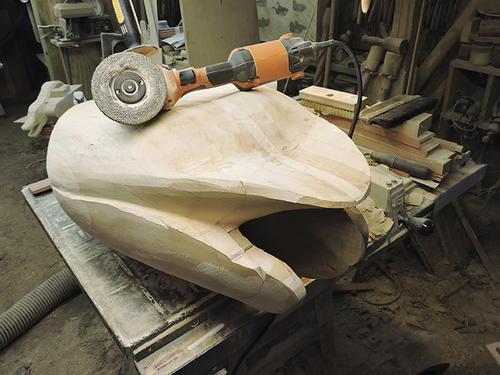
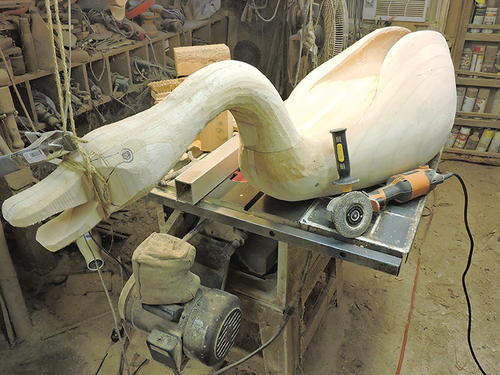
Back in the shop, Jim will use his Makita die grinder and Rigid angle grinder with a chainsaw cutter attachment to shape.
-
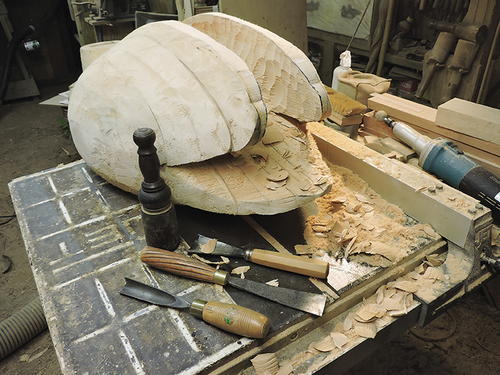
Jim uses wood sculptor’s gouges to shape the close-in area between the wingtips.
-
Using the gouges, Jim begins hollowing out the underside of the wings. The more of a scoop effect you can add by chiseling the underside of the wings, the more realistic the wings will look.
-
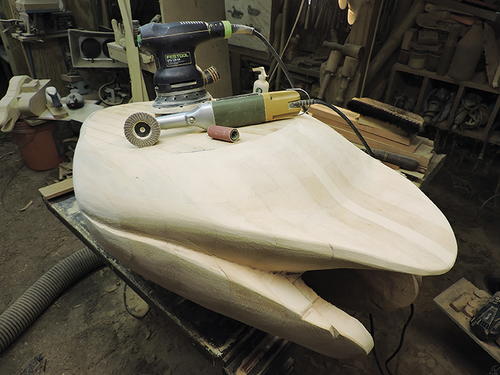
A disk sander with an oversize 7" disk and very coarse (36-grit) sandpaper will remove the chainsaw marks. The oversize disk on the sander allows the disk and sandpaper to flex to the shape of the piece better as it rotates.
-
Jim uses an angle grinder with a small disk to smooth the convex area under the tail.
-
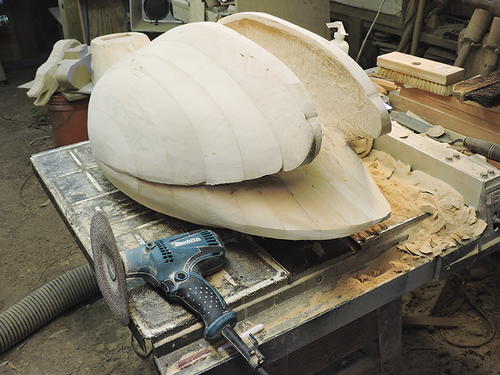
Switching to a Festool palm sander and a small angle grinder, Jim does additional smoothing.
-
The head and neck will be four boards thick with one more board added on either side where it joins the head shelf. The head and neck will be 19 1⁄2 inches long.
-
Here you can see the head/neck assembly, showing the tenon, base section of the neck, middle joint, and mouth and bill. Two 1⁄2" dowels are for reinforcement and alignment. The pattern for the head is alongside for reference.
-
For gluing up the head pieces, Jim crafted a glue block (at left) to true things up and keep the elements from sliding around.
-
Jim uses a carpenter’s hand plane to remove the edges from the top of the neck.
-
The additional layers will make the neck thick enough for the base. Keep in mind this five-layer neck would be one piece of wood in a conventional decoy. You won’t have to ever worry about this head snapping off!
-
You need to be very careful when using a band saw to shape the neck.
-
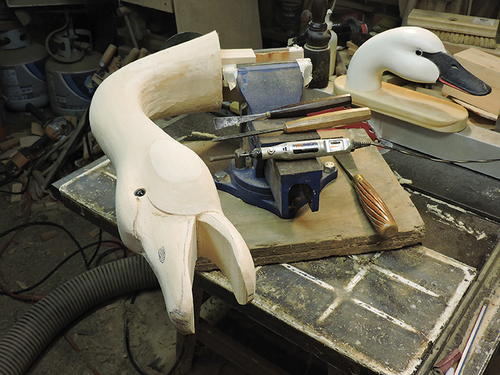
Jim made this decoy with two interchangeable head poses. For purposes of brevity we are just showing the most dramatic head. Jim has placed this roughed-out head on the body for positioning.
-
The rope holds the neck in place and properly aligned while grinding continues.
-
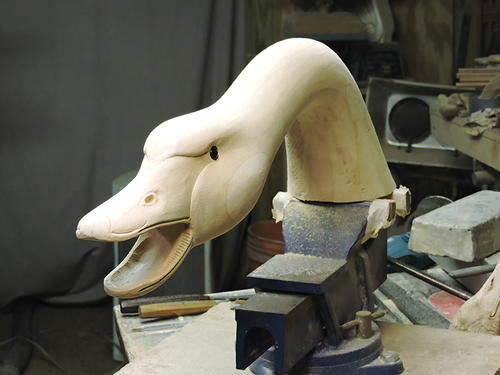
To finish the face and bill, Jim uses a small rotary tool and gouges. In the background you can see a carved head study for a swan.
-
Head details, including mouth, brow, eyes, and nostril, have been added. Jim will carve the tongue separately and glue it in. He made the serrations on the mandible with a rotary tool with a V-shaped cutter.
-
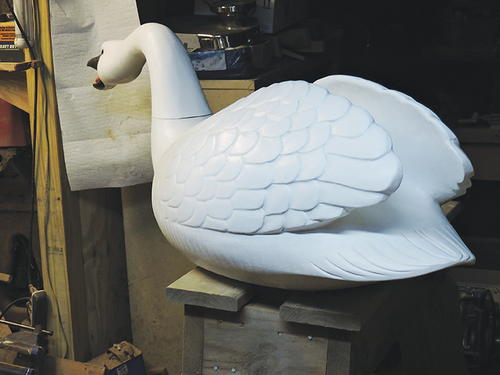
The swan has received its first coat of white latex primer. Trumpeter swans are completely white all over, except for their bills and mouths. The hole in the breast is for a 31⁄2" screw that will hold the tenon in place. Jim has used a V-shaped chisel to carve some scalloping cuts in the wings to suggest the feathers.
-
Here you can see the carved wing details.
-
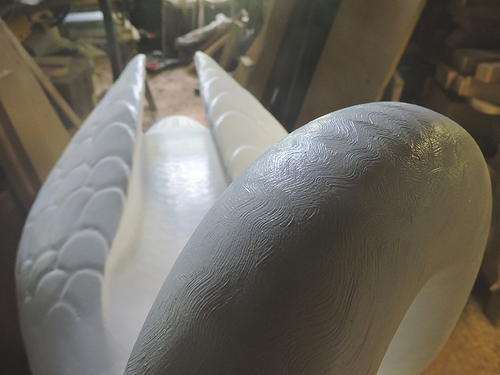
Finally, the swan receives a heavy coat of artist acrylic white paint. Jim uses a stiff bristle 1" brush to add the the swirl effect in the thick paint to suggest more feathering.
-
The completed trumpeter swan has a brass tethering ring added to the bottom of the breast.


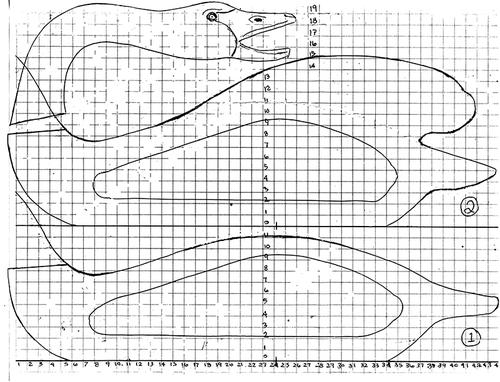
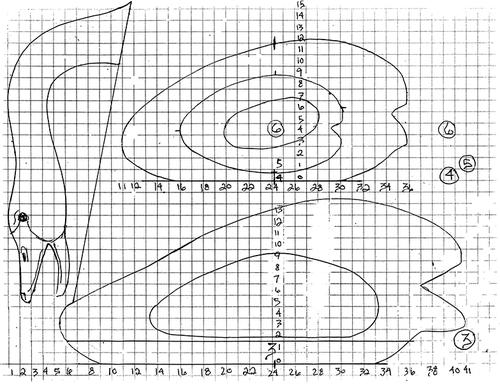
Trumpeter Swan
(18% Life-size)
By Jim Brockman © 2019
Note to professional copying services: You may make up to 10 copies of this pattern, without the express written permission of Wildfowl Carving Magazine, for any purchaser who states that the copies are for personal use.
-
(1) The three-layer, 3" thick centerline section
(2) Double layer, 23⁄8" thick -
(3), (4) Double layer, 23⁄8" thick
(5) A single layer, 3⁄4" thick
(6) Outline marked on the outside of layer (5) showing the location of the cutout in section (4)
Read NextMaking Feet

