
Making Feet
Birds gotta fly--but sometimes they need to stand, too.
Adapted from Three Bird Carving Projects: Power Carving Instructions for the Beginner by Tom Baldwin
© 2018 by Ampry Publishing, LLC
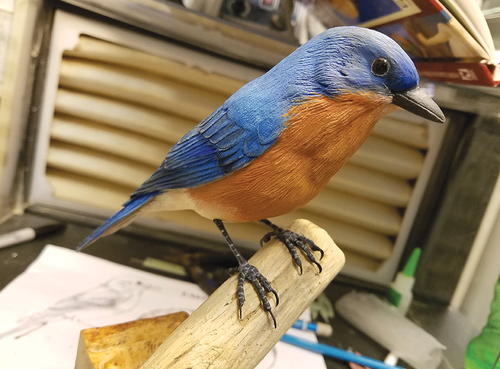
When picking a good songbird to demonstrate carving techniques, I chose the Eastern bluebird. I picked this bird because its size and shape are typical of many birds. Other species may have longer wings or tail, a curved beak, or unique characteristics, but the bluebird provides a good example of the common bird. It’s certainly a great place to start.
Making Feet
Not all bird carvings need feet—but when they do, you want to get them looking right. This article demonstrates an easier method for making feet for the bluebird. Some carvers use soldering techniques and even welding, but I feel that would be a difficult way to introduce you to making bird feet. The process shown here requires fewer tools, too.
Step-by-Step Instructions
Get your materials ready.
-
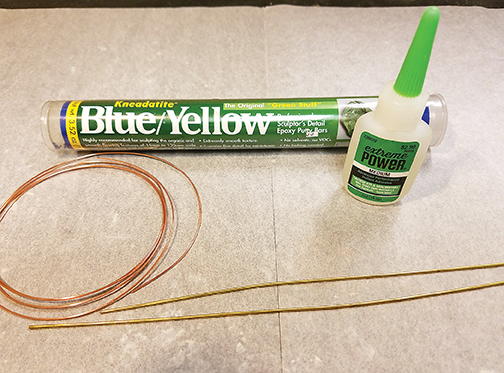
You will need the following materials: copper wire, brass rod, super glue (CA glue), and blue/yellow epoxy putty.
-
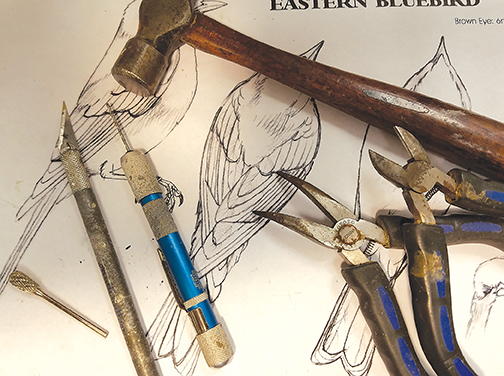
The tools required are needle-nose pliers, wire snip, micro hand drill, #110 X-Acto knife, small ball-peen hammer, and a 3⁄32" shaft, double-carbide bur. You will also need a small vise.
-
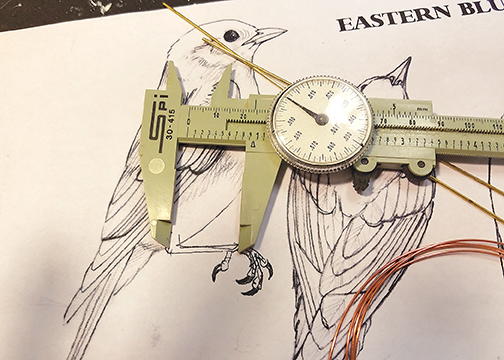
Measure the tarsus of the bird leg from the pattern.
-
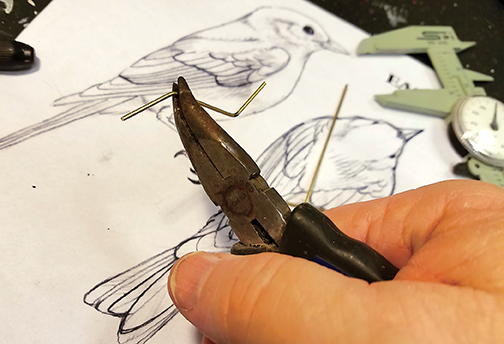
Add 3⁄4 of an inch to each end of the tarsus length. These extra sections will insert into the bird and the mount. Use a permanent marker to mark where you will cut the brass rod. Cut the brass rod to the marked lengths.
-
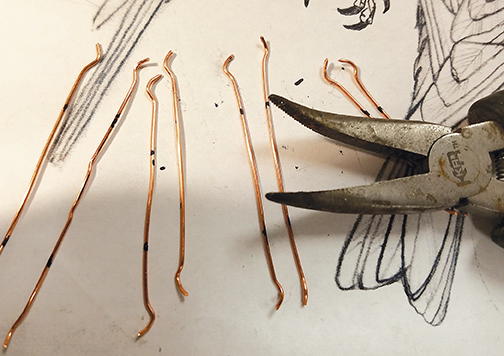
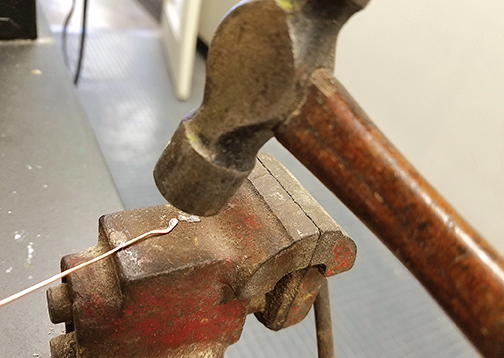
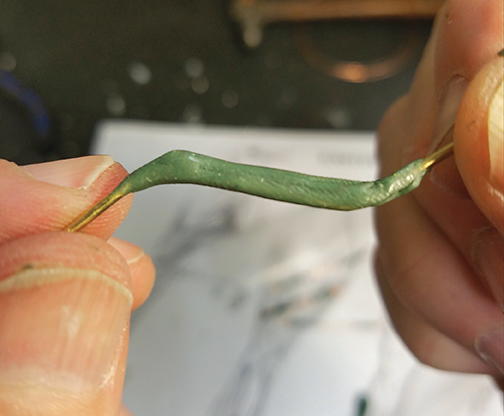
At each point you marked, bend the brass rod with the needle-nose pliers to the angle shown above. I call it a “lazy Z.”
-
Measure each of the toes and mark the copper wire to include two toe lengths. Add about an inch to that length and cut the wire. (Pictured: I usually cut wire for two sets of toes in case I need spares.)
-
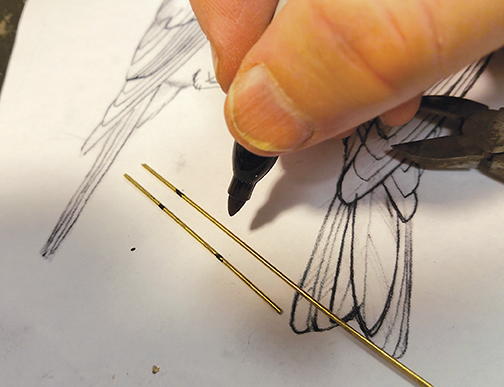
With the needle-nose pliers, bend each end of the copper wire to a half-round “claw” shape.
-
Place the copper wire on a small vise and use the ball-peen hammer to pound the bent end flat.
-
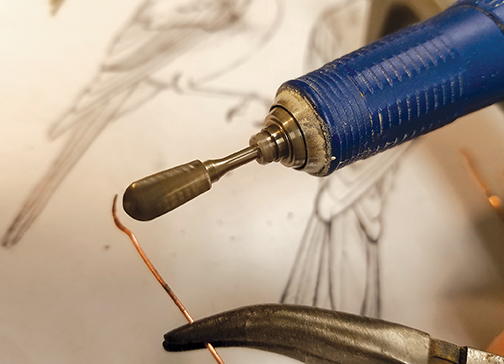
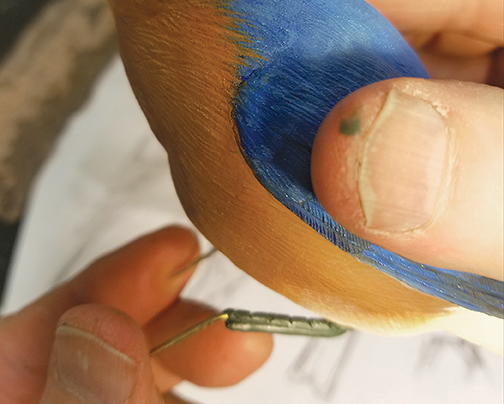
Use the carbide bur and gently shape the nail for the toe. Always keep the rotation of the micro-motor toward the end of the wire. Otherwise, it will grab the wire and bend your toe.
-
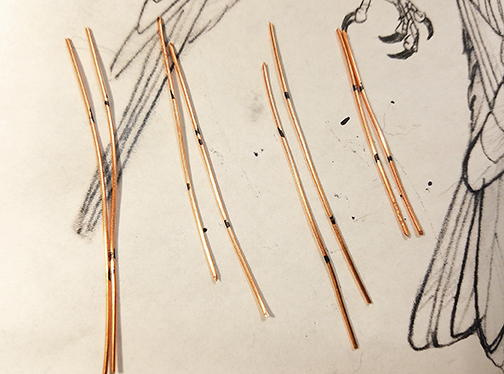
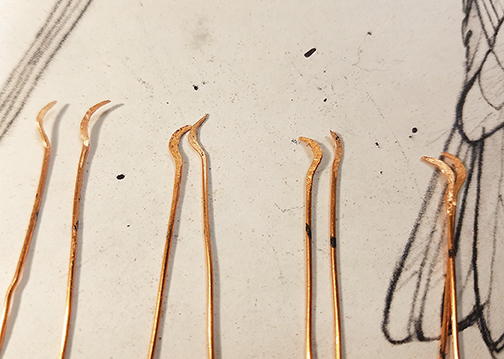
When you are finished, you should have a good selection of wires with toenails on them.
-
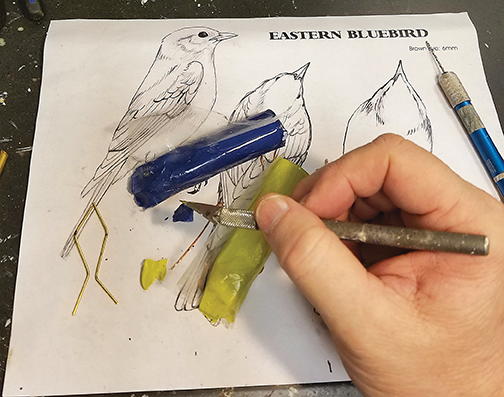
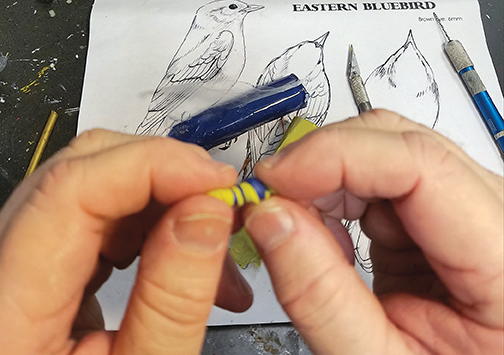
Open up the blue/yellow epoxy putty and cut off equal parts of each color.
-
Take the two equal parts of the epoxy and knead them together until the mix turns into a true green color.
-
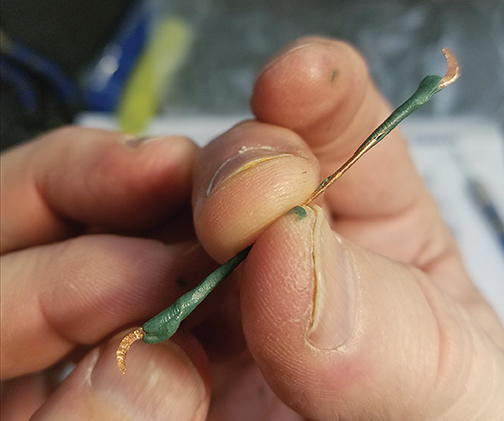
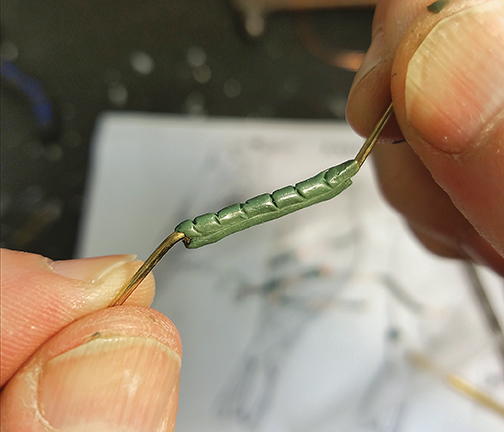
Pinch off a piece of the green putty that is about the length of the wire toe and a little bit wider. Wrap it around the wire. Leave the nail of the toes exposed and add a small amount of putty behind the toe on the bottom for the toe pad.
-
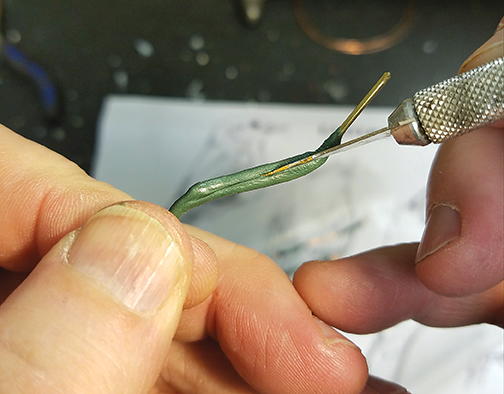
Using the X-Acto knife, etch the toe joints and the side scale details into the putty.
-
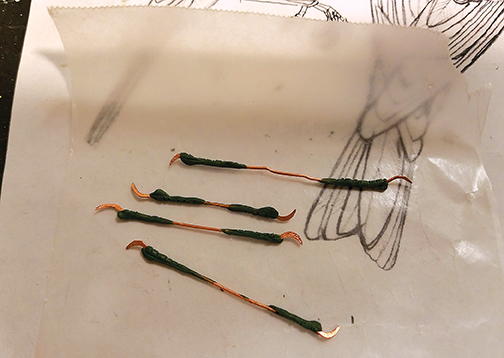
Once you have your putty in the four pairs of toes epoxy detailed (or fleshed), lay them on a small piece of wax paper to dry. This takes about four hours.
-
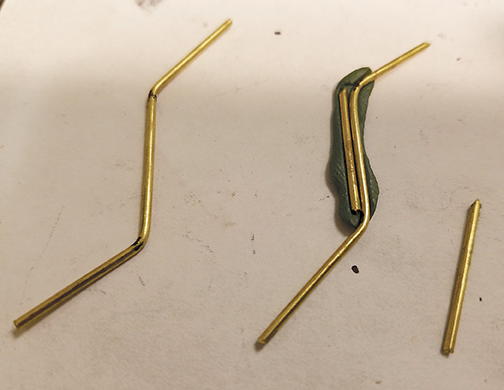
Get a piece of brass rod that equals the length of the tarsus and lay it beside the “lazy Z” brass piece. Get a slab of the epoxy putty and begin rolling it over both pieces of brass rod.
-
Once you’ve covered both pieces of brass rod, knead the putty into a leg shape. This is another case of “less is more.” Use the putty sparingly and keep the leg thin.
-
Once again, take the X-Acto knife and etch in the markings and scales of the bird leg.
-
This is an example of what you should have when finished.
-
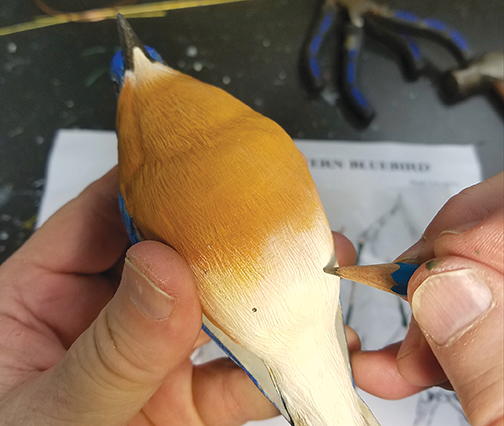
Review the pattern to confirm where you think the legs should go into the carving and mark the locations with a pencil.
-
Take the micro drill and hand drill a hole about ¾ of an inch deep for each leg location in the bird carving.
-
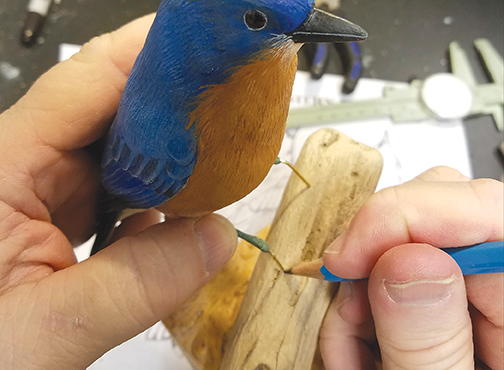
When the legs are dry, fit them into the carving. Do not glue them in yet.
-
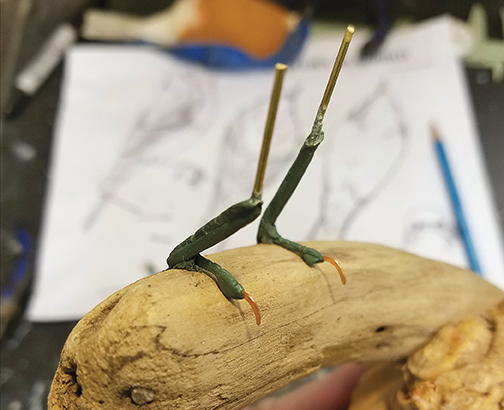
Take the branch or stick that you have selected for your mount and mark the spots where you want to put the feet.
-
Using the micro drill, hand drill the two holes for the legs and fit the carving on the branch. Do not glue yet.
-
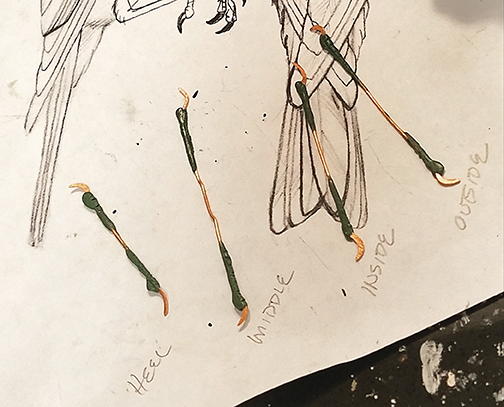
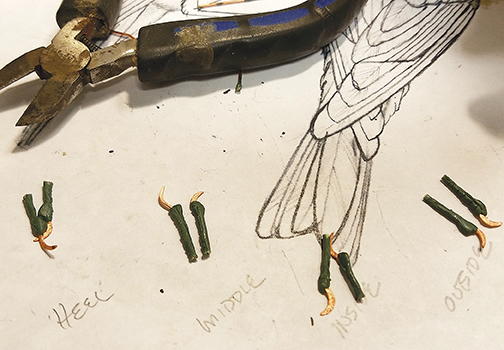
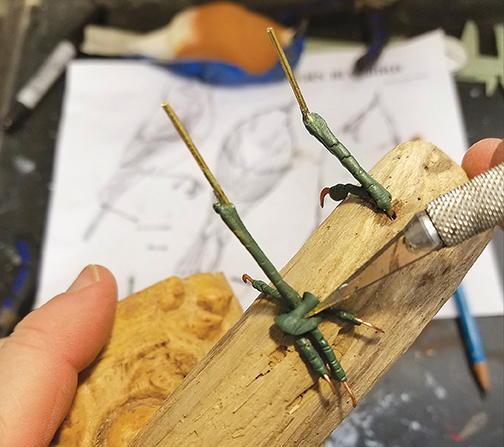
On a piece of paper, write labels for the individual toes—the heel, middle, inside, and outside. Place each toe by its title.
-
Cut each toe to the required length (as measured from your pattern) and return them by their names.
-
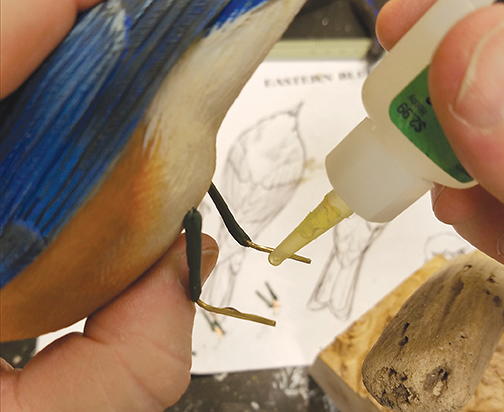
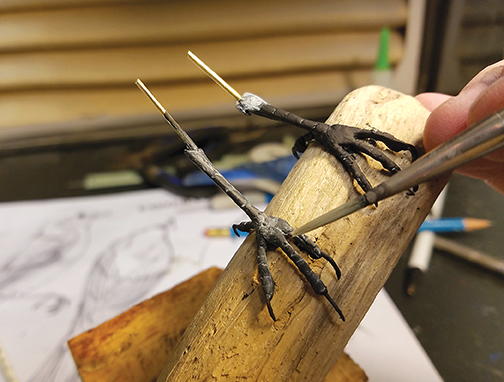
Add super glue to the branch ends of the legs and attach them to the branch.
-
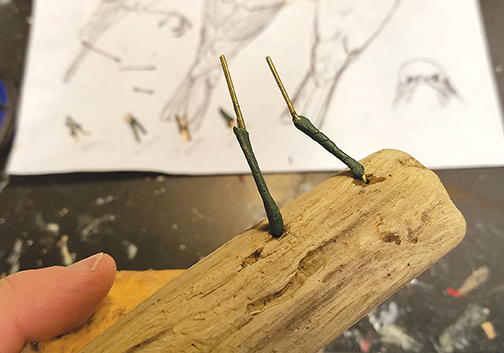
Let this dry for about an hour and remove the bird carving from the legs.
-
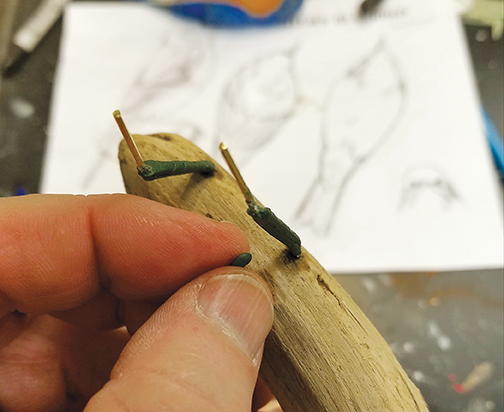
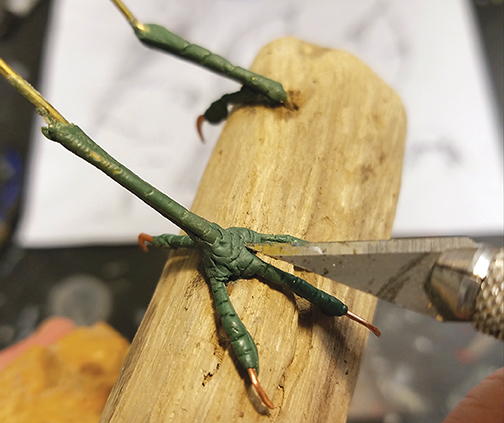
Take a very small piece of green putty and place it on the leg where the heel will go.
-
Attach the heel and use the X-Acto knife to knead the heel into the leg.
-
Make a ball of the green putty about an 1⁄8 of an inch in diameter and place it in the front part of the leg. Begin attaching the toes.
-
Using the X-Acto knife, knead the three toes into the leg.
-
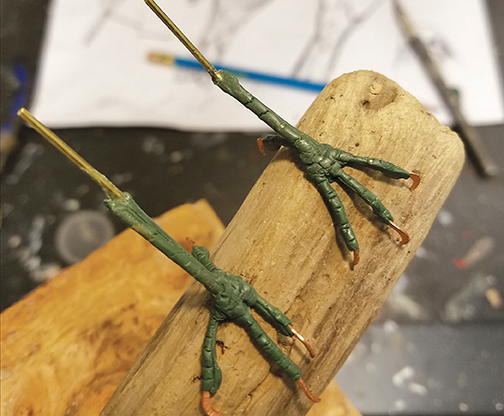
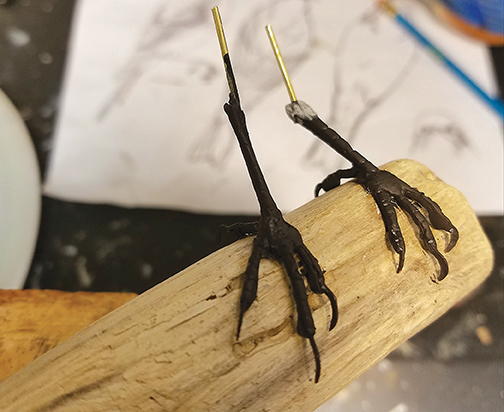
Now all of the toes and the heels are attached. Set the branch aside and let it dry for about four hours.
-
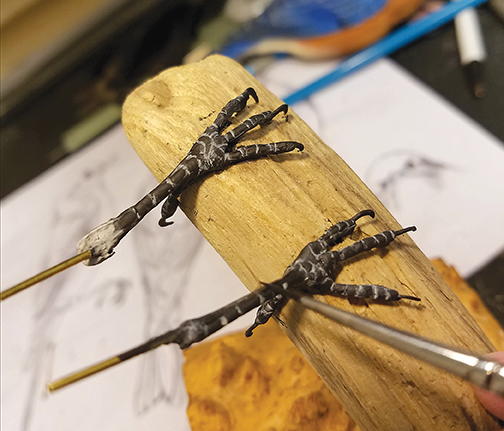
Mix just a pinch of white paint with black to get a very dark gray. Use a #3 round brush to paint the legs with this color.
-
Once the paint dries, mix a lot of water with white paint to get a very watery white and lightly paint over the legs. This should enhance the scaling detail but lighten the legs only slightly.
-
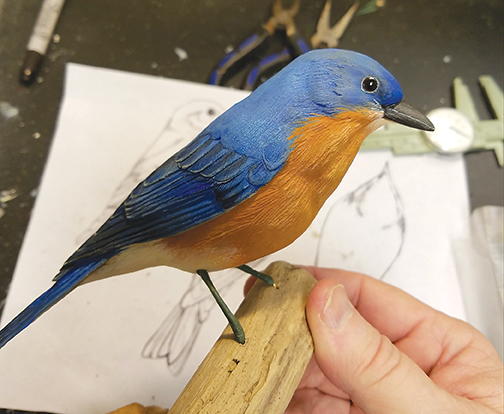
Once the white has dried, take a liner and paint the scales of the leg and toes with a nearly black mixture. When the legs are dry and painted to your liking, glue the carving to the legs that are mounted on your habitat.


For most of his life, Tom Baldwin has been a self-employed artist, and he took up carving after he was introduced to the art form during a vacation on Chincoteague Island in 1987. Since then he has won numerous best of shows at local, state, national, and international competitions, and second best in the world in interpretive at the Ward World Championship in Ocean City, Maryland. He is a contributing writer for Wildfowl Carving Magazine and has written six articles to date. Tom lives with his wife, Barbara, and their two dogs in Akron, Ohio.
Read NextThe Blair School, Part One
Share This Article
YOUR RECENTLY VIEWED ARTICLES

Free tutorials, expert tips, exclusive partner offers, and more straight to your inbox!
Thanks for your comment. Don't forget to share!
Report Inappropriate Comment
Are you sure you would like to report this comment? It will be flagged for our moderators to take action.
Thank you for taking the time to improve the content on our site.
