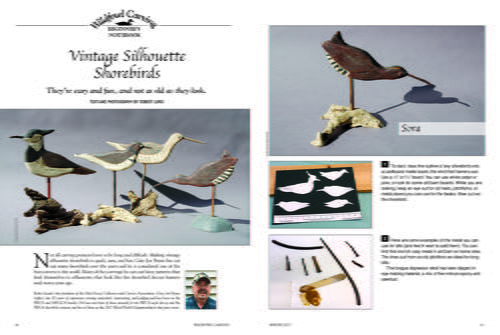
Vintage Silhouette Shorebirds
They're easy and fun, and not as old as they look.
Robert Lund is the president of the Ohio Decoy Collectors and Carvers Association. Gary Joe Bryan has 30 years of experience carving waterfowl, instructing, and judging and has been on the IWCA and ODCCA boards. He has won best of show awards for the IWCA-style decoy and the IWCA shorebird contests and best of show at the 2013 Ward World Championship in the pairs event.
Not all carving projects have to be long and difficult. Making vintage silhouette shorebirds is quick, easy, and fun. Gary Joe Bryan has cut out many shorebirds over the years, and he is considered one of the best carvers in the world. Many of the carvings he cuts out have patterns that lend themselves to silhouettes that look like the shorebird decoys hunters used many years ago.
This article is from the Winter 2017 issue. For more information on our issues, check out our issues page.
Vintage Silhouette Shorebirds
For a closer look at each project, click on the image to enlarge.
Step-by-step Shorebird Project
Photography by Robert Lund
-
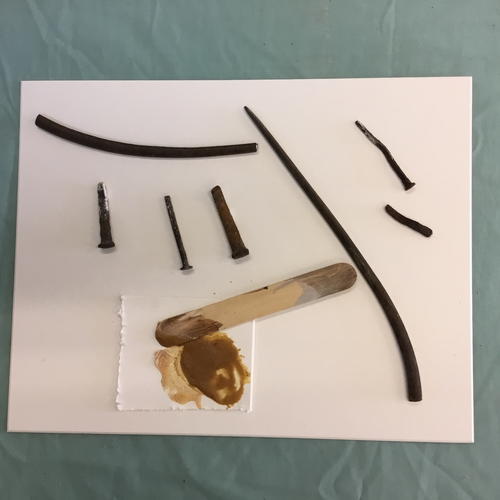
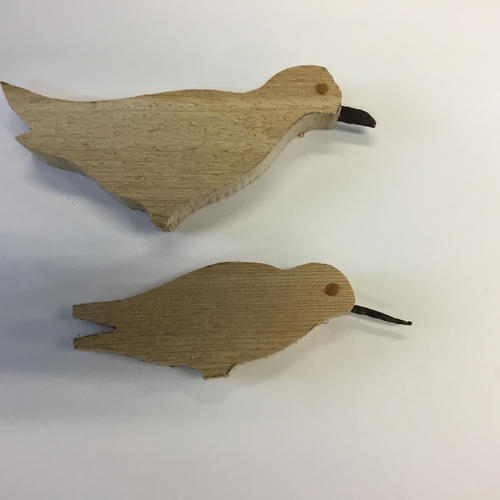
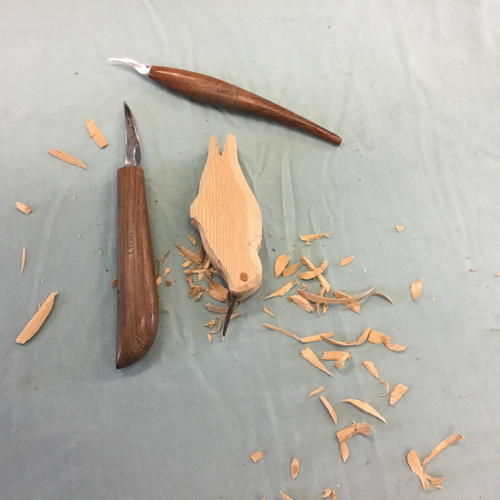
To start, trace the outline of any shorebird onto a cardboard matte board, the kind that framers use. Use a 1⁄2" or 3⁄16" board. You can use white cedar or pine, or look for some old barn boards. While you are looking, keep an eye out for old nails, pitchforks, or metal pieces you can use for the beaks. Now cut out the shorebird.
-
Here are some examples of the metal you can use for bills (and feet if want to add them). You can find this kind of rusty metal in old barn or home sites. The tines cut from an old pitchfork are ideal for long bills.
The tongue depressor stick has been dipped in eye-making material, a mix of five-minute epoxy, and sawdust. -
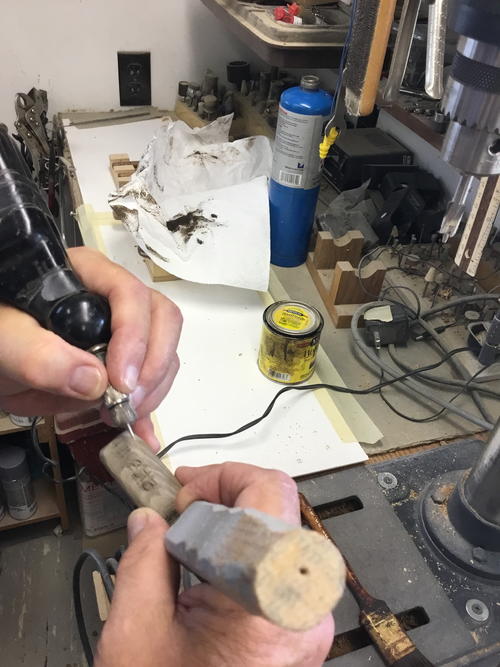
Gary takes his cutouts and dabs on the eyes on each side using the epoxy-and-sawdust mix. The bills are the old pieces of found metal or a square nail.
-
Gary uses carving knives to shape the birds by rounding off the sharp outer edges. You can also do this with a Foredom tool or by hand sanding.
-
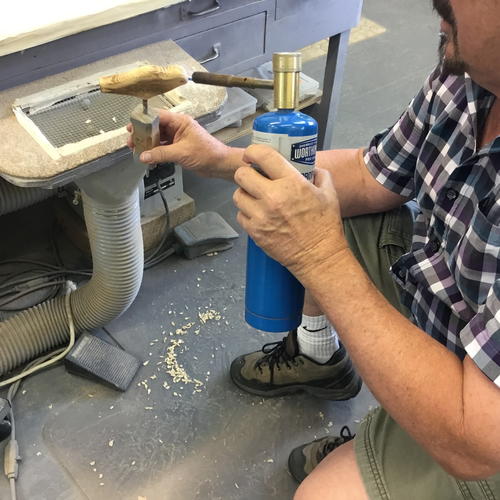
You want to get an aged look to your bird. Gary achieves this by first sanding the cutout and then burning it slightly with a propane torch. Burn the surface of the wood so the fine grain gets a slight burn look. Make sure to hold the bird by the leg.
-
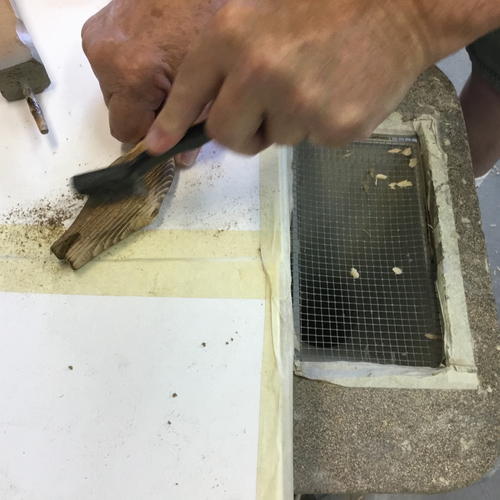
Using a stiff wire brush, Gary cleans up the burn marks. Notice how much the wood grain shows. This will add to the aged look of the bird.
-
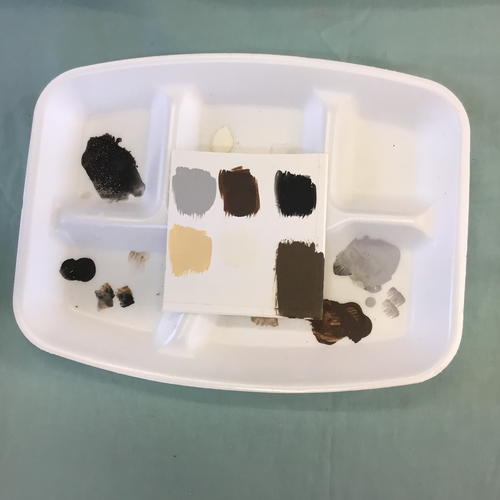
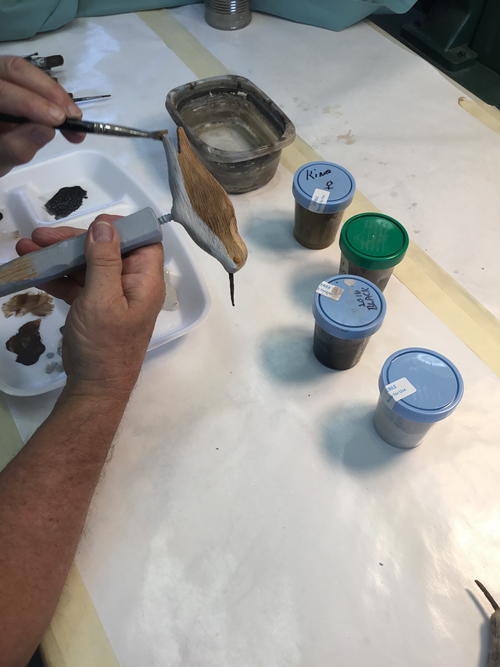
A Styrofoam picnic food tray provides a great place to put your paint. Shown here are various paint colors you can use for these shorebirds. The gray is a combination of black and warm white. Gary will also use burnt umber, raw umber, and yellow with warm white. The final coat is walnut stain.
-
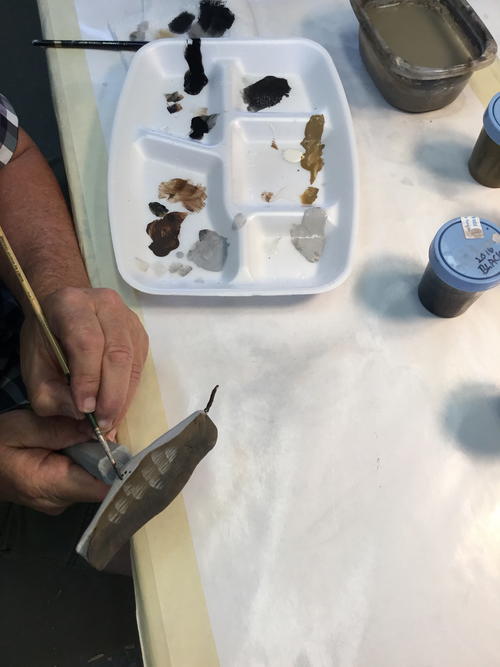
Paint your bird quickly, starting with burnt umber and moving on to white.
-
Add white and burnt umber for the feather detail on the side pockets and top of the bird. Add your own artistic ideas for the feather details and you can’t go wrong.
-
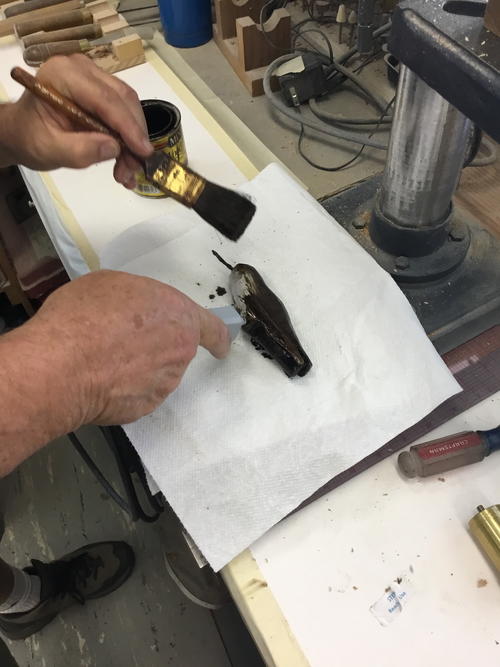
After the paint is dry, coat the entire bird with a walnut stain, and then use a paper towel to remove the excess stain. Wipe it clean and sprinkle the surface with sawdust or talcum powder and brush it in. This will give your carving an aged look.
-
You can add more aging effects by taking a wrench, hammer, screwdriver, or some other tool and pounding some marks into the bird. Do this after the paint is dry. This simulates the dings, dents, and wear marks real hunting silhouettes would have received in
the field. -
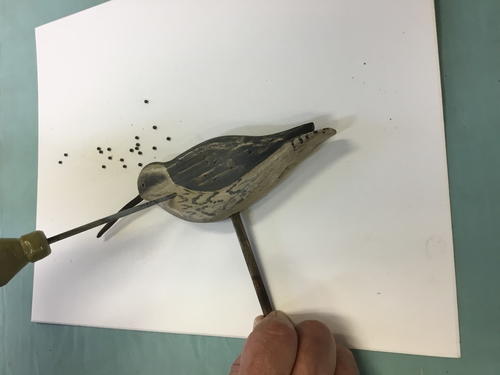
Use an ice pick, sharp tool, or nail to make holes in the bird to look like damage from a shotgun. You can even press some shot into the holes with a nail punch to make things even more realistic. You might notice that the feather pattern on this flatty goes in the wrong direction. Consider this an artistic detail. Most people will not even notice.
-
Always sign your work with a wood burner or inscribe and date with your power tool so potential buyers will know this is not a genuine antique.
-
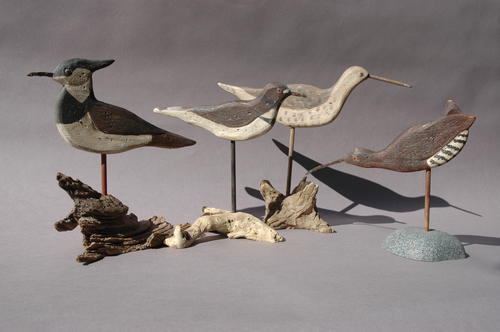
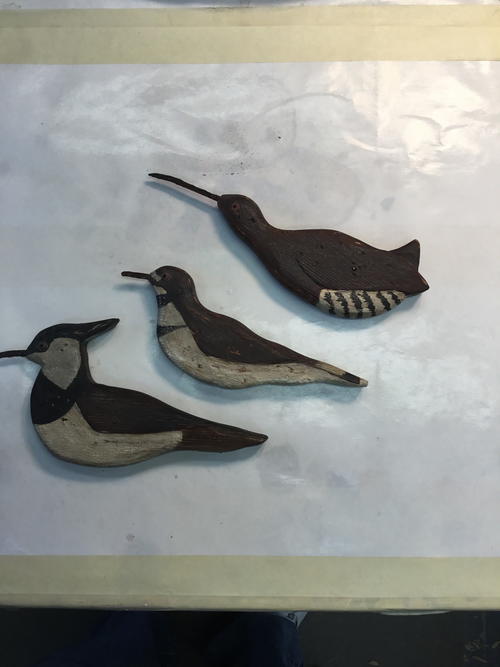
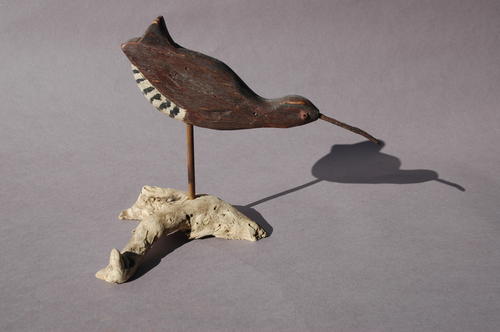
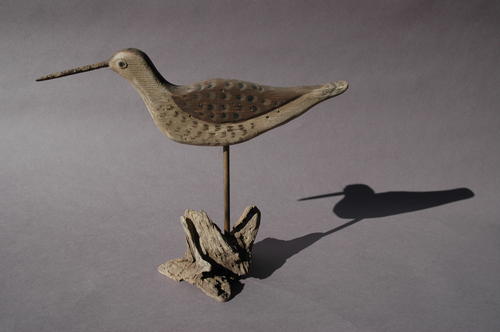
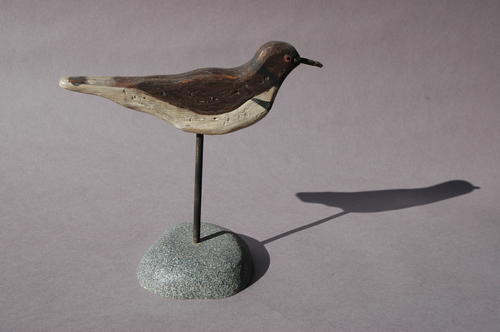
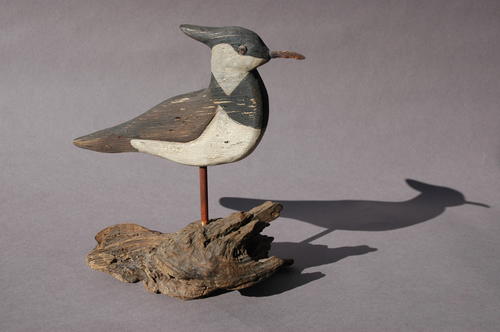
Here are some finished birds. At the top is a sora rail, then a killdeer, and finally a northern lapwing. These carved birds have the basic wing and field markings of vintage decoys that were once used to put food on the table. You can put your finished work on a dowel and show it off on a piece of driftwood or base.


The Finished Pieces
Photography by Tom Huntington
-
Sora
-
Yellowlegs
-
Killdeer
-
Northern lapwing
Wildfowl Carving Pattern
Life-size shorebirds
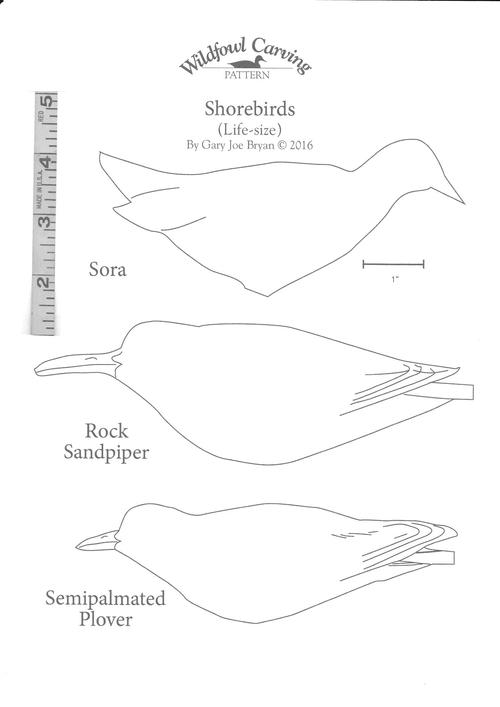
Sneak Peek
-
The first pages of "Beginner's Notebook" in the Winter 2017 issue