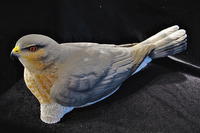
Sitting Pretty
Its nesting time for this sharp-shinned hawk.

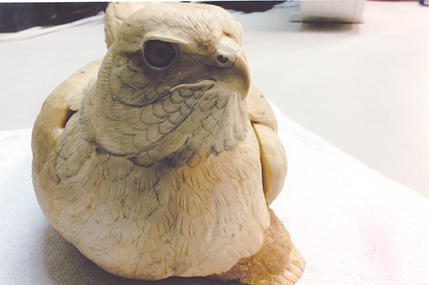
The inspiration for this carving came from my female goshawk, which builds a nest every spring, lays eggs, and incubates them. I have always thought this would be a great carving, as you seldom see the soft side of a killing machine.
The subject for this piece is actually a sharp-shinned hawk. Like the goshawk, the sharp-shinned is an efficient killing machine, but it comes in a smaller package. Anatomically, they are the same basic bird. The sharp-shinned is just downsized.
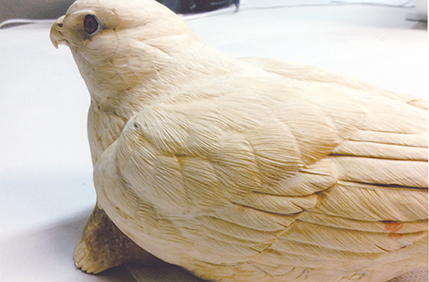
The finished carving does not include the actual nest. It would have been just too big, overpowering the bird and chick. Instead, I rely on educated viewers to imagine the nest and interpret the story I’m telling in the finished piece, which is that although this is a fierce accipiter that kills birds for a living, somehow Mother Nature allows her to care for a newly hatched chick.
Instructions
-
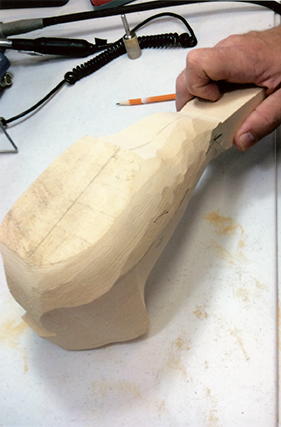
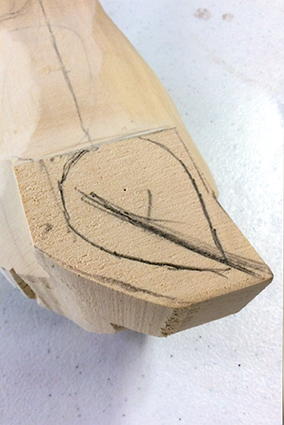
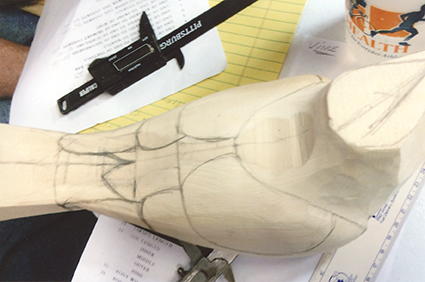
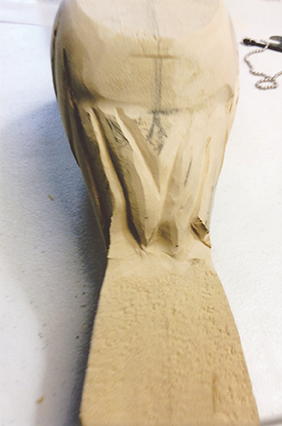
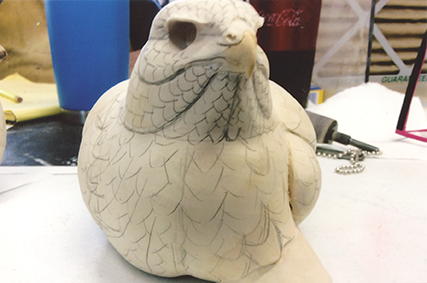
After making the rough cut on a band saw, draw the centerline and wing line. Use a coarse drum sander to start rounding the bird. For now, avoid the head and the tail. Leave the primaries partially done and leave wood for later. Focus mostly on the bird’s center mass. Round up from the side center to the top center, and round down from the side center to the bottom. Rounding is all about removing angles. The first cut creates two new angles, and working those creates four more smaller ones. As you work each angle, you begin to form a curve.
-
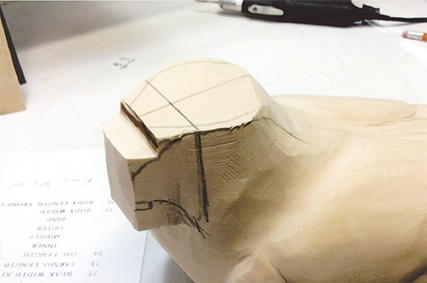
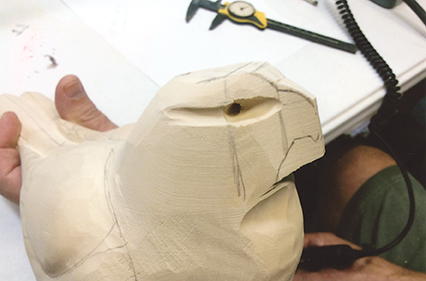
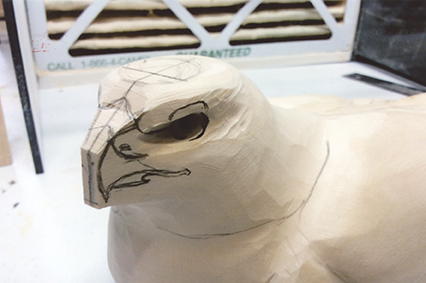
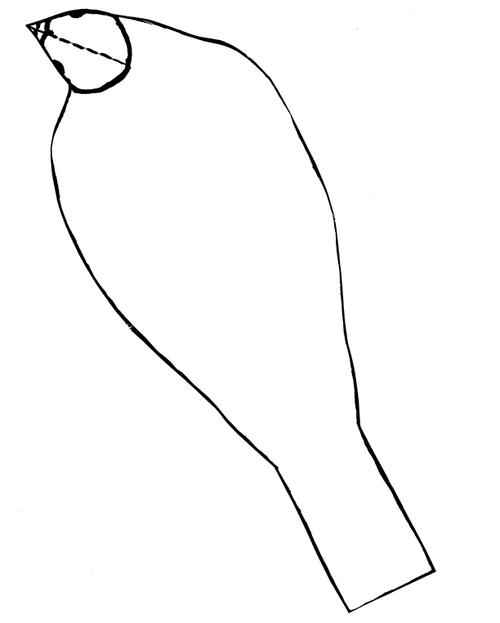
Locate the center/pivot point on top of the head and trace the top pattern at the desired angle and position. You have some freedom here, as birds hold their heads in many positions—pulled back, jutting out, and so forth. Now locate the end of the primaries. From the end of the tail it’s 68–74 mm. Mark the front of the wing at the wrist (or what most call the “shoulder”). The wing chord of a female is 185–205 mm. Make a cut to define the wrist location. Remove most of the wood from the side of the head.
-
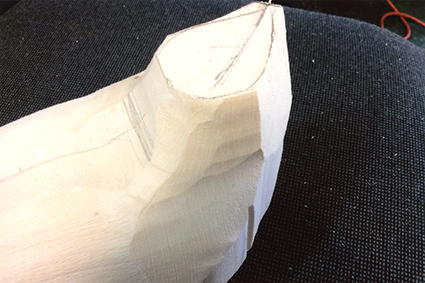
Use a ruler to draw two straight lines along the side of the head pattern. Still using the coarse drum sander, cut to the line. Angle the cutter with a slight bevel so it’s a bit wider at the bottom of the head.
-
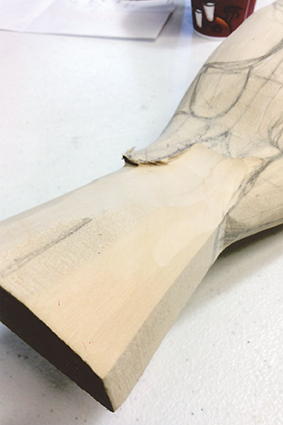
Redraw the centerline to the front of the chest. With the coarse drum sander, round the sides of the chest in toward the centerline. The centerline is the “high point” of the chest.
-
Use the contour of the drum sander to create a valley between the head and the wrist. Resolve the angles you create doing this. Now go over everything you’ve worked on to this point and smooth things out. Begin rounding the top of the tail a bit.
-
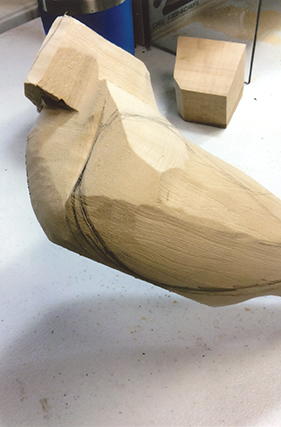
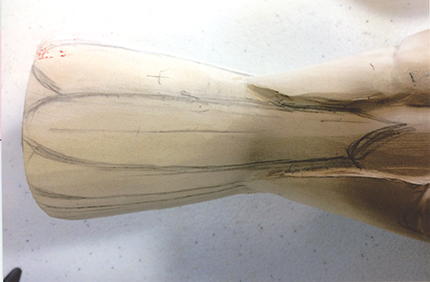
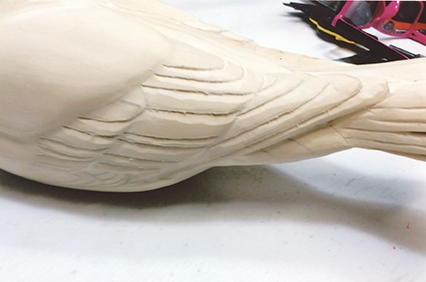
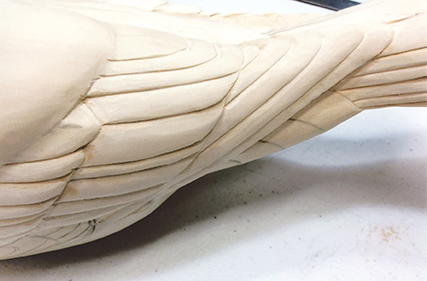
Roughly sketch in the wing groups. Primaries-secondaries are approximately 26 mm, measured from the band saw cut mark. Remove the ends of the primaries to get the proper length. Mark the other wing groups. The wing chord can range from 152 to 180 mm. I used 156 mm for this project. End of the primary to the alula is 106 mm. End of primary to the cape is 102 mm, and the cape width is 42 mm. The end of the primaries to the scapulars is 66 mm. The end of the primaries to the primary coverts is 90 mm.
-
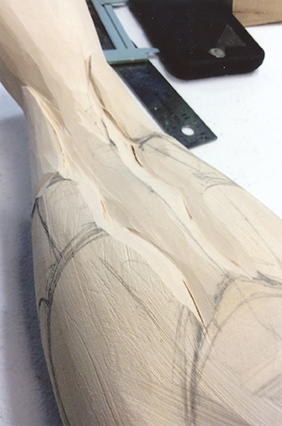
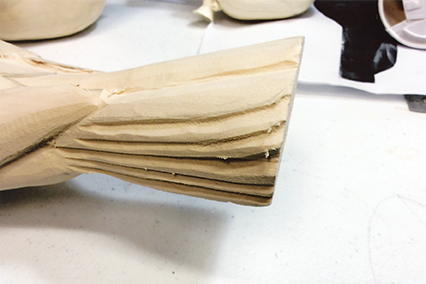
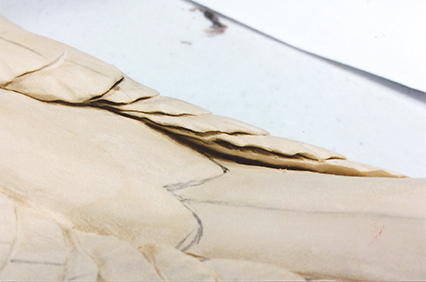
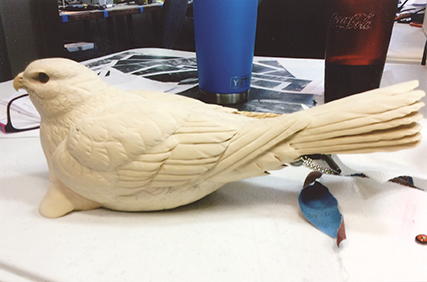
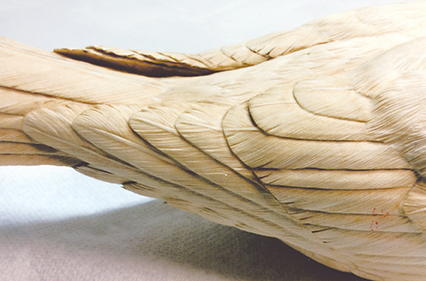
Draw an arc on the back of the tail, approximately a quarter-inch down from the top. With a fine drum sander, shape the tail, keeping it level all the way up to the coverts. Be careful you don’t hit the primaries, which will be slightly raised above the tail.
-
Still using the fine drum sander, begin to shape the underside of the primaries and inside edges of the feather groups. To create an east–west curve on the inside edges, don’t be afraid to go fairly deep into the back feathers.
-
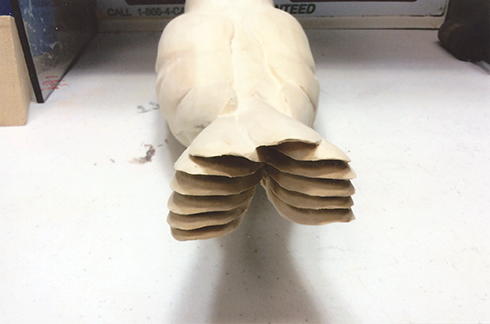
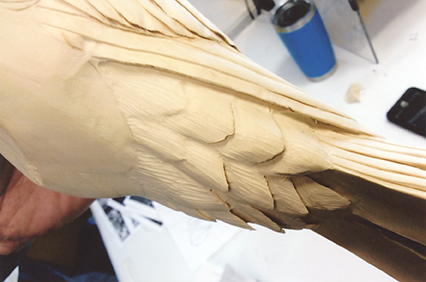
Switch to a small fine drum sander and begin shaping the secondaries, secondary coverts, and scapulars. Use the smaller contour to further refine the groove between the head and wrist. As the feathers move up toward the head, the separation between the step cuts gets smaller.
-
Locate the under-tail coverts and draw a triangle pointing toward the end of the tail. Draw a few rows of feathers and use the small fine drum sander to cut the channels between the rows. The deeper the cuts, the more “fluffy” the feathers will appear.
-
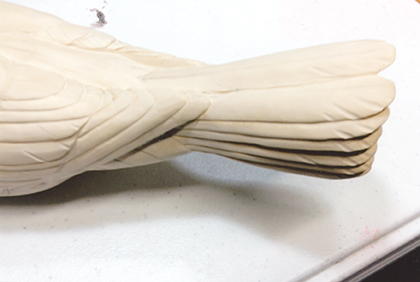
Draw the tail feathers. Start with the two deck feathers (they are approximately 20 mm wide) and add six feathers on each side for a total of 12. Be careful not to use the centerline as an outside edge—shift the feather off center. (Note: a nesting bird will be molting, so there may be fewer than 12 feathers, or perhaps new ones coming in.)
-
Use the small fine drum sander to cut in the initial separations. The deck feather cut must be deep enough to create the east-west curve. Round the top of the feathers to create this effect. Continue initial cuts for the feather edges with the diamond cylinder and the diamond point.
-
Cut in the back feather edge at the end of the tail. Start by using the drum’s contour to create a concave curve on the two bottom feathers. Further refine the separations with the diamond cylinder and point. Cut the inside edges under the tail and round the tips as well.
-
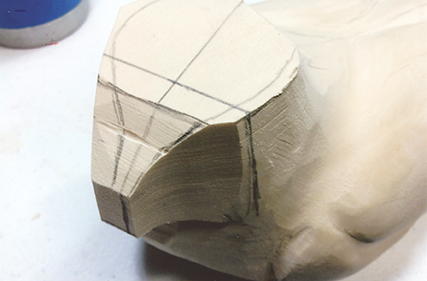
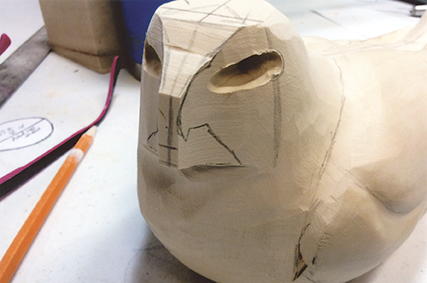
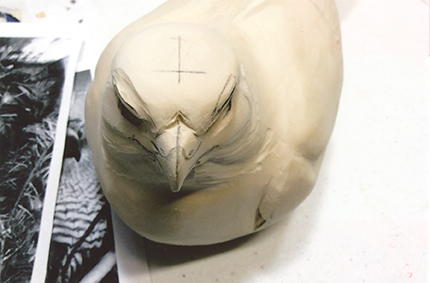
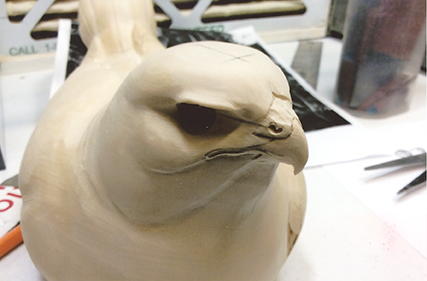
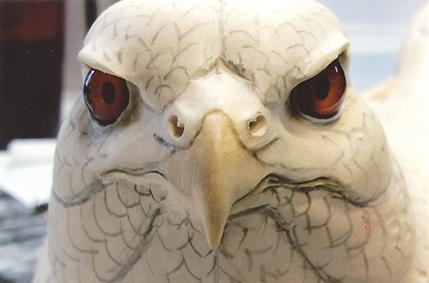
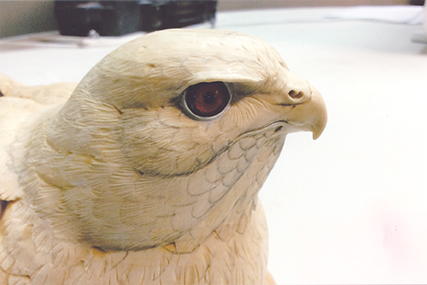
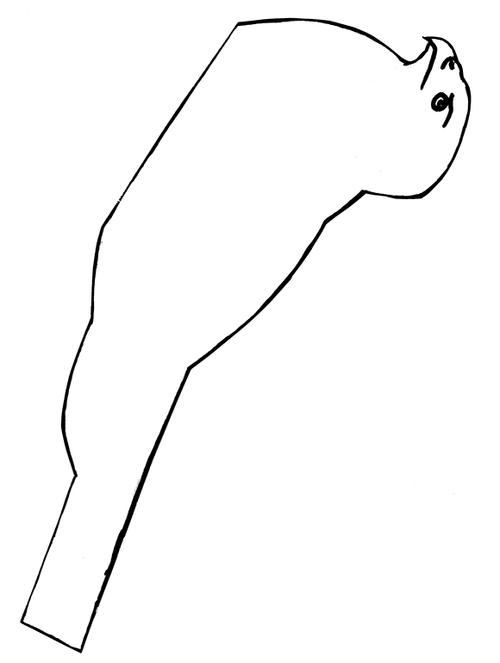
Determine how you want to place the head. There is still time to make slight changes. Lower and pull back the head by cutting 1⁄4 of an inch from the top and front. Keep the cutter straight. Locate the center of the eye by measuring 20 mm from the front edge of the bill (not from the point) and draw a 90-degree line across the top and straight down the sides. Draw the side outline from the pattern. Don’t hold the pattern down, as this will distort it. Instead, keep the pattern straight along the side and “project” it. Keeping the cutter flat, cut the profile, starting with the bill/head point. Round the forehead and bill. Cut under the bill, leaving a little extra wood.
-
Draw the top profile, projecting from the pattern. Keeping parallel to the centerline, cut to the lines. Use the curve of the sander to create the curve from the bill to the head. Keep the angle at 90 degrees at the bill and transition to a slight bevel on the forehead and cheeks so that the bottom of the head is a little wider.
-
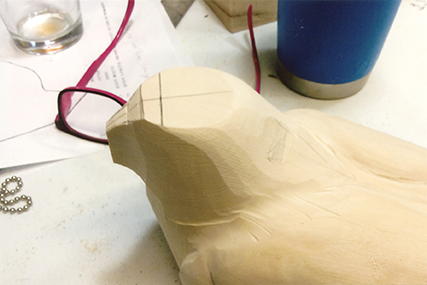
Begin to round the hackles (back of the head) into the cape while maintaining symmetry.
-
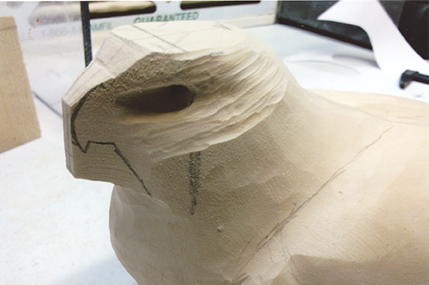
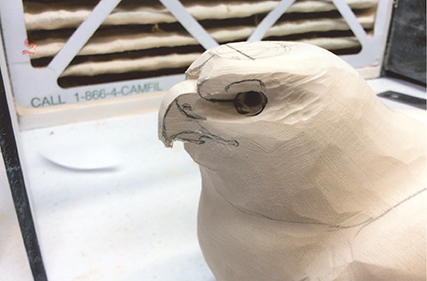
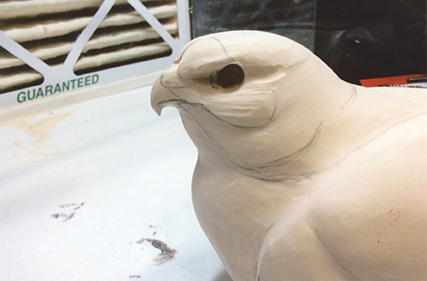
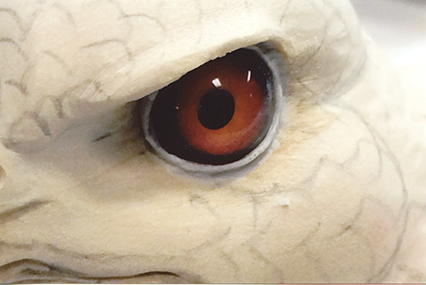
Locate the eye by lining up the side profile with the 20 mm mark you made earlier. Drill pilot holes straight into the head, not at 45-degree angles. The eyes are 8 mm, so stay smaller than this. There will be room to adjust if necessary.
-
The width from eye to eye is 15 mm. Use a diamond ball to cut a channel in front of each eye. Keep it to about 16–17 mm for now and be careful not to hit the bill. Re-drill the eyehole if needed.
-
The measurement from brow to brow is 26–28 mm and from the front of the bill (not the point) to the crown is 40 mm. Mark the back of the eye channel and cut a 27 mm buffer with the diamond ball.
-
Start shaping the head to size with the fine drum sander. This is the time to begin giving the face its proper symmetry.
-
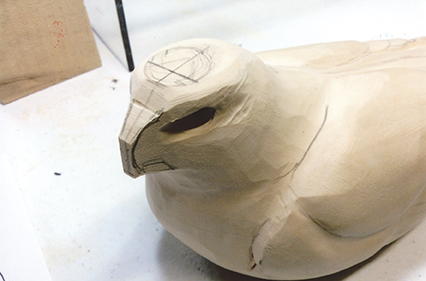
Redraw the side profile. Continue shaping the head and rounding with the fine drum sander. There is a flat spot on top of the head about the size of a penny. Draw a circle on top (or trace a penny) and round to that.
-
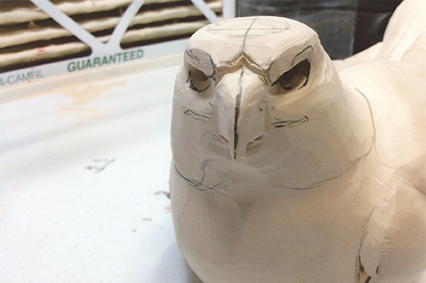
Mark the final bill size. The beak width at the forehead is 10 mm; the outer beak (not the point) to the V-notch is 12 mm; outer beak to gape is 18 mm; bottom mandible length is 8–9 mm; height at forehead is 12 mm, and the width from gape to gape is 22–24 mm.
-
Using the diamond cylinder, cut the V-notch and lower it to the bill plain (reshaping the notch if necessary). Remove wood from under the bill. With the base at 10 mm, taper the bill and round over the top.
-
Draw in the lower “jaw” line and the auricular (cheek) line. Use the diamond ball cutter to cut below the line and blend. From the eyehole to the top of the head is about 6 mm.
-
Draw a line halfway along the brow, about 1 mm in, and remove the wood from the “box.”
-
Deepen the V-notch and sand it.
-
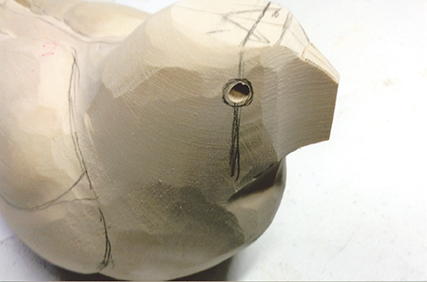
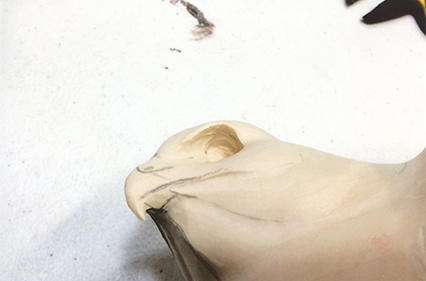
Use the 20 mm eye mark to outline the 8 mm eyehole. Cut the hole slightly larger and round over the shelf it creates. Check the front of the eye width (15 mm) and back of the eye width (25 mm) and adjust as needed. Test the end of the bill to the front of each eye for symmetry.
-
Add the curve under the brow with the small diamond ball.
-
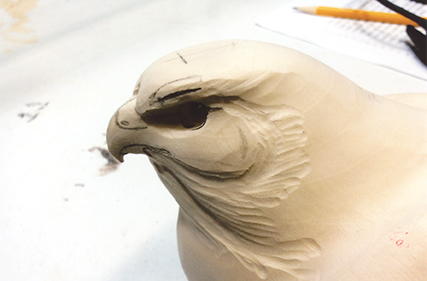
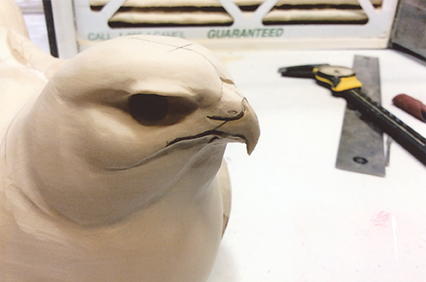
Use a Guge burning tip to iron the lower mandible notch on the side. Depress the lower mandible at the separation line. Keep everything symmetrical and make sure the mandible lines are not straight—there are curves.
-
The nostril is not a round hole; it’s shaped like a kidney bean. Carve a large hole, then a smaller hole, and connect them. Use the diamond ball to “pinch” above the holes to get some lift, then sand the entire bill/cere. Drop some super glue onto the bill when you’re done.
-
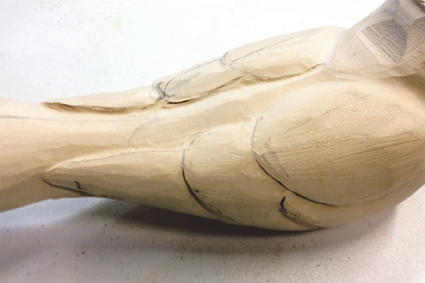
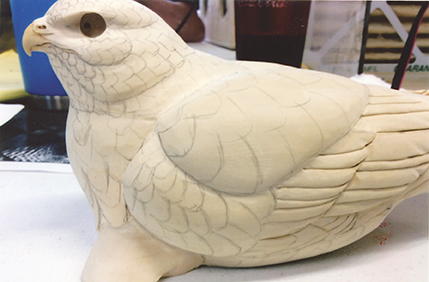
Draw the primaries, secondaries, secondary coverts, and tertials and cut them in. Don’t make the feathers all the same width. Add some variations.
-
Use the Guge tip to clean up the edges of the cut-in feathers.
-
With a sanding mandrel roll, create ripples in the feathers. The ripples tend to appear in the bottom third and inside edges of the feathers. Undercut the primary feathers with a diamond disk. Primaries are similar in size, so the bottom feather will not be wider. When cutting, reduce the width with a K-tip burner. With the diamond point, reverse the ripple, cutting on the underside of the feathers. Use the K-tip to create some separation in a few of the feathers, but don’t overdo it.
-
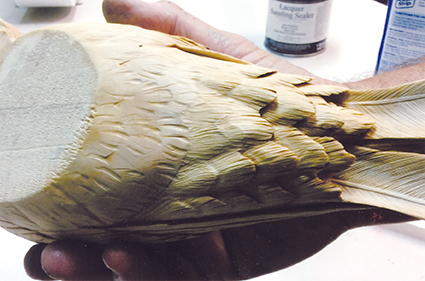
With a rounded diamond cylinder, create deep steps in the under-tail coverts, deeper closer to the tail. Use the diamond disk to begin the undercuts. With the diamond point, work the underside of the top feathers to shape and define the undercutting. Use a diamond ball to shape the top of the feathers. Follow the feather flow (similar to stoning) and lightly sand.
-
Pencil in feather group separations (these will be feather edges) and then draw in feathers, from small to large. Be aware of the overlap from each group. During painting these can create a translucent effect. Mark in some areas for contours.
-
Cut in the feather groups with the diamond rounded cylinder and then smooth out the edges you’ve created. Pick some larger feathers to “lump and bump.” Make splits with a burnishing ball on the ends of all the feathers up to the back/top of the head. Sand with 400-grit to smooth out the edges.
-
To install the eyes, use putty and a pencil eraser to push them in without scratching. Use the excess putty to create a lid, and smooth it out with an old paintbrush. Watch the thickness of the lids—they are not big—and keep them symmetrical.
-
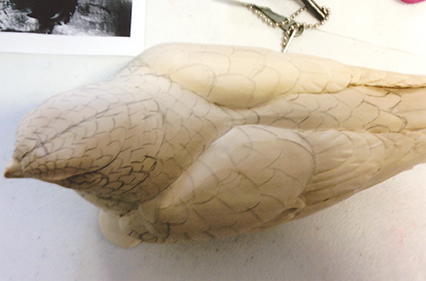
Carve and round the chick and fit it into the body of the mother. Attach it with a brass rod. Use putty to build up the mother’s feathers as they flow over the chick. Use super glue and some coarse wood dust to create the fluffy fuzz. Apply the super glue and then coat with the dust. Once it dries, do it again. Repeat three or four times until you have a good texture.
-
Lightly burnish the bird with a felt pad, run at around 20k rpm. Draw in quills and use the Guge tip to depress the wood on each side of a quill. Use the Guge tip to create accentuation points where feathers join. (During painting, these places will get an extra hit of light color.) Lightly sand away the burn color and hard lines created by the Guge tip. Burn the barbs with a nice curved arc—avoid the Christmas-tree look.
-
Before using your red ceramic rod, use a diamond sharpener to taper the tip. Don’t make a point—keep a flat spot. You will use the edge to make the cuts. Draw a line from the center of the eye to the bill. Stone the rictal bristles, curving up toward the head above the line, and curving down below.
-
Stone the back, scapulars, cape, head, and wing marginals.
-
With the K-tip burner, burn some accentuation lines on the breast feathers, around the burnished marks, and some random lines. Make 5 or 6 in the direction of the feather flow on each feather.
-
Stone the under-tail coverts. Add some random burn lines on the tips of the feathers. Try to create a soft, fluffy effect. The bird is ready for paint.


Sharp-shinned Hawk
(75% Life-size)
By Al Jordan © 2019
-
Note to professional
copying services: You may make up to 10 copies of this
pattern, without the express
written permission of Wildfowl
Carving Magazine, for any purchaser who states that the copies are for personal use.
Al Jordan lives in Rochester, New York, where he is a master falconer. He was the North American Shorebird Champion in 2008 and the IWCA Shorebird Champion in 2010. Al is also an instructor and judge and the author of Wildfowl Carving Magazine’s Half-Size Osprey workbench project. You can contact him at ajordanbirds@yahoo.com.