
A Cork Mallard
PART ONE: CARVING
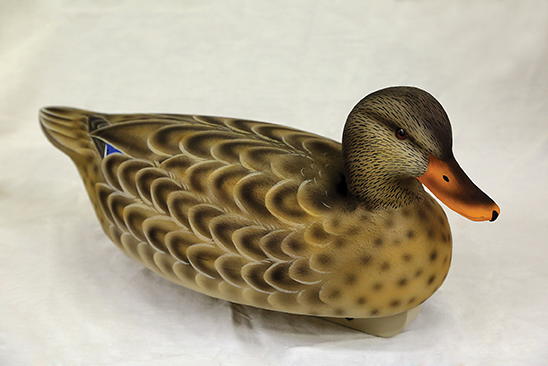
This cork decoy is reasonably easy to make, and sturdy, too!
Jim Higgins made his first cork decoy in 1974. Since then, his Sneakbox Decoy Company has produced hundreds of decoys for duck hunters from Alaska to Florida. Jim’s love of waterfowl and duck hunting led him to complete an MS degree in biology (thesis topic: waterfowl habitat selection) and start full-time decoy carving after his retirement in 2005. Jim shares a 230-year-old farmhouse in Eliot, Maine, with his wife of 50 years, Elizabeth. Each year they travel to hunt ducks in North Dakota and to fly-fish for cutthroat trout in Montana with their two grown sons.
Historically, the use of cork for making decoy bodies was common in the East, especially in the coastal areas of Connecticut and Long Island. The material was readily available from discarded life jackets and other flotation devices. Because of its buoyant and water-resistant properties, and because it was easy to sculpt, cork was a great material for making decoys.
The cork available to decoy makers today is much different from the natural cork bark or cork insulation board that Shang Wheeler used to create his great black duck decoys 80 years ago. Today’s decoy cork is pressed into very dense sheets from granular, ground Portuguese cork. The process to manufacture these cork sheets uses no heat, so the cork retains the natural light color of the original bark. Carvers refer to this as “tan” cork. “Insulation” cork sheets are still manufactured and are made of ground cork pieces that are baked in a mold. The heat puffs up the cork pieces and causes them to release resins that bond the pieces together. This cork has a very dark, burned color and is referred to as black cork. For my work I use only tan cork. Black cork will make a great decoy, but is very messy to work with because it releases dark, sooty dust as you carve it.
For this demonstration, I will start by carving the cedar head. After many years of helping beginning carvers learn the craft of making decoys, I realized that carving the decoy head can be intimidating. I developed the steps outlined here so new carvers could create beautiful heads on the first attempt, and duplicate the results when working on their own.

