
Hand-Made Kingfisher
How to carve this unusual bird with only minimal use of power tools (although you can use them if you want to).
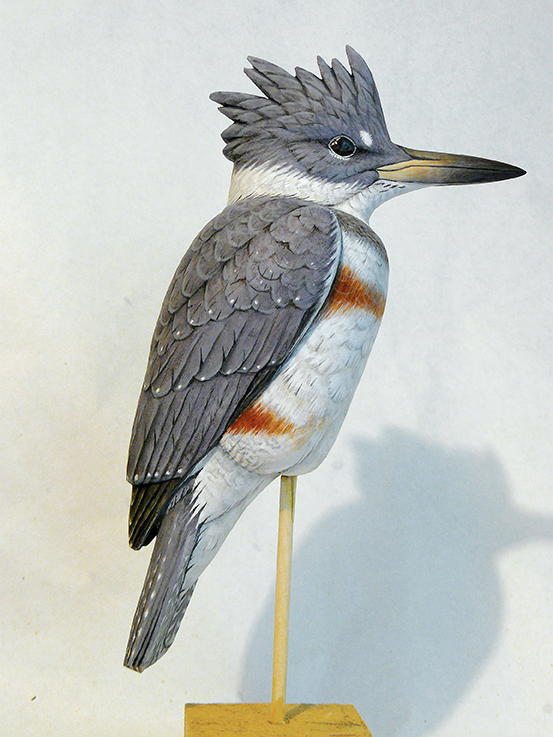
My goal in this article is to carve a fairly simple belted kingfisher (a smoothie) with the carving process centering on shape and form. I will leave a smooth surface and achieve the feather detail, shadowing, and shading through paint.
You can power carve this bird or use traditional hand tools. I will carve it by hand, with the exception of setting the eyes, where I will use a micro-motor tool and a small diamond round bit. I use Pfiel gouges and an X-Acto knife for rounding. I am comfortable with those tools because they are what I used when I started carving. Another important tool among the gouges is the “V,” or parting tool, which I use to outline areas to carve and places on the bird’s surface to be lowered.
The kingfisher is an unusual looking bird, with a large head and bill and a distinctive crest. It’s fun to carve.
Hand-Made Kingfisher
-
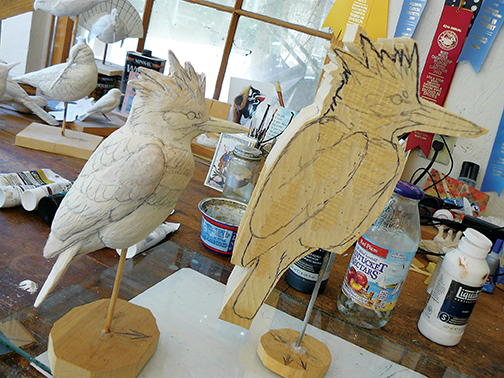
To generate my blank, I first make a clay model. Not only does the clay model help me with the blank, it also guides me during the carving process by giving me a three-dimensional reference. That’s especially useful to see how one area blends into another. You can use any number of materials for the model. I use clay—mostly Sculpey, because you can harden it in an oven.
-
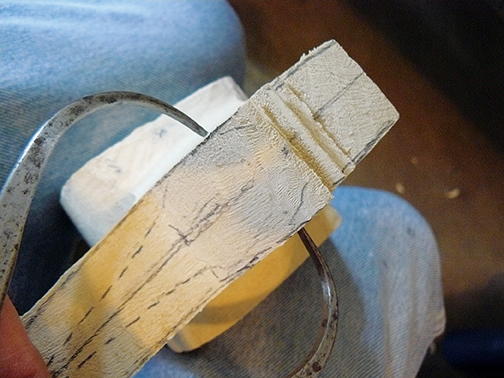
The most important thing you can do when you start carving your blank is to establish a centerline. This will help you create a balanced, symmetrical carving. After I draw my centerline, I draw parallel lines on each side of the head to mark the basic width. I start removing wood with a larger gouge—a 10 mm #9. This takes off a lot of wood quickly. When I am close to the width lines I switch to an 8 mm #5. I use that to make the surface flat again so I can redraw the head profile. I normally carve one side and then the other.
-
After I’ve pulled the sides of the head in to the lines I’ve drawn, I redraw the head profile.
-
I use calipers to measure the basic width of the head of the model and then check the measurement against the wood bird in progress. If you don’t make a model, you can use the pattern for measurements.
-
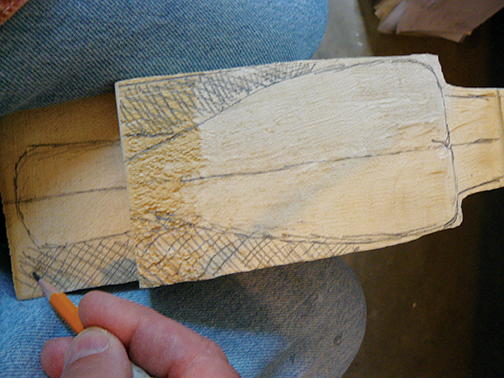
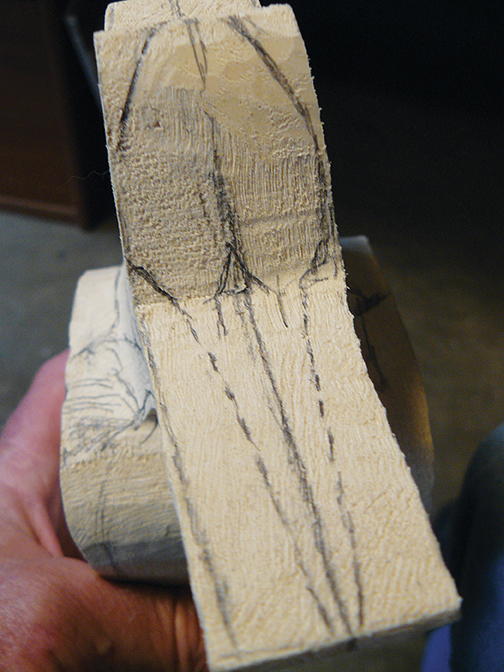
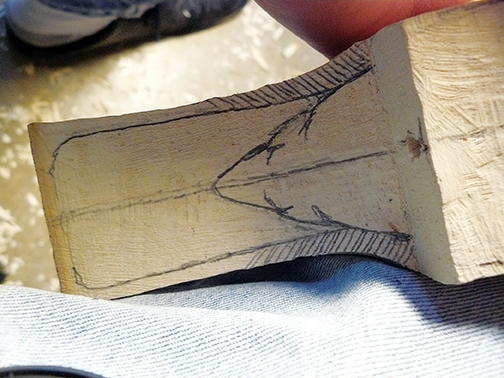
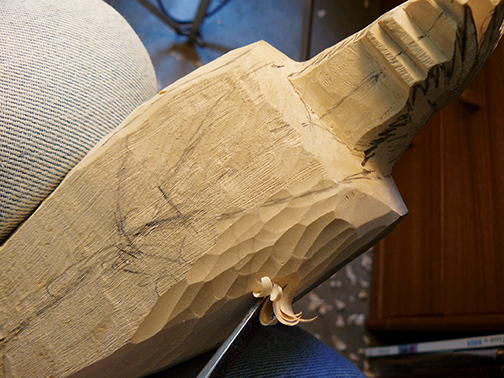
In a process similar to what I did with the sides of the head, I take in the sides of the body. First, I draw my centerline to help me keep the sides even, and then I use a pencil to indicate the wood I will remove. In this photo, the lines I’ve drawn create a very shallow V from the front end of the wings (shoulders), angling to the outer edge of the tail. The crosshatched areas are the wood I will remove. I use the same tools and process that I used in step 2.
-
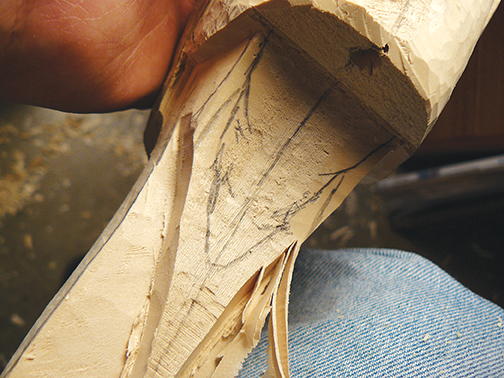
I use my gouge to bring in the sides of the body and the tail. After removing the majority of wood, I again switch to the 8 mm 5 gouge to flatten the surface so I can redraw the profile.
-
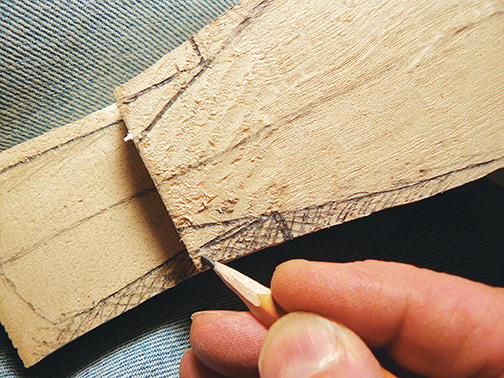
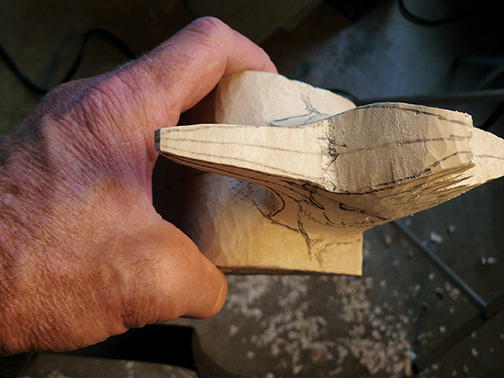
I’ve come a long way with taking in the sides, but you can see here that I have more wood to remove. There is still a small angle of wood to carve where the wing and tail lines meet, as you can see in the photo.
-
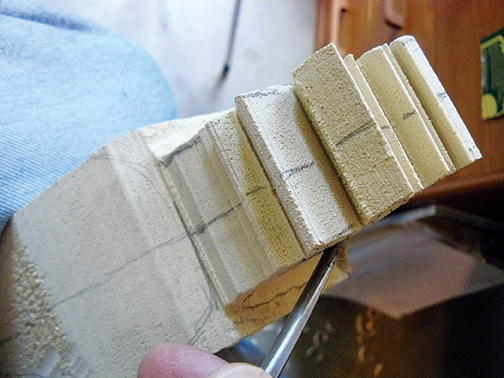
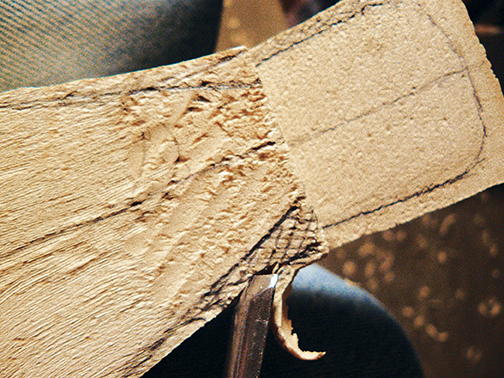
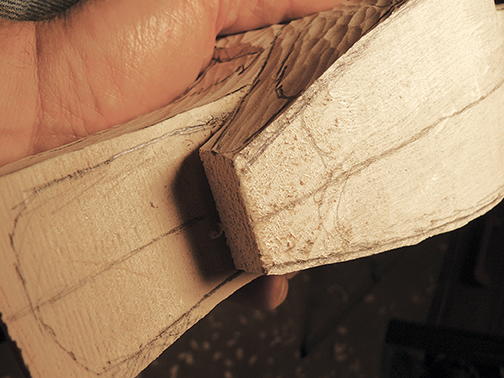
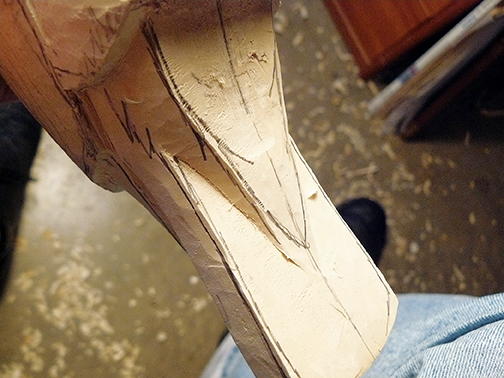
The primary feather groups will sit above the surface of the tail. Following the angle of the wings off the body, I draw in the ends of the primaries. They follow the same angle as the rest of the wing and draw towards each other on top of the tail. I use a parting tool to outline here, and the 8 mm #5 gouge to lower this small triangle of wood until it is level with the rest of the tail surface.
-
Following the wing lines seen in the previous step, I have pulled in the ends of the wings so they sit on the surface of the tail. You have to outline and remove this wood a little at a time so you don’t carve beyond or into the surface of the tail.
-
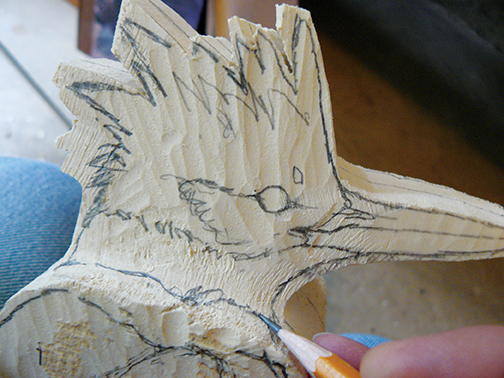
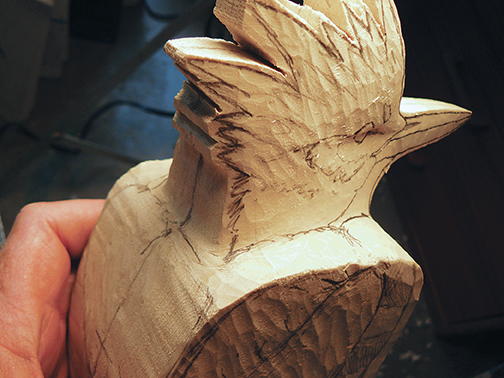
Going back to the head, I draw lines to show how much wood I will remove to define the bill and crest. In this photo you can see how the crest feathers draw towards each other and form a more pointed than rounded top of the head, a unique
feature of this bird. -
Using the same gouges and carving procedure used in step 2, I’ve pulled in the right side of the bill, and angled the top of the head toward the centerline. The next step shows the left side being done.
-
In this photo, you can see that I’ve pulled in the bill to the lines seen in step 10, and now I’m pulling the crest feathers toward the centerline on top of the head. I am carving from top to bottom on the side of the head here, but will carve in whatever direction it takes to get back to a smooth surface so I can redraw the face and head. Tupelo does gives you the ability to do this because it is less grainy than other woods.
-
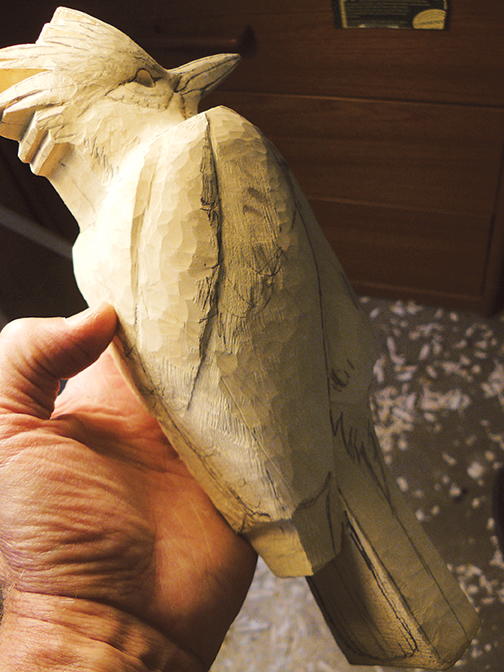
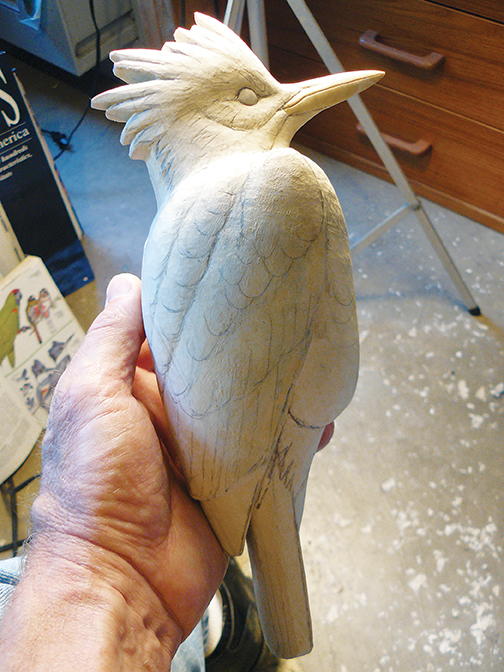
I’ve finished the basic rough-out of the head and I’ve redrawn the head profile.
-
Using gouges, I define the eye channel. First, I use the 10 mm #9 gouge and carve about 1/4-inch deep, level with the top surface of the bill. Then I switch to the 8 mm #5 and angle the side of the face from where the head meets the body up to the eye channel. I carve a straight shot from the head/body connection to the 1/4-inch channel.
-
I have finished defining the eye channel. When both sides have been done, the distance from one eye to the other should be about an inch. The calipers are also helpful to determine if the eyes line up with each other.
-
After drawing the wings, I begin to pull in the belly and flanks on both sides of the bird. This gives me the effect of having the wings laying outside the body. To do this using the parting tool, I will follow along the drawn wing line, carving in about 1/4 inch depth, and lower both sides of the belly, leaving the belly about 2 3/4 inches from one side to the other.
-
In this frontal shot, you can see how I’ve defined the wings by removing and pulling wood from both sides of the chest and flanks, moving in toward the centerline.
-
Now I start pulling in the wood where the tail meets the body. I want to create the a step down where the lower flanks overlap the tail and covert group on the profile of the bird. There is step down from the end of the flank feathers to the sides of the tail and tail covert feathers. In this photo, I am using the 10 mm #9 gouge to carve a 1/4-inch deep channel at the end of the flank feathers to lower the surface of the upper tail. The area where the upper tail meets the end of the flank feathers will be about two inches from one side to the other when both sides are done.
-
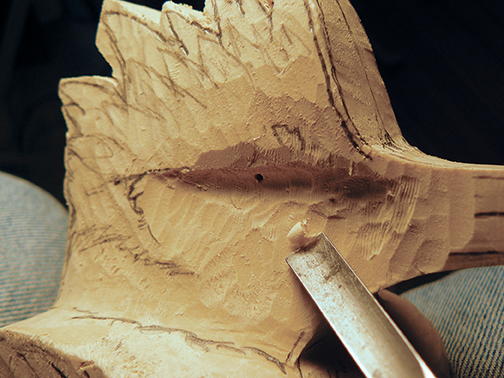
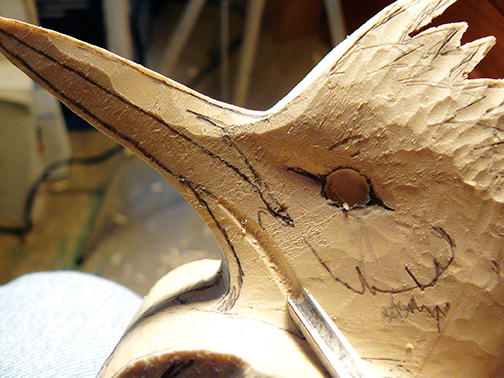
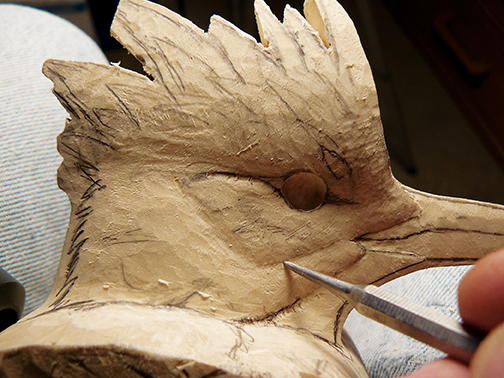
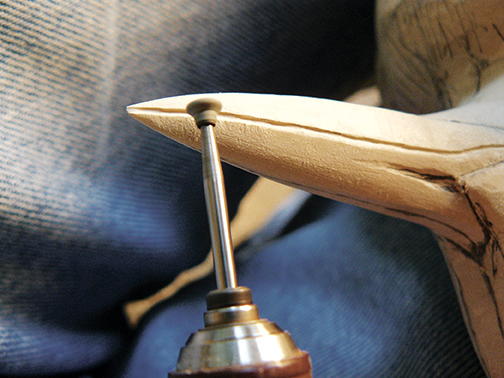
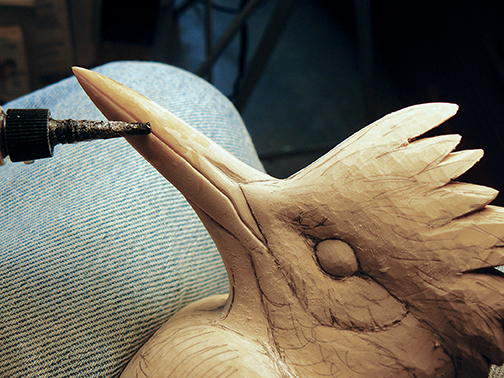
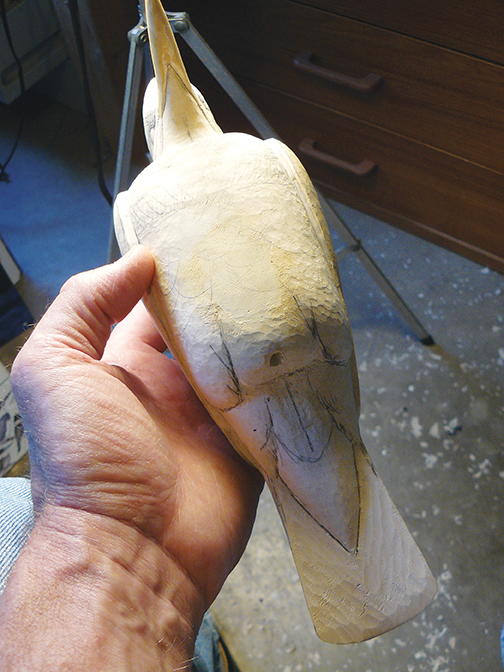
To add the eye holes, I use a diamond ball bit and micro-motor. A Dremel tool will work, too. I position the eyes by drawing a line horizontally from the top of the bill towards the back of the head. I draw a second line vertically from the end of the mouth line on the bill and up toward the top of the head. Where these lines intersect, the top of the eye should just touch the horizontal line, and the front of the eye should just touch the vertical line. After I complete the rest of the face detail, I will make eyes from two-part QuikWood.
-
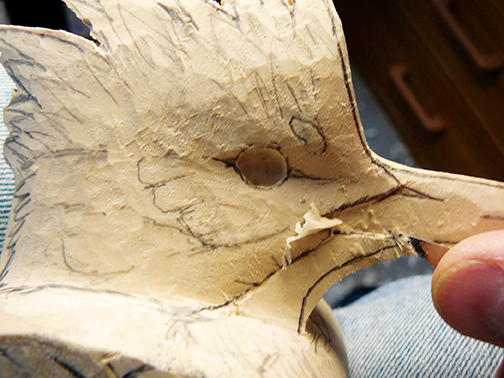
I start the process of adding definition to the head by pulling in the throat on both sides. I use a small gouge along the lines that I have drawn. I create the throat area as I pull in both sides. This is another step-down area, so when I’m done with both sides the width of the throat is less than the sides of the face. Whenever I carve away my pencil lines, I draw them back on.
-
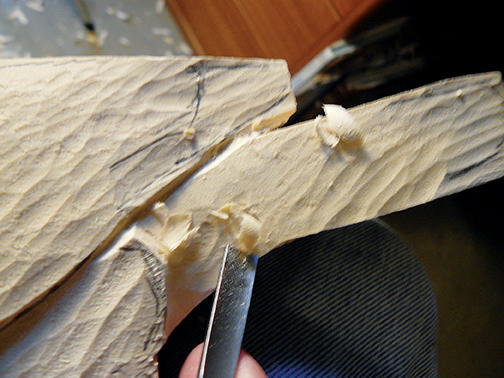
I define the bill where it meets the facial feathers. The facial feathers will lay on top of the bill. Using a parting tool, I cut in along these lines to a depth of around 1/8 of an inch. Then I lower the surface of the bill with a gouge, rounding the hard edges.
-
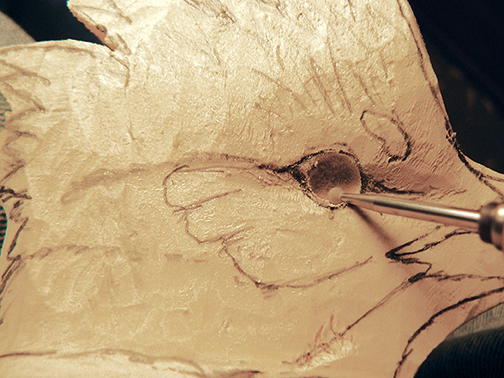
Here you can see the detail I’ve added to the bird’s face. I use the diamond round bit to add a cheek feather group and create some contour. These indentations are subtle and can be defined and smoothed. A dental tool works well to burnish and smooth these areas. This cheek area is the extent of detail that I will carve into to the face. Paint will do the rest.
-
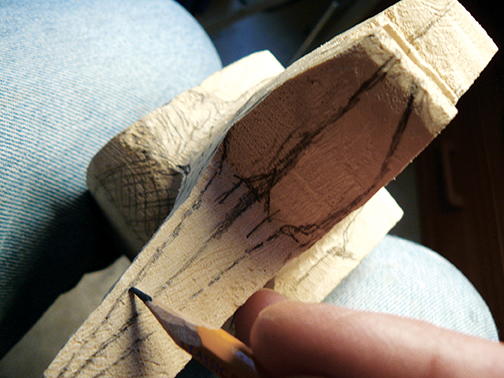
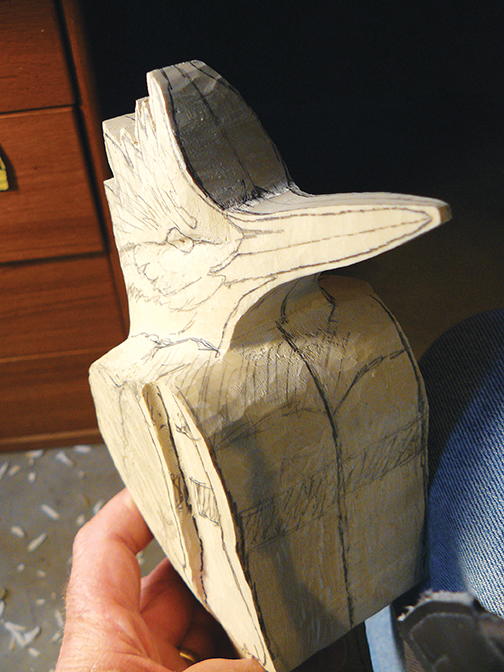
This is the layout for the tail and the under-tail covert group of feathers. You can see where I have indicated wood that needs to be removed.
-
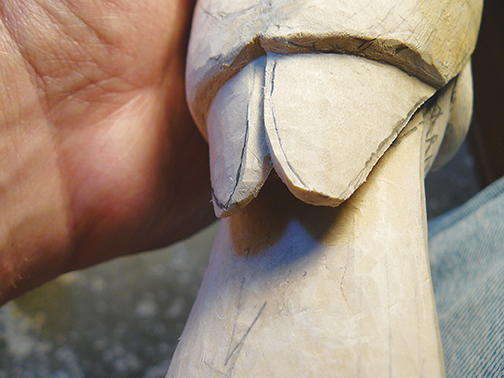
Returning to my gouge, I outline the under-tail covert group and lower the underside surface of the tail. This will define this group of feathers. Once again, I use a parting tool to make initial cuts, outlining this feather group. Then the #5 gouge lowers the surface of the underside of the tail, creating the feather group.
-
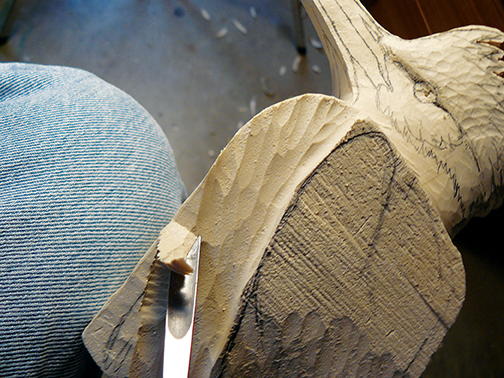
I finish the underside of the tail by rounding the hard edges of the covert group. Any straight-edged carving knife will work for this task.
-
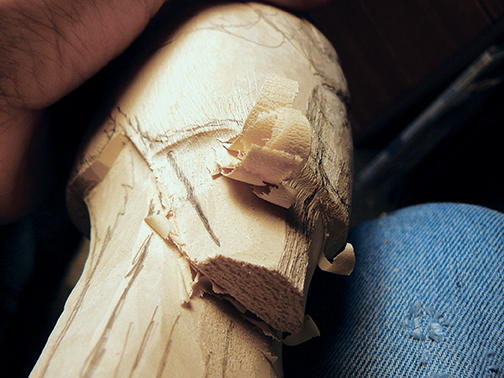
With everything defined and in place, it’s time to start rounding all the hard angles that remain. Here I use the gouge to round the bird’s back. Typically, I will round the entire back, then round the front, belly, and under-tail covert group. As long as you retain the centerline, you can do one side at a time or bounce back and forth.
-
You can see how I’ve rounded the body in this photo. I’ve also used the parting tool to create a step down of the back feather group. Feather groups are variable with regard to bumping them out. Here, about 1⁄8 of an inch will work for the step down, followed by rounding of any hard edges. I use an X-Acto knife, but any straight-edge carving knife will work.
-
I want to separate the primary feather sets from the secondary feather group. This is another step down, which leaves the secondary feather group sitting on top of the primary feather group. Primary and secondary feather groups both follow the angle of the whole wing, as you can see in the top view photos from steps 5 and 6.
-
Using a straight-edge carving knife, I undercut the primary sets to separate them from the tail, and leave them at a thickness of about 1/4 of an inch.
-
When I separate the upper and lower mandibles, I use a rotary stone in the micro-motor. This gives me a bit more definition than a burning pen. The pen also leaves harder edges on both sides of the line being burned.
-
Tupelo is not a hard wood so I always use super glue to strengthen bills. Super glue soaks into porous woods and gives them a hard surface, making it great for replicating the bills of the actual birds. The glue also makes the surface better for sanding. I sand it smooth with fine-grit sandpaper.
-
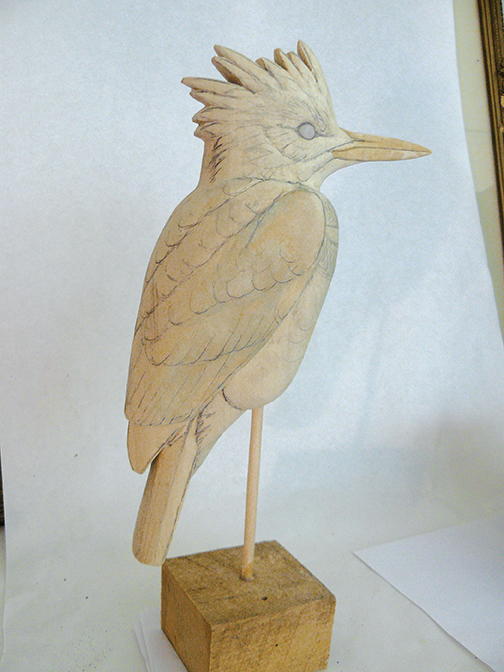
Here’s what the bird looks like once it’s been carved. I use QuikWood epoxy to create the eyes, which I sand smooth. I have
redrawn the feathers from the pattern. These will provide me with guidance when I paint. I have also added some definition of the crest feathers with a parting tool, as you can see up close in step 31. I will add other feathers and detail with paint. -
I will finish the carving by sanding the entire bird and sealing it with a 50/50 mix of lacquer and lacquer thinner. Light sanding will create a smooth painting surface.
-
For now, I’m just using a rough block of oak and a dowel to set the bird. I will explain the painting in the next issue.


Jeff Rechin is recognized as an elite sculptor whose artistry and technique have garnered him two Best in World titles at the prestigious Ward World Championship. He wrote about carving and painting a fli cker in the Fall 2016 and Winter 2017 issues of Wildfowl Carving Magazine.
Read NextEastern Bluebird, Part One
Share This Article
YOUR RECENTLY VIEWED ARTICLES

Free tutorials, expert tips, exclusive partner offers, and more straight to your inbox!
Thanks for your comment. Don't forget to share!
CKinney
![]()
![]()
![]()
![]()
![]()
Jun 22, 2021
Excellent article, I mainly loved the simple tools used so it made it much easier for us beginners. Thank you so much for the article!
Jeff Polaski
![]()
![]()
![]()
![]()
![]()
Feb 03, 2018
The one thing you always leave out is how to start. I can't make clay models then draw outlines on wood. That's a skill I have not mastered, and frankly it's an important part of saying "free tutorial". One more bird I can't even start working on. Why did I subscribe? When does that subscription start? You have my payment months ago.
Editor
Feb 07, 2018
Hello Jeff. I appreciate your feedback, and I've passed it along to our magazine editors. As for your subscription, it appears that you subscribed in December. Your first issue will be Winter 2018 which was pulled on January 11. It can take 6-8 weeks to receive your first issue, as noted on our website. If you do not receive your issue within the next few weeks, please contact our customer service team at (877) 762-8034 or email amprypublishing@emailpsa.com. I hope that helps! Please let me know if you have any other questions. - Editor Beth
Report Inappropriate Comment
Are you sure you would like to report this comment? It will be flagged for our moderators to take action.
Thank you for taking the time to improve the content on our site.
