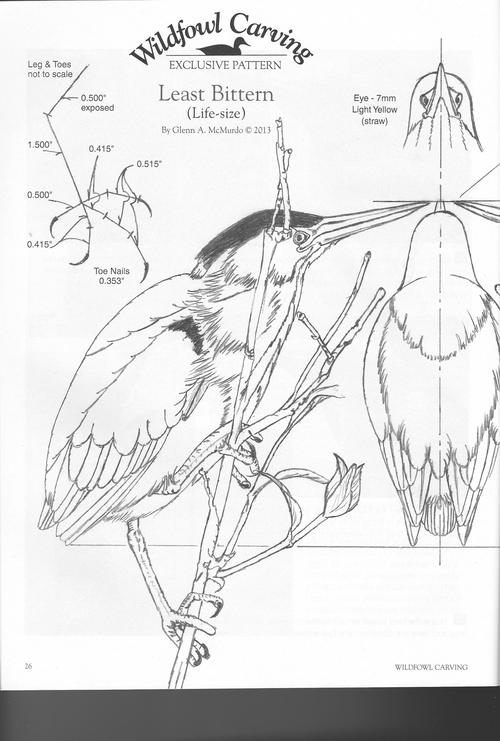
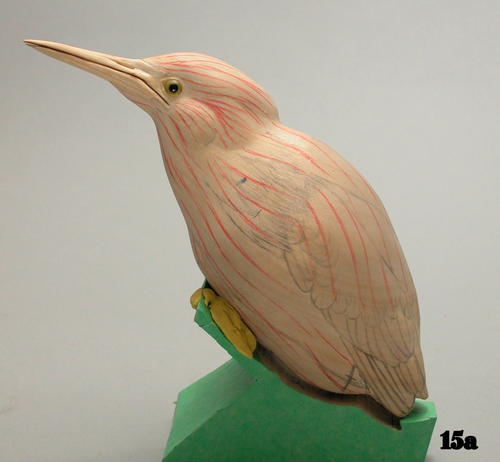
Least Bittern
Here's how to carve the great blue heron's diminutive relation.

Glenn McMurdo’s interest in decoy carving began in 1985. Since then Glenn, now a master carver, has written numerous how-to articles and has judged carving competitions from coast to coast across Canada and the United States. His most recent Workbench Project is Green-Winged Teal Pair. Castings of the author’s award-winning, competition-grade carvings are available. Contact Glenn at mcmudocarvings@sympatico.ca or by phone at (905) 372-5821.
While researching a great blue heron project in 2008 I ran across some reference about the least bittern. Where the great blue heron is North America’s largest heron, the least bittern (Ixobruchus exilis) is arguably the smallest. And, yes, the bittern does belong to the heron family. This diminutive little bird caught my attention because of its size and bold colors. It made me wonder how a species so bold in color could blend so well with its background. And blend it does. Although I have tramped around swamps and marshes all my life I can recall ever seeing only three of these birds. After I finished my blue heron, I knew I had to visit the other side of the scale in the heron family, so I developed an original pattern of my own.
The least bittern’s size depends on its attitude. When at rest with its head and neck pulled in the bird is around eight inches in length, but with its neck extended the bittern can measure up to 14 inches.
Read the rest of this article in Wildfowl Carving Magazine's Summer 2013 issue.
Least Bittern Demonstration
For a closer look at each step, please click on the image to enlarge.
Step-by-step carving
-
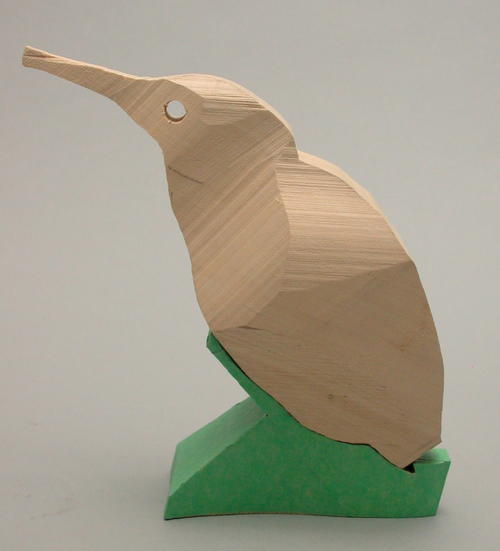
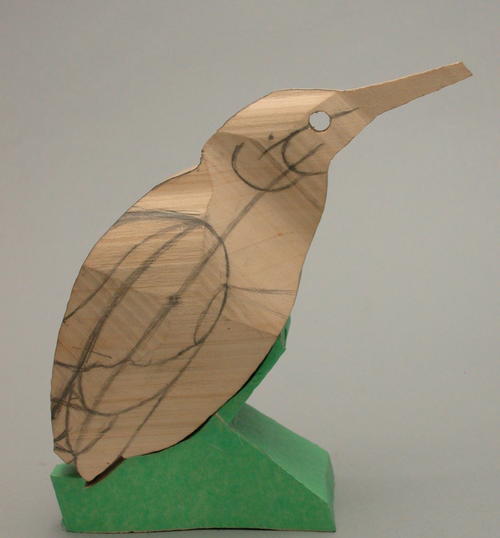
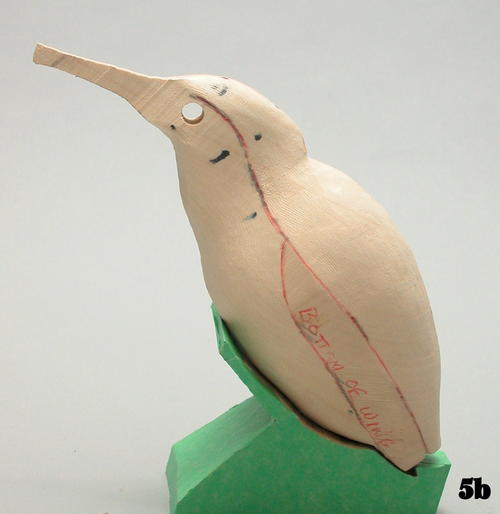
Cut out the bird on the band saw. Before cutting out the bird, I drill a 7 mm hole as a reference point to locate the eyes.
-
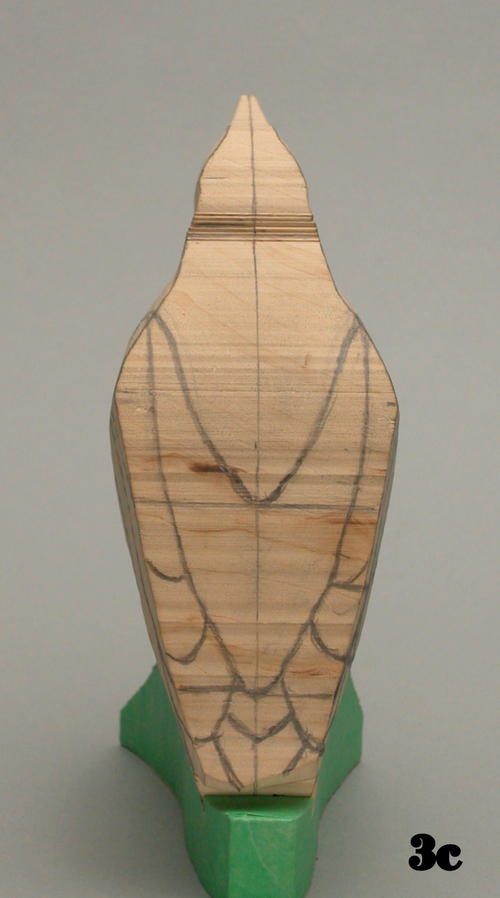
With a pencil, draw on the reference lines to outline the major feather groups.
-
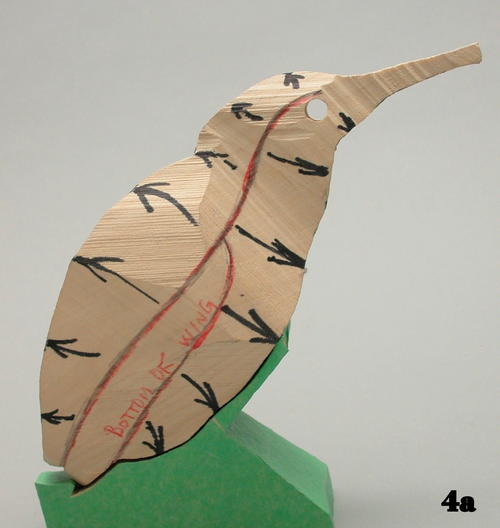
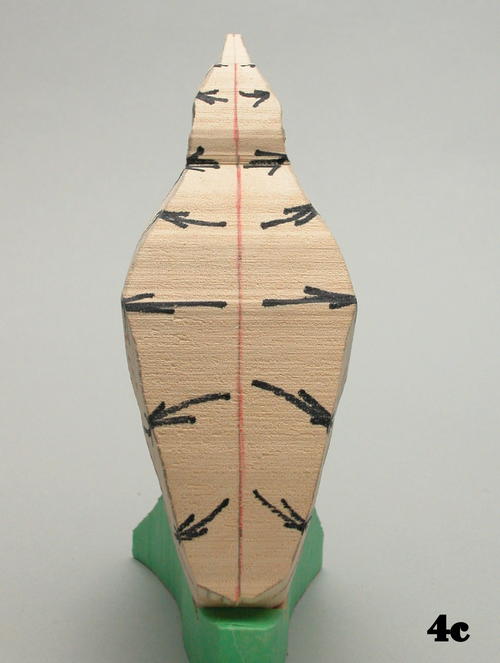
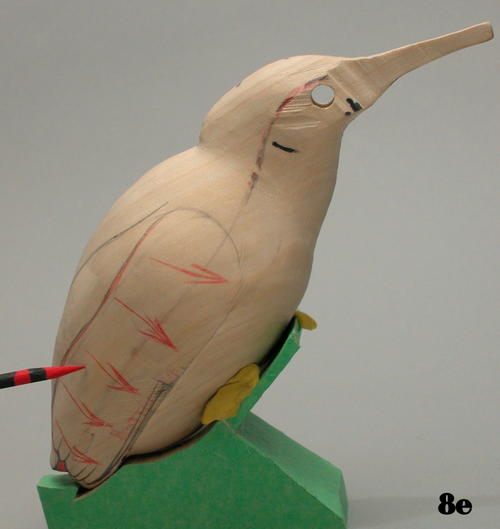
I’ve drawn in arrows to indicate where you should remove wood to give roundness to the bird. Remove the wood on both sides of the red lines, leaving an area of wood along the bird’s side, where I’ve indicated the wing.
-
I rough out the bird with a coarse cutter, giving it a nice round shape.
-
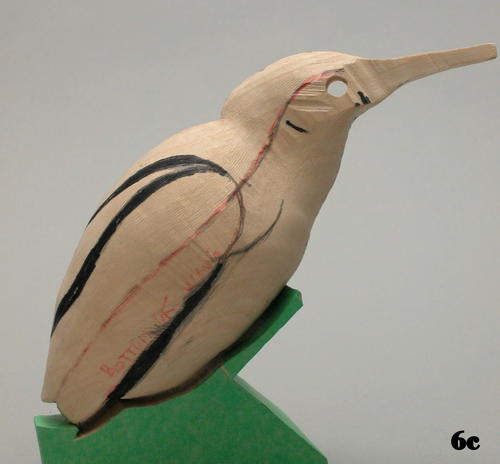
The black area indicates wood to be removed from the lower edge of the wing, from the cape and scapular areas and the bird’s back, and from the side to form the cape and scapular feathers.
-
Now using a flat-end coarse cutter, remove the shadowed area at a 90-degree angle. Closely follow the outline of the shadowed area to ensure the final shape and size of the feather groups are correct
-
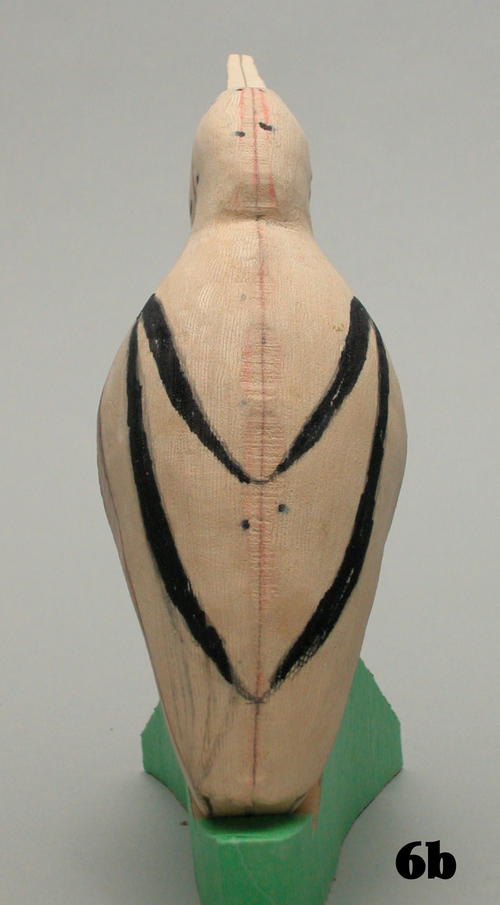
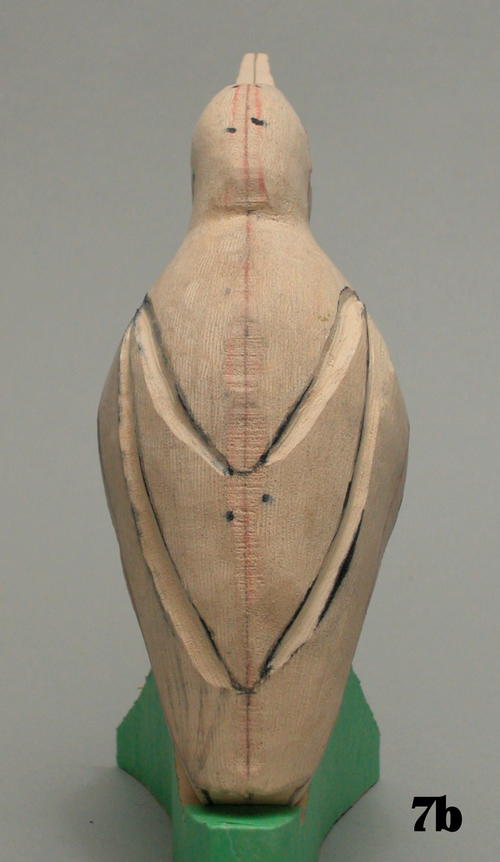
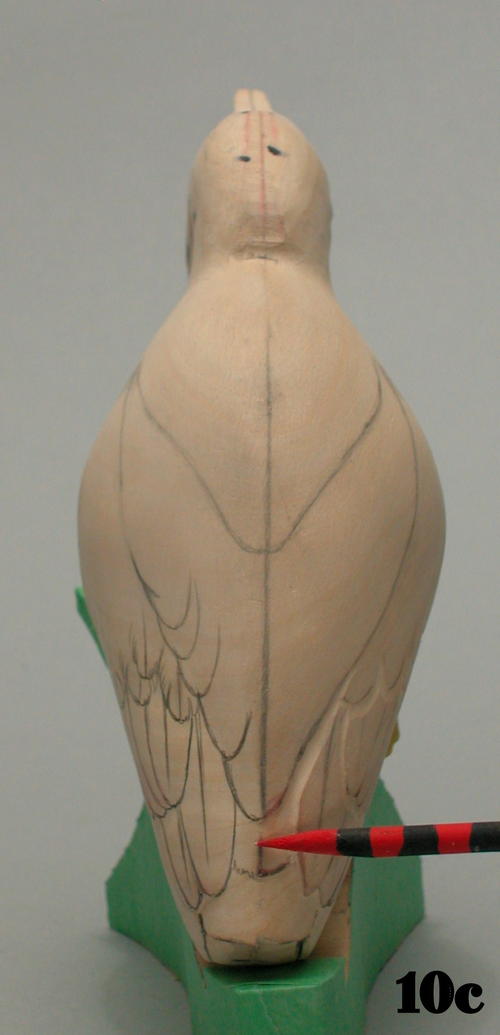
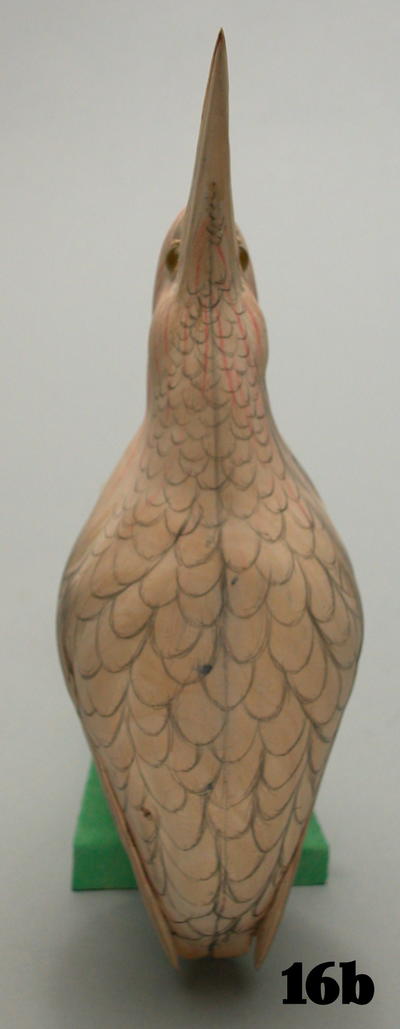
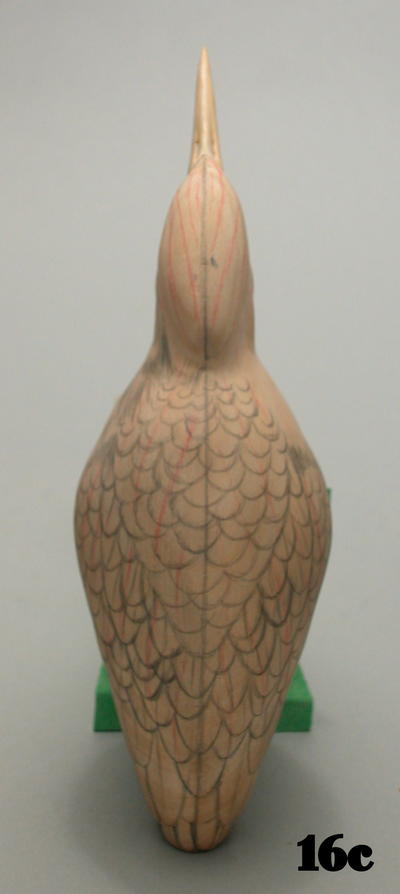
The back view shows the final shape of the bird after I’ve rounded it over from cut line to cut line, creating the final shape of the landscaping here.
-
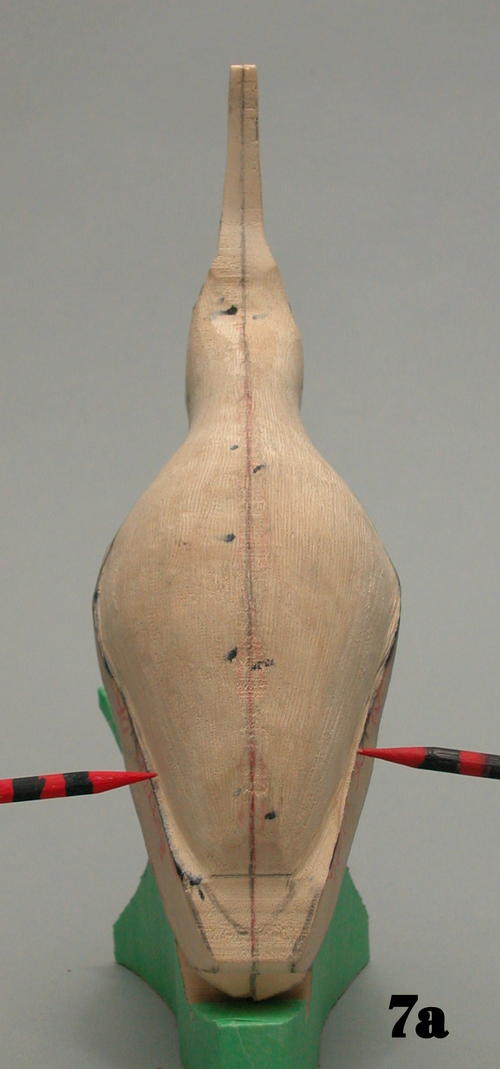
Remove the wood colored red at the top of the wing to accent the shape of the wing’s upper portion. Image 8b shows how I’ve blended the feathered area above the wing into the upper wing area.
-
Do the final shaping of the wing from top to bottom and front to back (as indicated by the pointer), and sand it smooth.
-
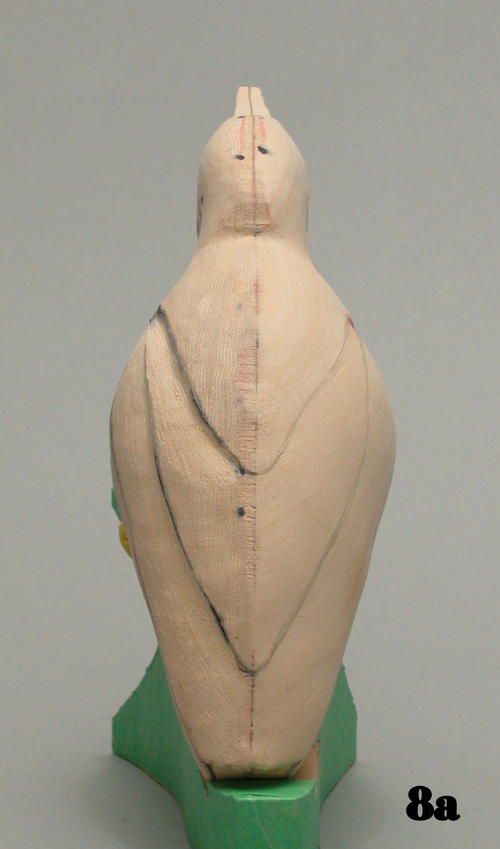
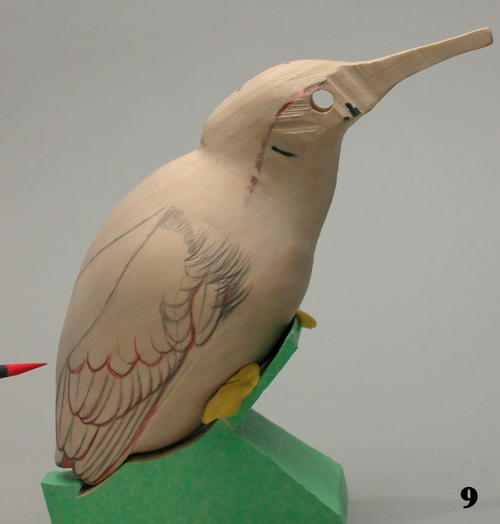
Draw in the major feather groups to be sculpted.
-
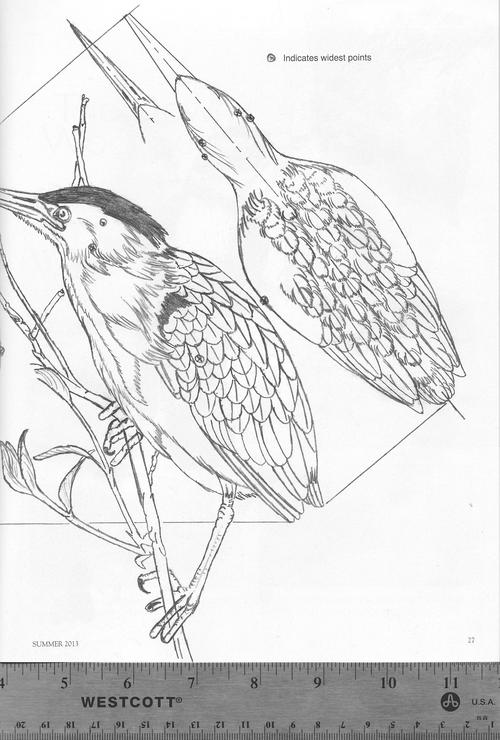
Photo 11a shows the depth of cut you want to outline the feather groups and separate them from each other. Handle both sides the same way. Do not smooth these feather groups into one another—leave them with a hard edge to better define the groups. Clean up these areas to eliminate any fuzzy areas or roughness. 11b shows the outline of the tertial group of feathers.
-
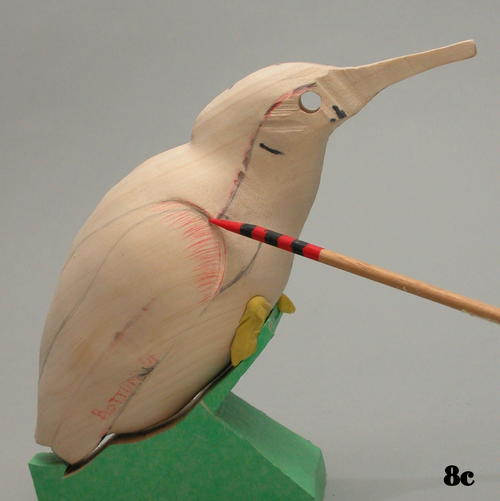
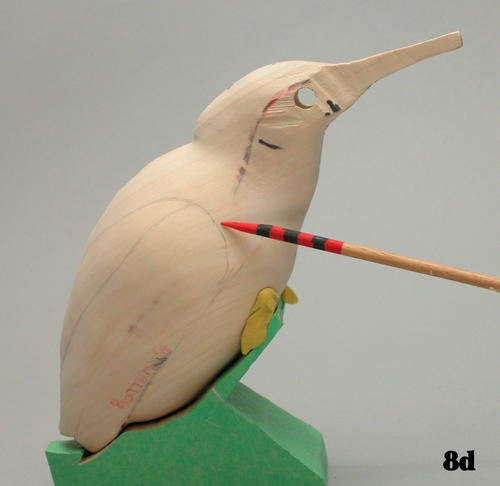
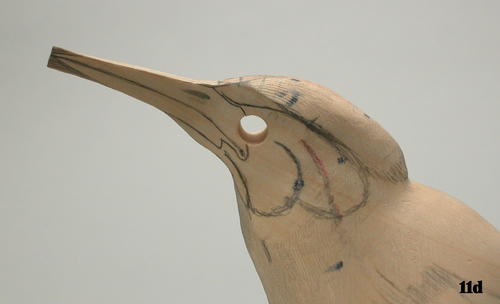
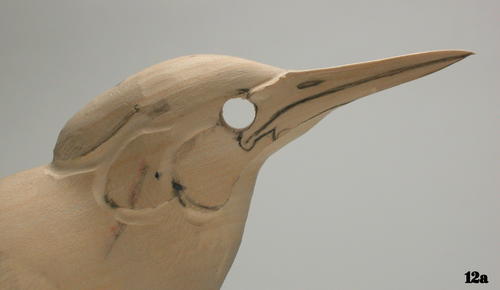
The side and top views show the bill as I’ve drawn it on and indicates the excess wood you will remove to form the final shape. Notice the major feather groups I’ve drawn on the side of the head.
-
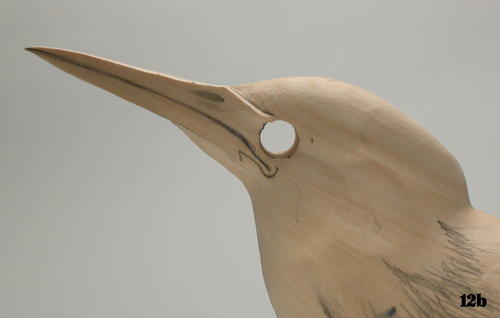
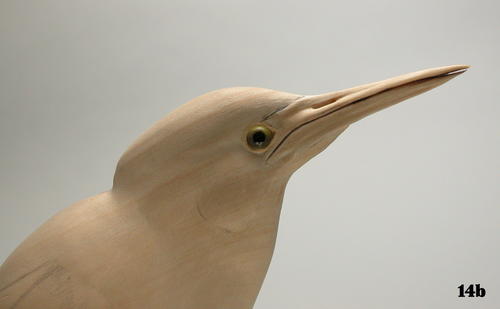
Once you’ve outlined the head feather groups, define them as shown in figure 13a. Then round and blend them into one another, as shown in figure 13b.
-
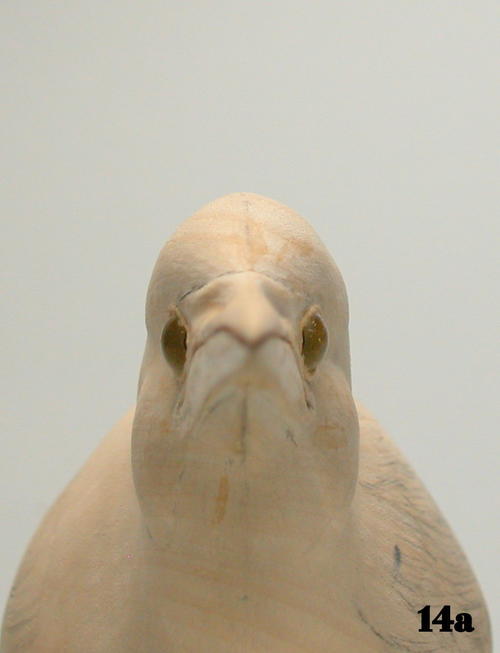
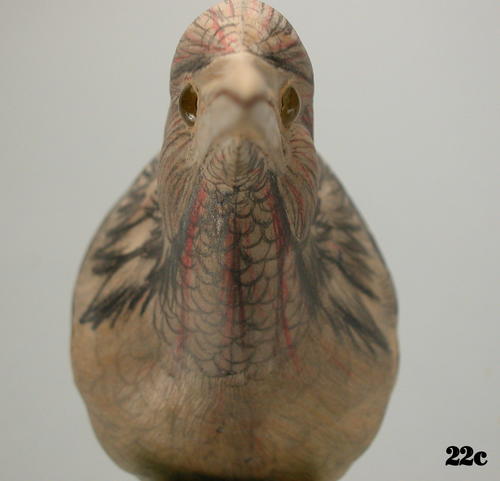
Before setting the eyes, make sure to measure their location after the final shaping of the head to ensure correct placement. Then fill the hole with modeling clay of your choice. Place the eyes and remove any and all excess clay that has ooze out. Fill in the area around the eye with wood filler and let it dry. Once the filler is dry, give the eye opening its final shape. I use a sharp knife. The final step is to take a small paint brush dampened with water and smooth out the hard edges of the filler to blend it into the surrounding area.
-
I draw flow lines throughout the bird’s body. These are important because each feather group has a definite sense of flow and capturing that helps you enhance the softness and give a lifelike appearance to the final carving. I use the flow lines to assist with the drawing of individual feathers throughout the feather groups.
-
Draw the feathers using the previously established flow lines. You will need a sharp pencil, good reference photos, and, most important, an eraser to wipe out your mistakes—and you will make mistakes. Different groups of feathers do have different shapes and sizes that you must research before attempting to draw them on the bird. You can easily mess up a good carving if you don’t have the proper size and shape of the feathers. This is the point to get them right, so take your time.
-
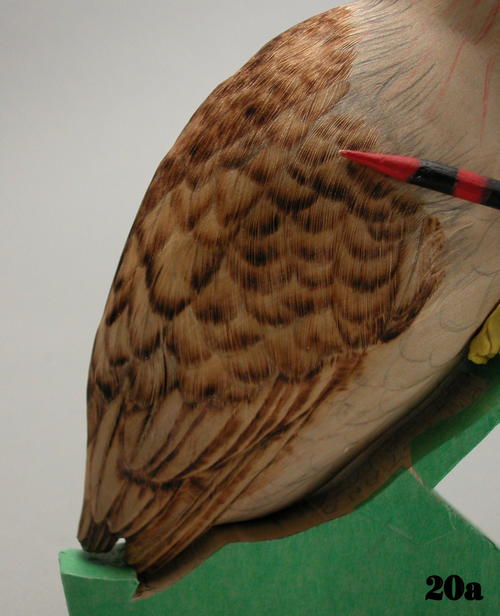
The primary (wing) feathers, tail feathers, and tertials are all used for flight, and they are classified as stiff feathers. To make these feathers look stiff, first outline the outside marine of each with a burning pen, and then burn on each individual line, moving from the base of the feather toward the outside edge. When I burn, my goal is to end up with the color of lightly burned toast. Also, keep all the burn lines parallel with one another and give them a long, slow S-curve flow. It is most important not to cross burn lines. It creates a mess and makes it difficult to paint the surface.
-
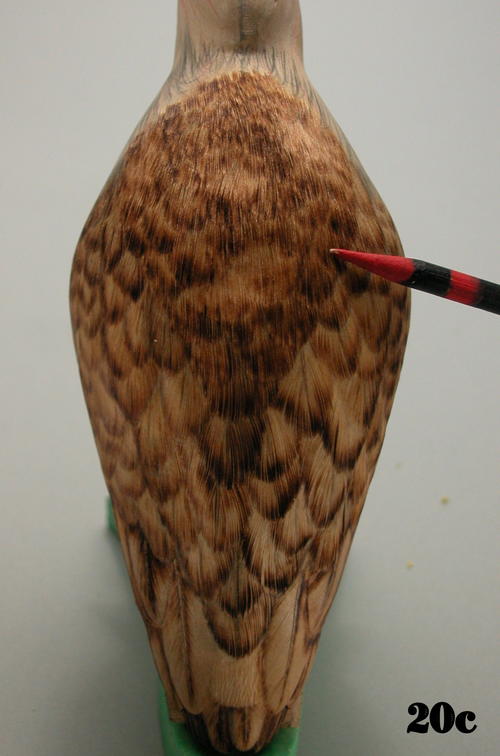
Here I’ve finished burning the scapular, cape, and back feathers. I burned from the top of the feather toward the base, which creates a look that’s different from the stiff feathers. At the end of the day, the last thing I do is seal the finished surface with a top-quality wood sealer. I use Curt’s Teekay’s Rapid-Dri Wood Sealer. It prevents moisture from migrating into the finished surface.
-
The areas indicated with red lines in figure 19a are the places on the belly and lower rump feathers where I apply lumps and bumps and then sand smooth before I apply the final texture. This creates shadows and highlights that help add softness to these areas. To apply the texture in these areas, I use a barrel-shaped carving stone and apply individual strokes to each feather. Then I apply longer strokes of texture through groups of three or more feathers, which enhances the flow to the feathers in this region.
-
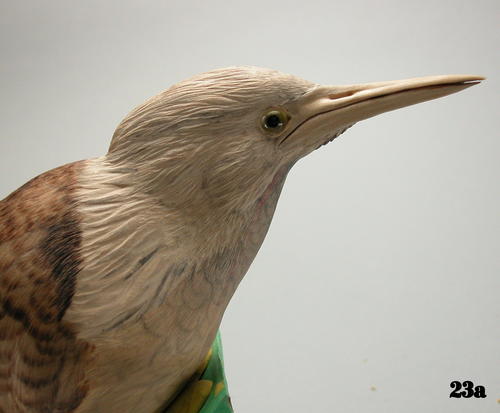
Draw on the head and neck feathers. These feathers don’t have an individual look to them—they appear more hairy, lacy, or stringy. This is because the bittern can stretch its neck considerably. When at rest, as this carving is, the bird is approximately eight inches long from the tip of the tail to the tip of the bill. When fully stretched out the bird can measure up to 14 inches long.
-
I have textured the head and neck areas. I define larger groups of feathers in these areas and then texture each group, using individual finer lines within each group to create an airy, stringy appearance.
-
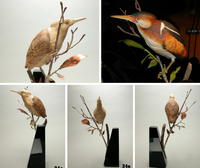
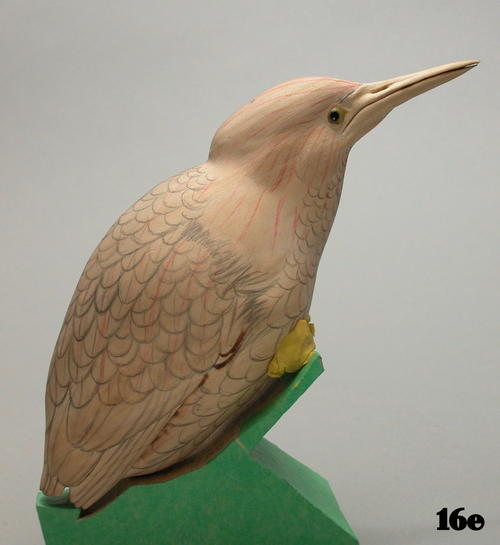
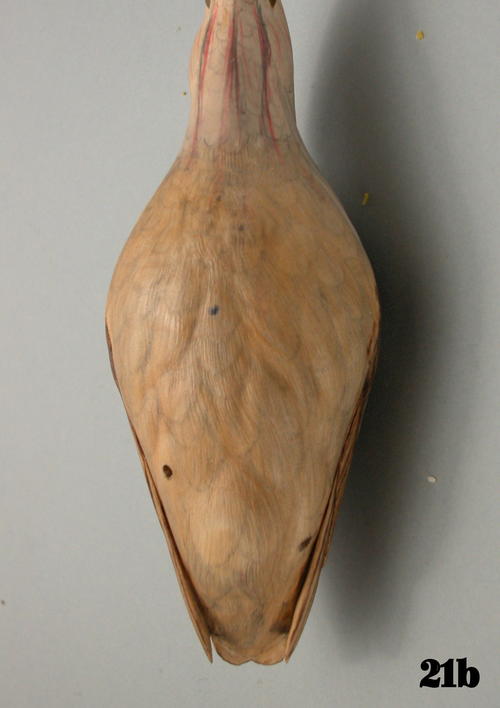
This is the final sculpture as it appears before painting. The legs and base are complete, and I’ve applied sealer.


Wildfowl Carving Exclusive Pattern
Life-size least bittern