
The Littlest Falcon
The American kestrel is a tiny killing machine--but it is fun to carve.

One possible base for this bird is tupelo textured to represent a piece of old barn oak.
The American kestrel also goes by the name of sparrow hawk. It’s a beautiful bird and our smallest falcon. Before this project, I had sculpted only one other kestrel and that was when I first started carving. It was a smoothie and I did it before I knew anything about major detailing. But I’ve always been drawn to this bird for its compact size, intricate color patterns, and its overall popularity with birders. My goal for this carving was to create a simple pose and concentrate on anatomy and the personality unique to the kestrel. I carve using hand tools and use power tools only for some detailing, but power carvers can use these steps as well. I hope this article will be helpful for any carver interested in carving this beautiful little falcon.
The painting stages of this project can be found in "The Littlest Falcon, Part Two: Painting The American Kestrel" from the Spring 2014 issue.
Jeff Rechin is recognized as an elite sculptor whose artistry and technique has garnered him two Best in World titles at the prestigious Ward World Championship.
This article is from the Winter 2014 issue. For more information on our issues, check out our issues page.
The Littlest Falcon
For a closer look at each step, please click on the images to enlarge.
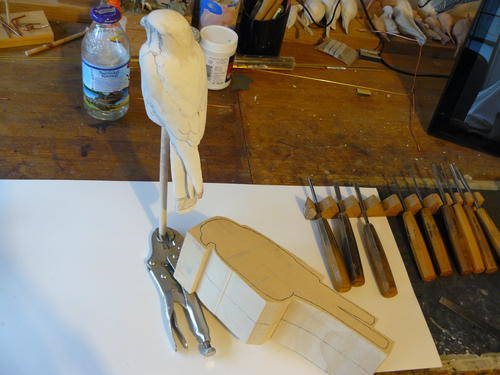
Wildfowl Carving Demonstration
Follow along step by step with Jeff Rechin.
-
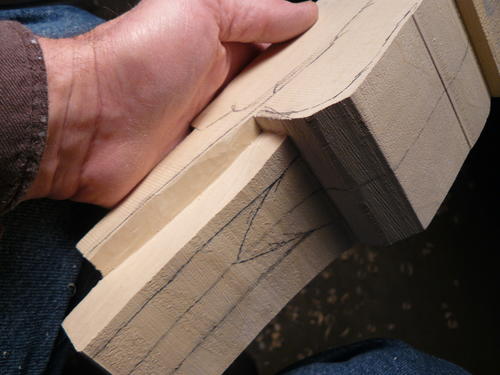
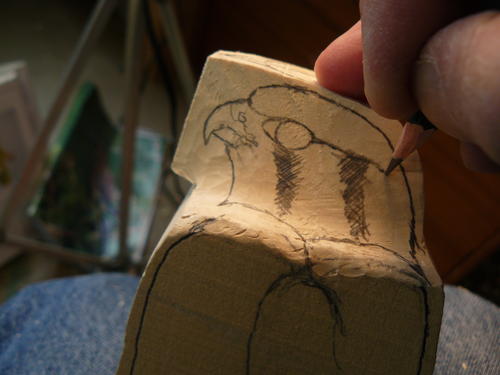
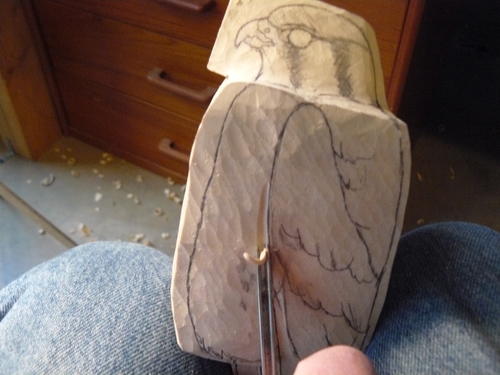
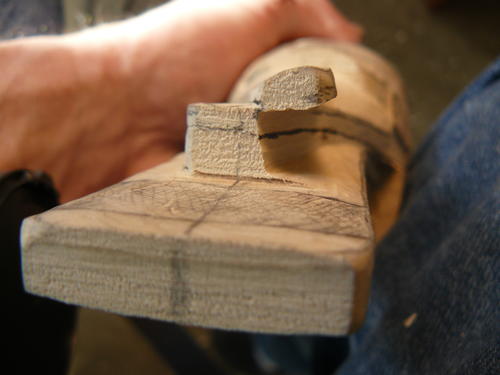
Most all birds I sculpt begin as a clay model of one clay type or another, from which I generate the pattern for the blank. The first line I add is a center line, which I feel is one of the most important lines used in the sculpting process. As I carve I keep the body proportions consistent on both sides of this line.
-
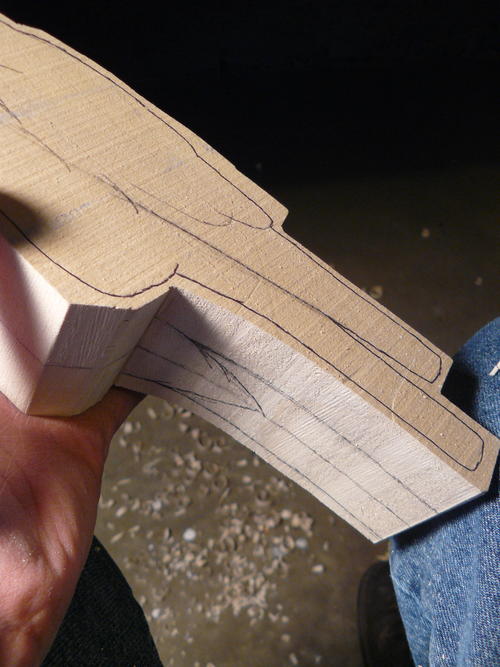
I started by drawing the layout of the tail and under-tail covert feathers group. I will begin to remove wood inward from each side to these layout lines to define these groups.
-
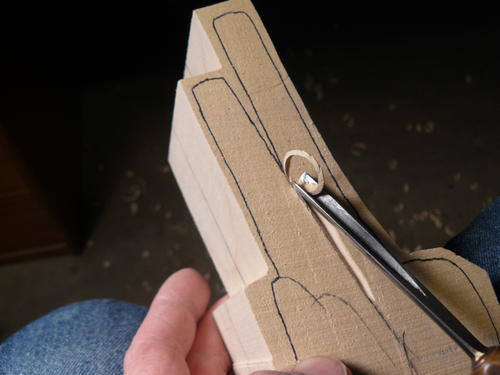
Using a parting tool I begin separating the tail from the primary feather group and moving toward the tail layout shown in the previous photo.
-
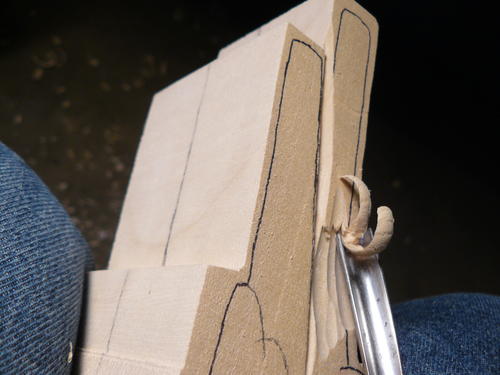
I switch to a larger 8 mm #9 gouge and begin removing wood, working toward the tail layout lines from step 3.
-
Here you can see how I’ve removed the wood on one side of the tail layout lines. I will continue moving closer to these lines, leaving a small margin so I can adjust the width later if I need to, before committing to the exact lines.
-
This photo shows how I’ve moved in both sides basically to my line layout. You can see how much extra I left in case I decide to alter my lines slightly.
-
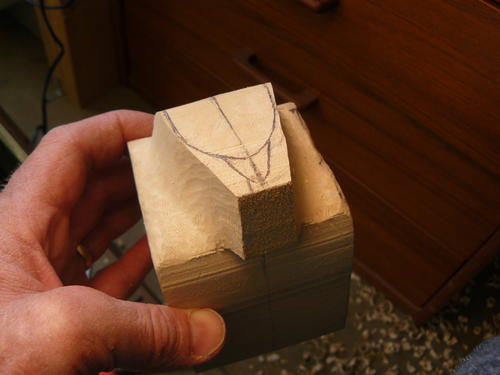
I tend to work a bird in different areas rather than move from bottom to top or top to bottom. For me it’s a visual thing, working the bird as a whole. For example, I don’t want to work up from the tail only to later discover that the head does not work with the rest of the body. With the kestrel I’ve moved from the tail to the head next, drawing the top of breast and shoulder lines. I then move in from both sides of the lines I’ve drawn on top of head, mostly using a 7 mm #5 gouge.
-
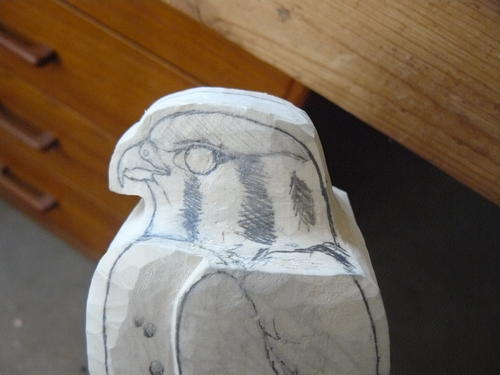
By this point, I’ve moved in the sides of the head to lines drawn on the top. I have also angled in toward the bill to from a rough triangle shape as seen from top.
-
You must continually redraw the head/face as you pull the sides in to line layout drawn on top of the head. Again, leaving a slight margin of wood at the bill allows adjustment later. The head and face are crucial to create the personality of this particular species of falcon.
-
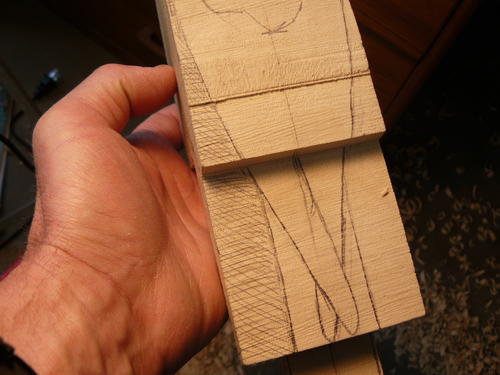
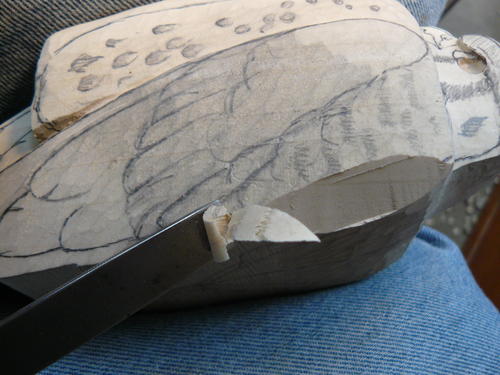
This photo shows the layout of the sides as seen from the back of the bird. The crosshatching indicates wood to be removed along the wings and tail. I’ll carve from the side first.
-
Following the layout from the previous photo of the primary feathers and tail, I begin removing wood inward toward these lines. I do this on both sides of the bird. I will carve the crosshatched sections down to the top surface of the tail and then use a parting tool to begin and then a gouge to carve to the tail surface.
-
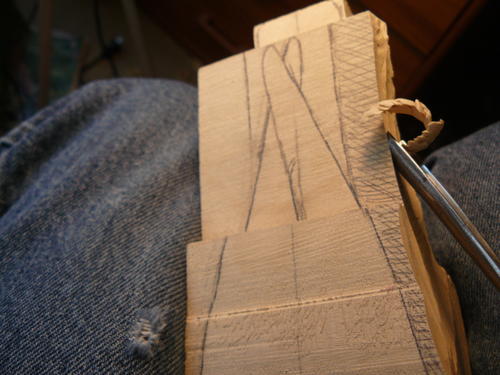
Here you can see how I’ve carved the primary feather groups down to the tail’s top surface, angling and separating the two groups later. Using a parting tool I outlined the crossed primaries and then carved down toward the tail surface until I was down to the tail lines shown in the previous step.
-
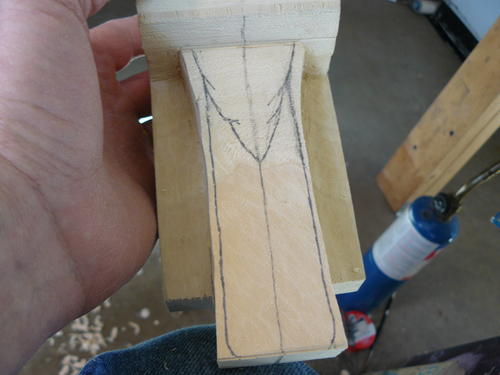
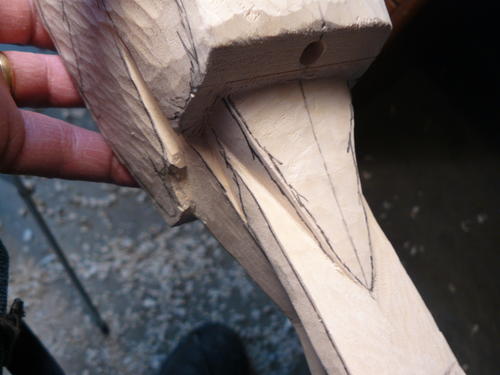
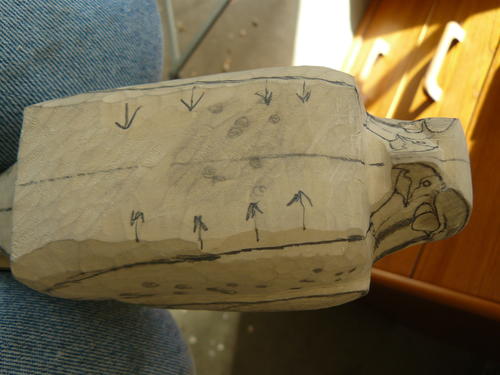
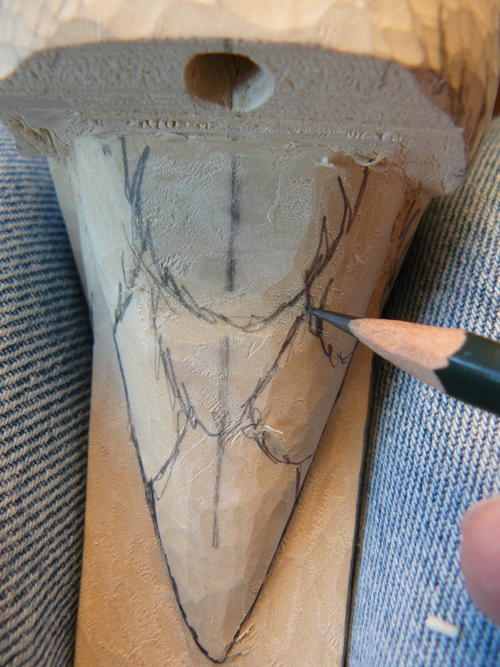
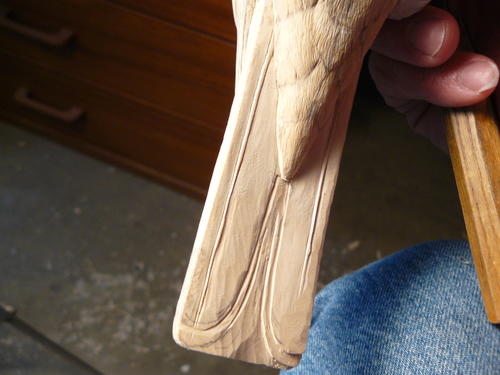
The top portion of the under-tail feather group is basically the width of the tail, which gradually comes to more of a point on its lower end. Remove the wood around this group to the tail line seen on side profile, leaving the tail about ¼ of an inch thick.
-
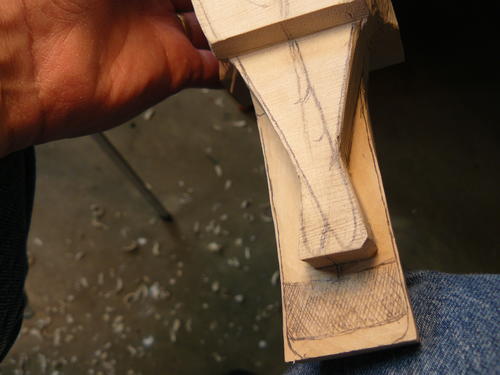
This photo shows how I carve the under-tail covert group. I carve downward with a parting tool, lowering the wood to the tail surface around the covert group.
-
This shows the under-tail coverts carved out to separate them from the tail. I rounded the hard edges to create the soft rounded groups that lay on top of the tail’s underside.
-
Using a parting tool in a step down fashion, I begin to pull in the bird’s belly. I leave the wings exposed—they will be the body’s widest point when viewed from the front and back. I separate them from the belly and flanks.
-
I’ve carved the head down much closer to the final dimensions of the head and bill layout, committing when I think the eyes and bill placement look correct. Every raptor species possesses its own individual look, and that’s what I’m trying to capture.
-
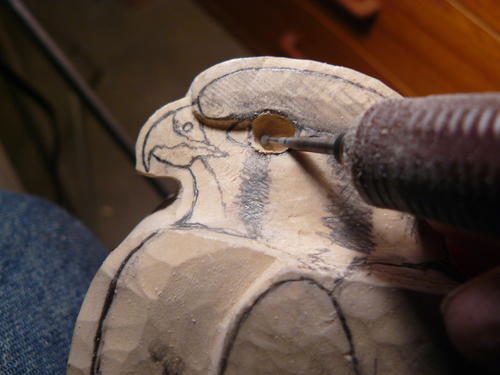
Using a small bur bit I create the eye holes, working from the center of the eye outward to the drawn dimension. Eye placement is very important in creating the personality of a specific species. Use extra care here.
-
This is the bird in the basic block out form. The next step will be “turning” or rounding the hard angle edges, which means moving away from the basic geometric shapes I use to guide me through the early stages of this form of sculpting. Once I’ve carved the bird to all the lines of its profile, I can begin the rounding process.
-
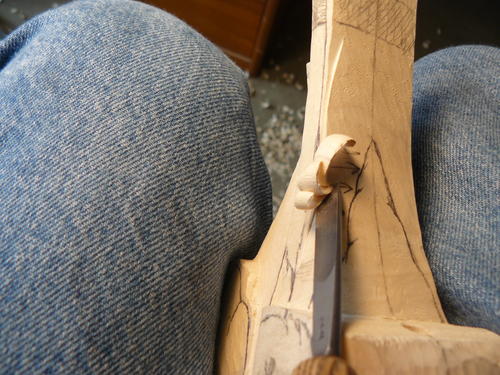
I take an X-acto knife and begin to work the hard edges to turn the form in the belly area. Eventually, I will work towards the center line I drew on the blank at the beginning of the process.
-
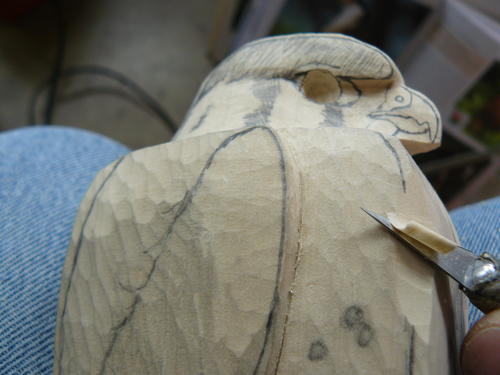
Here I work on the hard edge of the bird’s back. The center line is always present, as it is the point in the rounding where both sides will eventually meet. This line represents the highest point of the bird, and you have to keep things symmetrical on both sides if you want a correct anatomical profile. Keep rounding until the sides meet at the center line.
-
Now, it’s on to the belly. As on the back, round the edges until the sides meet at the center line. Also, I’ve angled the head further in toward the bill’s center line.
-
I outline the back cape feather group (back feathers) with a small gouge. I lower the wing surface in step fashion to have the back feathers sit on top of the wings.
-
In this photo, you can see how the back feather lay on top of the wings. When the wings are folded in at rest, they lay under the back feather group (cape).
-
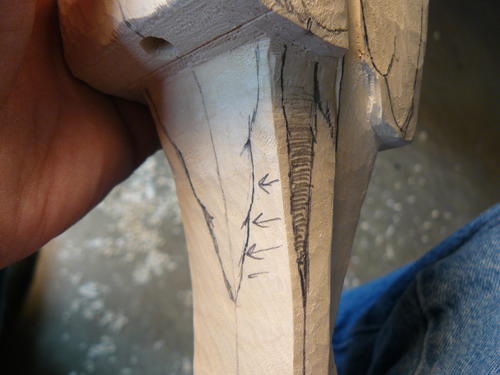
These are the primary feather groups. They are crossed, and I will undercut the lower primary set so it will sit slightly above the tail surface. The line you can see on the lower set shows where I will undercut to create the space between this primary set and tail surface. I will remove this wood with a parting tool, a 4 mm #11 gouge, and an X-acto knife to create a smooth surface on the tail.
-
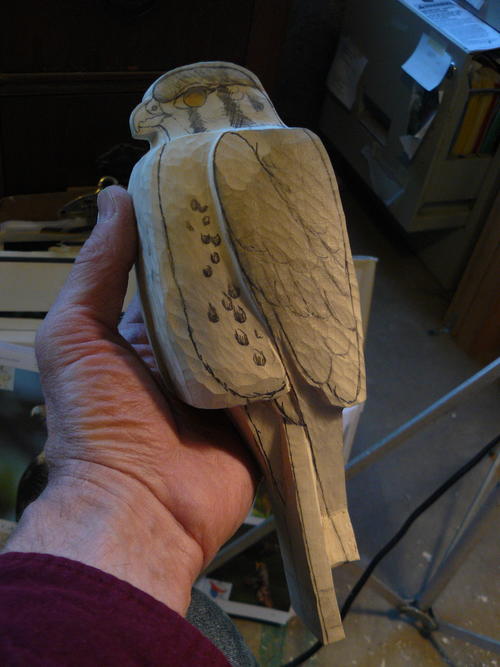
Here you can see the rounded back, wings, and primary feather group. I will work on drawing in the secondary feathers until I’m perfectly satisfied with the layout. I will then do the relief work, starting with a parting tool and then stepping down each feather with a straight chisel and slightly rounding the leading edge of each individual feather.
-
This photo shows relief work I’ve done on the secondary, covert, and back feathers, as they overlap the wings. Feathers are carved in a fashion consistent in all birds, similar to the shingles on a roof.
-
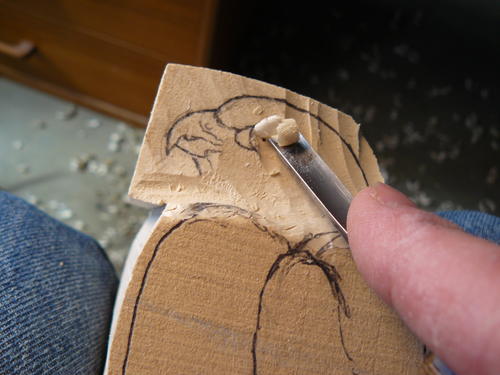
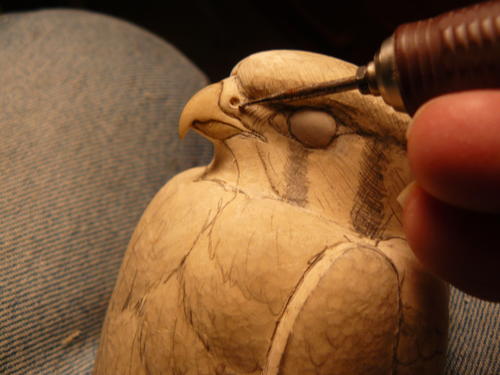
I carve the cere, containing the nostril, in step down fashion to the surface of the bill. I used a small bur bit to form the nostril and also to separate the upper and lower mandibles. The lower mandible fits into the upper when closed. Also, I fill the eye holes with QuikWood and form the eyes with a wooden clay tool.
-
The facial work is mostly done. I’m using a small bur to further define the nostril. I apply super glue to the bill to harden the surface and then sand it with 600-grit sand paper.
-
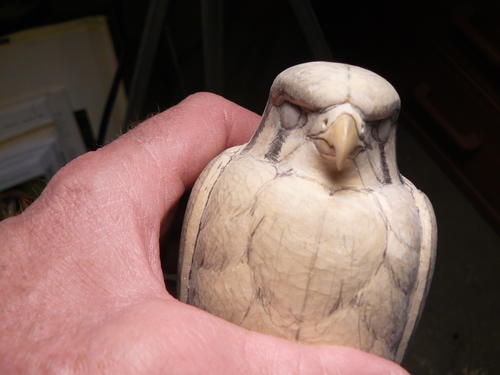
Here’s a front view of the kestrel’s head and face. Notice how I’ve drawn in contours on the breast and belly and done some light relief work done with a small stone, as you’ll see in following photos.
-
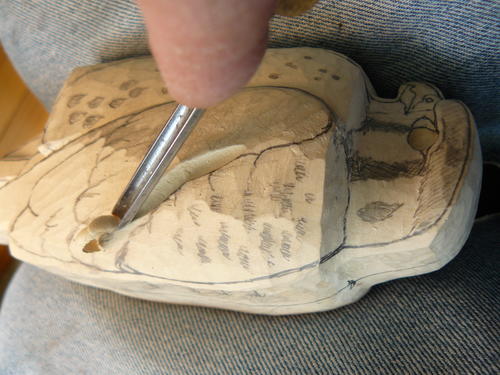
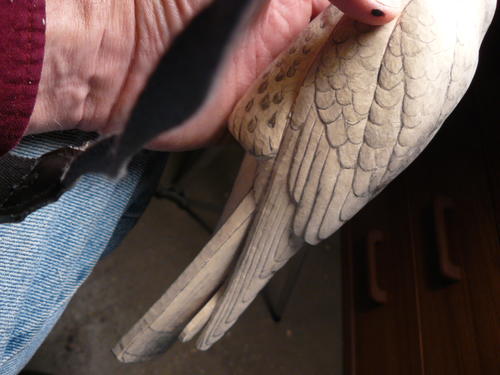
This is the under-tail covert feather group with smaller groups penciled in within it. Relief work gives definition to these smaller groups and the overall under-tail covert group.
-
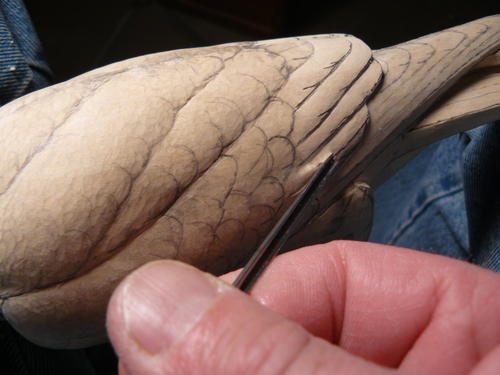
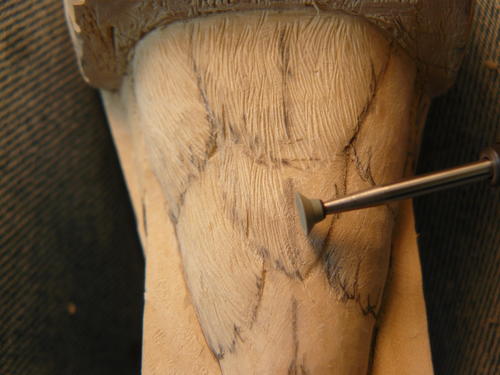
I’m texturing the smaller groups within the under-tail feathers with a small round ceramic dental stone. These feathers are light, loose feathers, so I try not to be too tight with the texturing here.
-
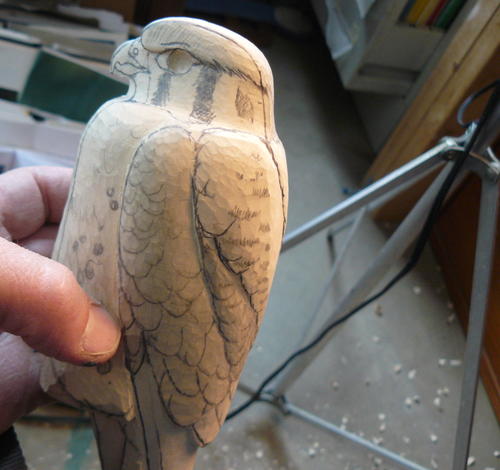
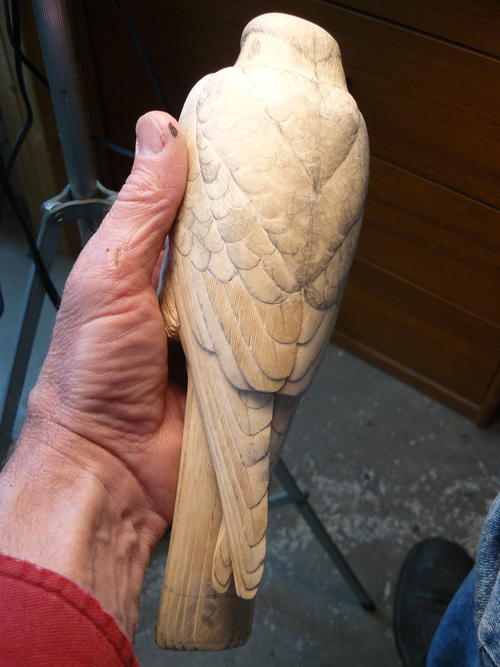
This back view of the bird shows it ready to be burned and stoned. I use a wood burner for primary, secondary, and tail feathers. I use a stone, as seen in the previous step, for texturing all other areas the bird.
-
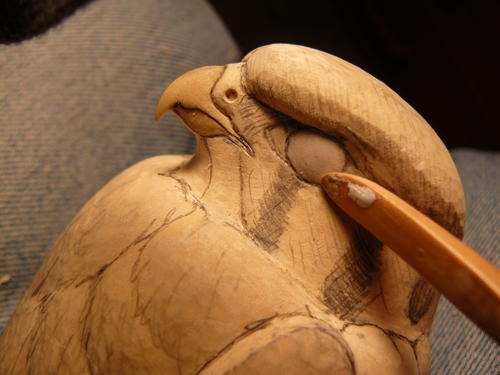
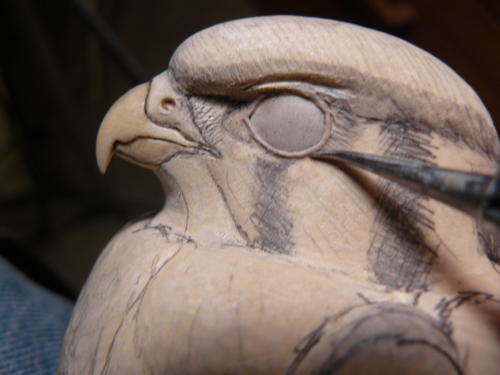
Using QuikWood and a pointed dental tool, I apply and shape the eye ring. The eye rings are thin. If you make them too heavy, it will detract from the eyes’ overall look.
-
I’m stoning the belly feathers. These feathers are loose and somewhat splayed out when textured, similar to the feather texturing of the under-tail covert feathers.
-
I’ve worked the underside of the tail to separate and rough in individual feathers. I will refine it further and texture it with the wood burner.
-
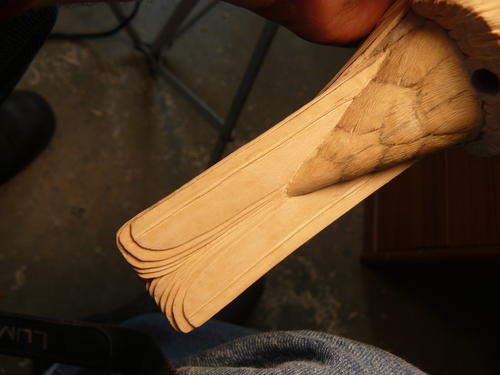
Here are the finished and refined tail feathers, ready for burning.
-
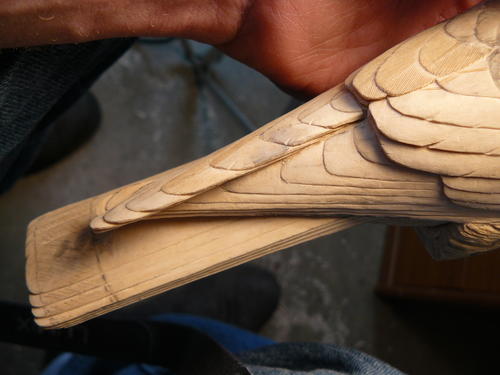
This is the finished tail and the lower third of the kestrel. The secondary, primary, and tail feathers are ready to be textured. I will burn all these areas.
-
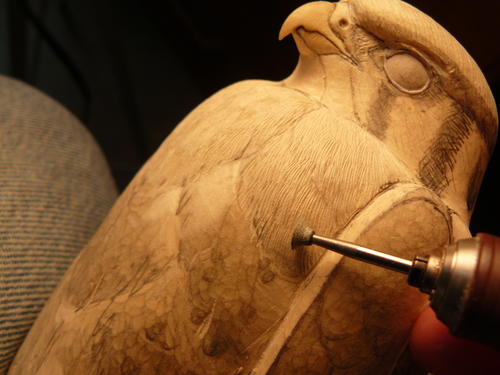
I use a small stone to texture the areas above the secondaries to the head. As I texture, I use a toothbrush to clean away the dust the grinding process produces.
-
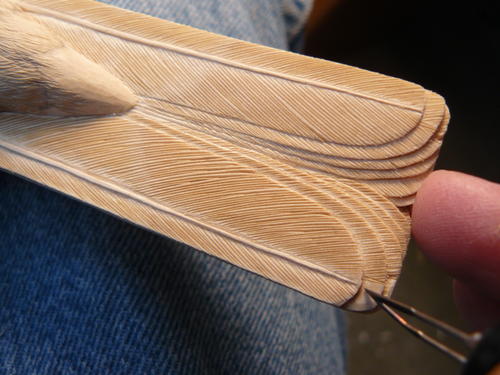
I texture the feathers after forming veins on the outer tail feathers. Here you can see a good example of my burning on the underside tail feathers. After texturing, whether with a burner or a stone, I will seal the bird with lacquer in a 50/50 lacquer/thinner mix, as opposed to straight lacquer, which will penetrate and seal.
-
The textured and sealed kestrel sits on dowel rod. It is ready for painting. Later you can cut the dowel to an inch or two and use it to mount the bird on a base. I will demonstrate how I painted the kestrel in part two.


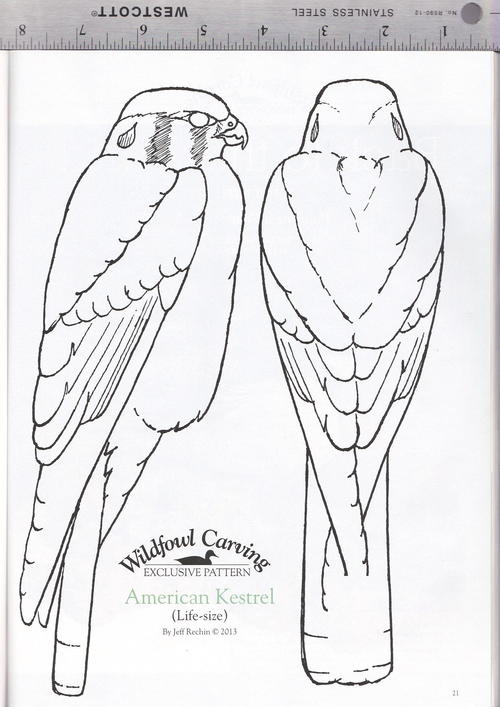
Wildfowl Carving Exclusive Pattern
Life-size American kestrel pattern
Read NextCarving the Black-billed Magpie

