
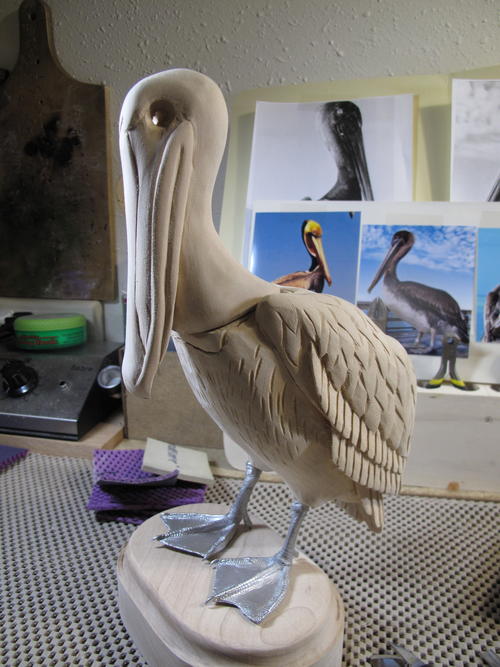
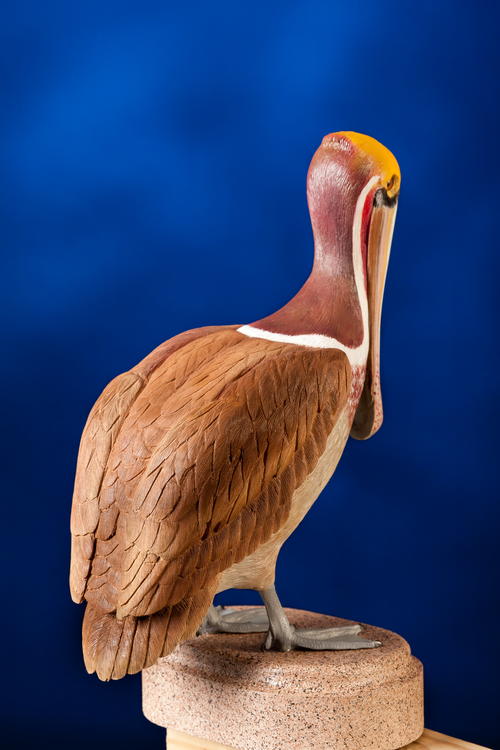
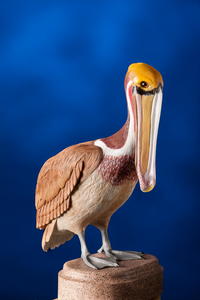
West Coast Brown Pelican Carving
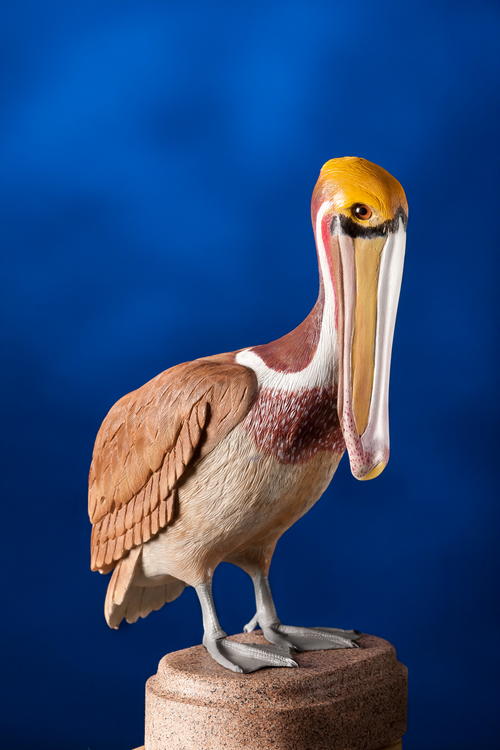
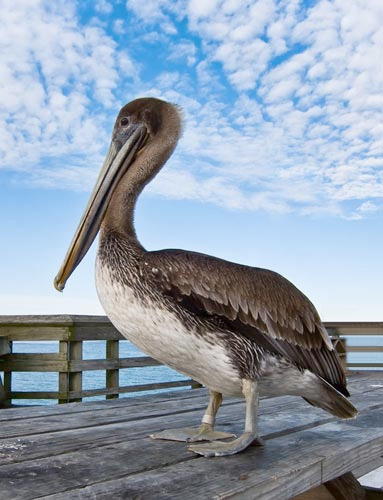
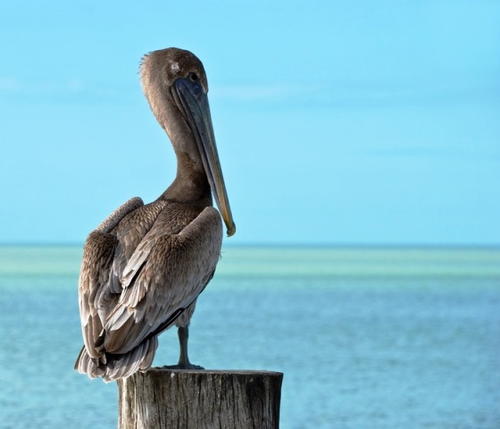
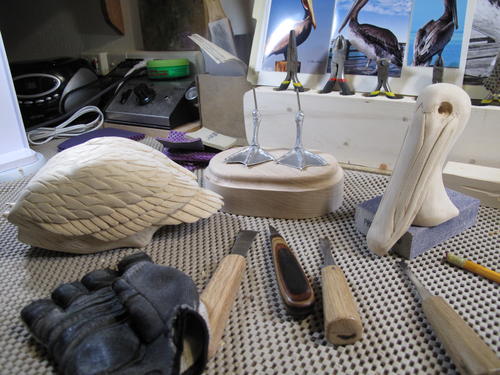
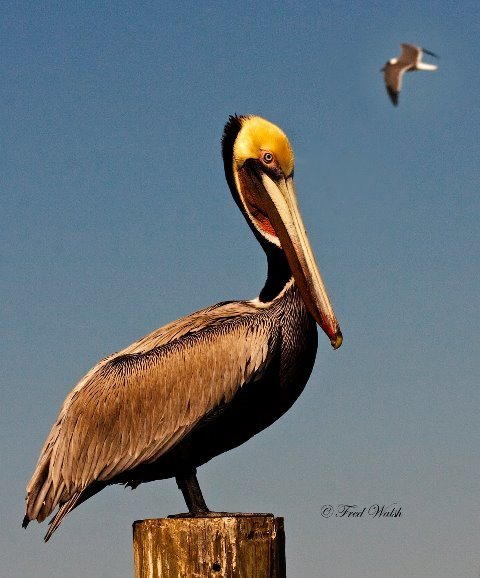
I have always enjoyed woodworking and wildlife. I have carved many other types of birds; however, this time I decided to try my hand at carving a pelican. I referenced a copy of National Geographic Field Guide to the Birds of North America and settled on the West Coast Brown Pelican in breeding colors. The field guide was full of information about size, feather and eye color, and range. My next step was to surf the web to find additional photos that showed side/back profiles, contours, and feather details. After gathering the images, I was able to begin developing my pattern. Basswood was selected for the project because it is tight grained, resists splitting, and carves easily. The head and body are carved separately and then joined together. This enabled me to conserve wood and the pieces were easier to handle during carving. I used both power and hand carving tools and sandpaper to round the wood, develop contours, and relieve the major feather groups. The head and body were textured with a Detail Master wood burner and a Gesswein high-speed grinder. The bird was finished with a Gesso base and airbrushed with acrylic paint. The paint was applied with a Testors Aztek 470 airbrush, with a fine nozzle, to finish the bird. I find it was easy to use, light in weight, and sensitive to the touch. Final touch-up was done by paintbrush. A clear satin Krylon finish was used to protect the paint and add a little shine.
Materials List
- Basswood
- Block of maple remnant approximately 1-3/4” thick
- 2 – ¼” dowels
- Sandpaper (180, 120 and finer grits)
- 1600 grit micron sandpaper
- Apoxie Sculpt
- Taxidermy painted eyes
- Cast webbed birds' feet
- Epoxy glue
- Gesso acrylic primer
- Testors Acrylic Paint: Burnt Umber Acryl, Chrome Yellow Acryl, Yellow Zinc Chromate Acryl, Acrylic Wash Barn Red, Clear Red Acryl, and Aluminum Acryl
- Testors Aztek Airbrushable Acrylic Paint: Opaque Brown, Transparent Mocha, and White
- Testors CreateFX Enamel Sand Texture Spray – Sand Arena
- Krylon Spray – Clear Satin
- Blue masking tape
- Band saw
- Carving tools: knives and chisels
- Detail Master woodburner
- Leather strop
- Small brass wire brush
- Gesswein high speed grinder with a diamond bit (32nd Shaft)
- Testors Aztek Airbrush # A470
- Aztek .30mm fine nozzle
- Router with ¼” ogee bit
- Blick master sable brushes (Kolinsky round) #4 and #2
Step-by-step Instructions
For a closer look at each step, click on the image to enlarge.
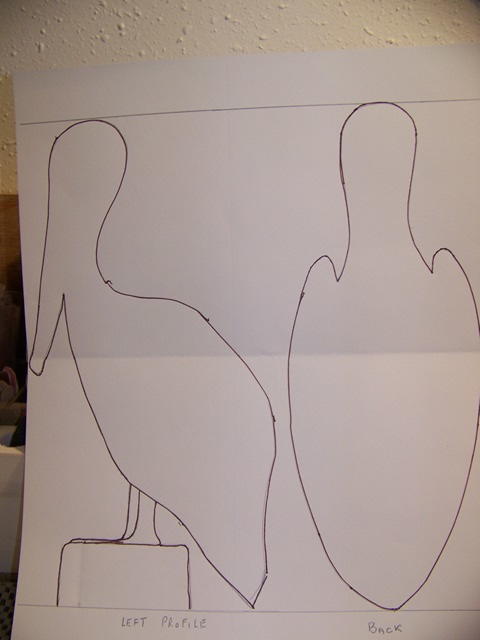
Developing the Pattern, Wood, and Cutouts
-
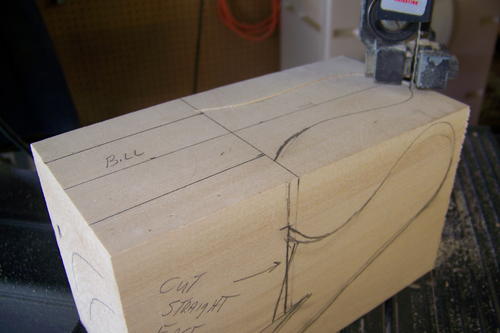
Select images showing side profiles and back images of the specimen that you would like to carve. Enlarge them to the size of your carving and transfer the images to paper. For this project, the bird is about 1/8 of life size.
-
Transfer the side and back paper images onto blocks of wood using carbon paper.
-
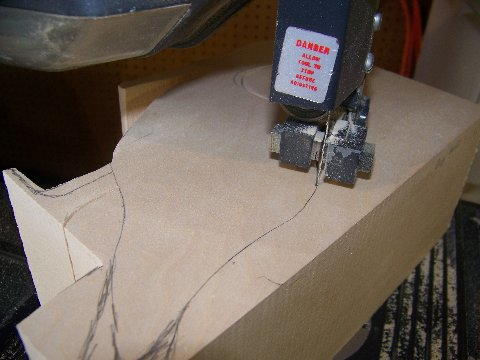
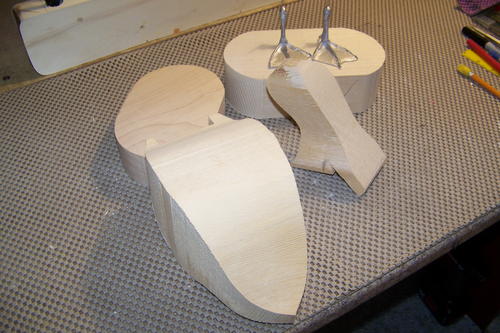
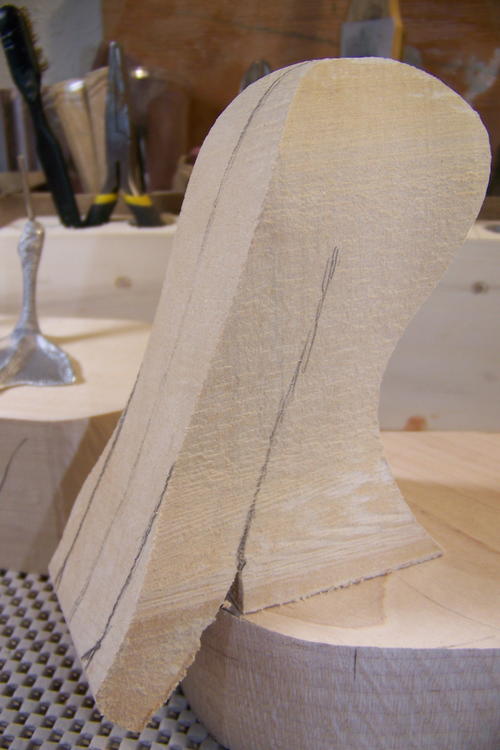
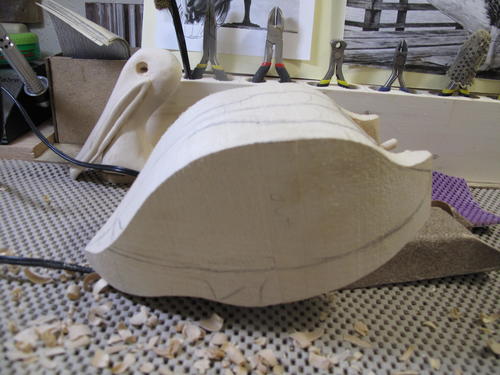
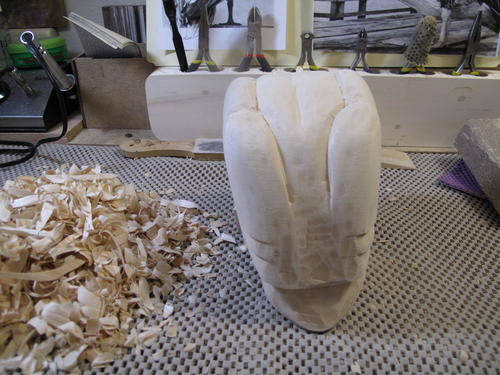
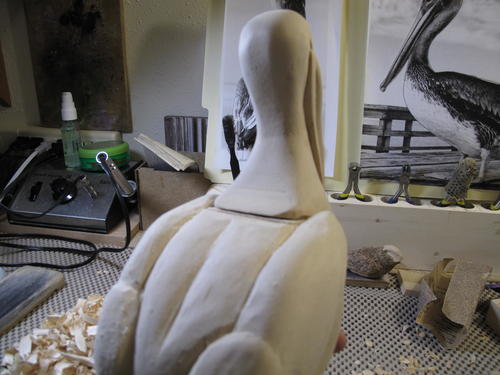
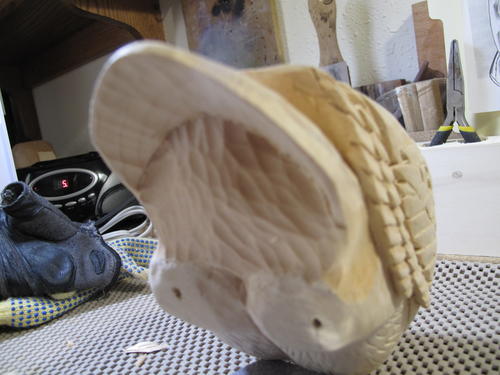
Cut the images out of the wood with a band saw. The head and body are two separate pieces. The bird’s head is being cut out in the images below.
Let’s Start with the Head
-
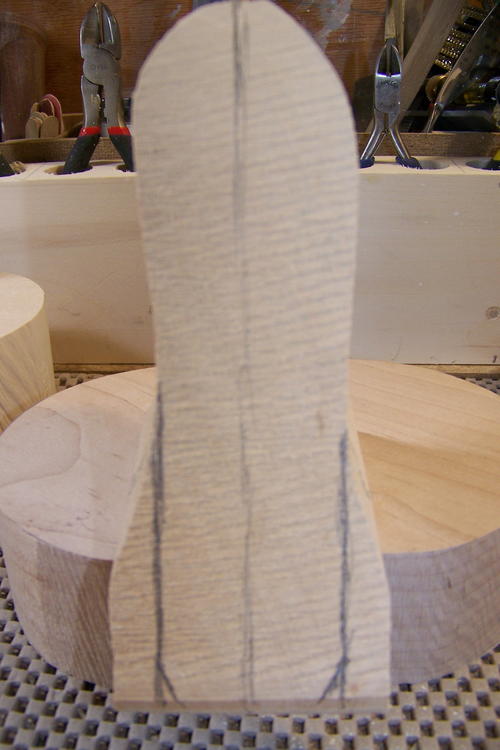
Using a pencil, draw the desired shape of the head onto the “head piece” of wood.
-
Begin rounding over the sharp edges of the wood using a knife, chisel, and sandpaper.
-
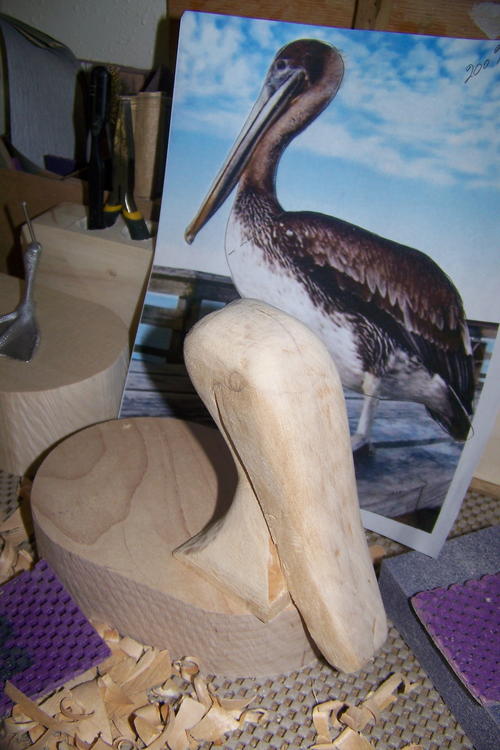
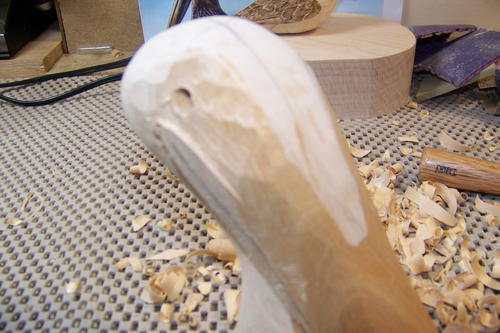
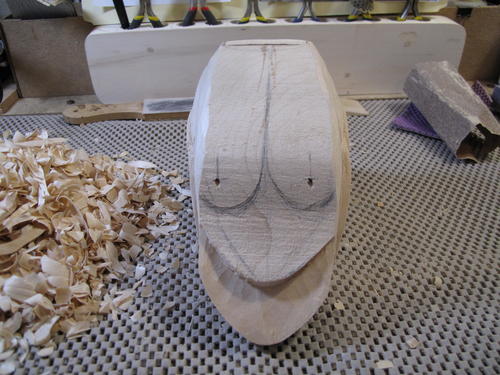
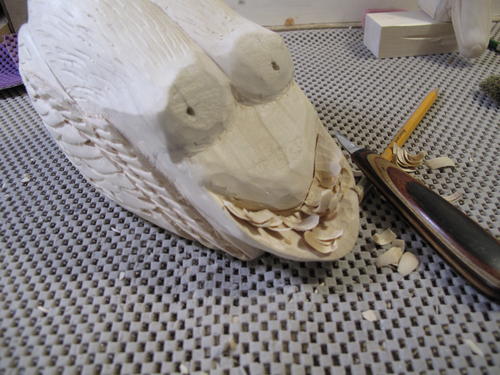
With the pictures as a reference, begin to develop the contours of the mandible and gular.
-
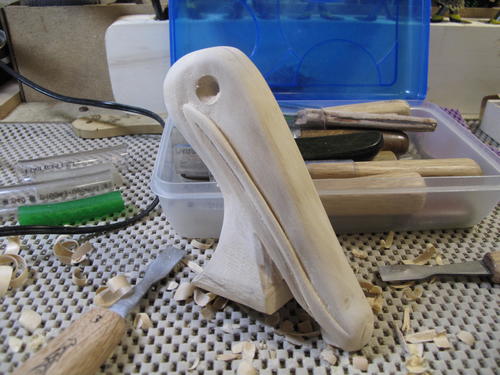
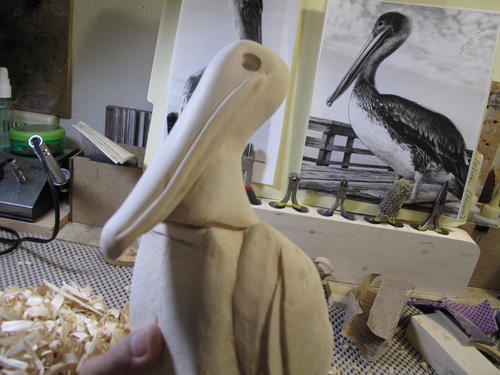
Locate and drill eyeholes. The eyes will be inserted later on in the process.
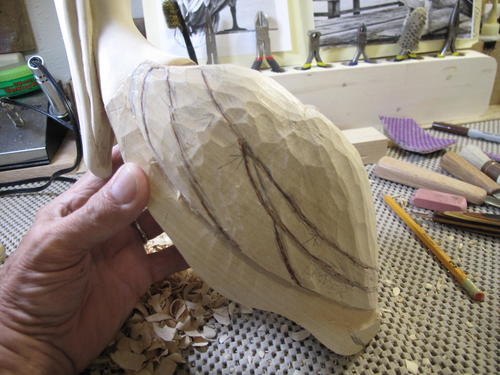
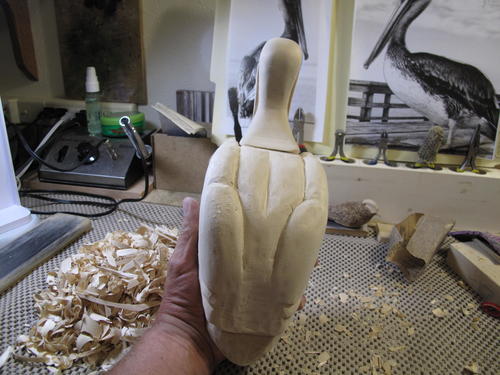
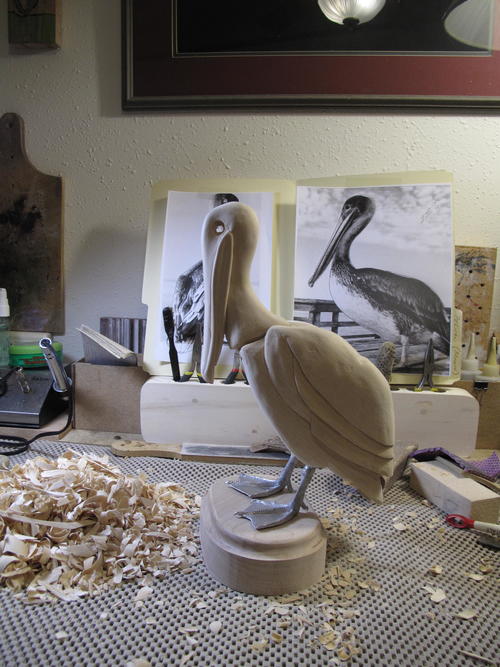
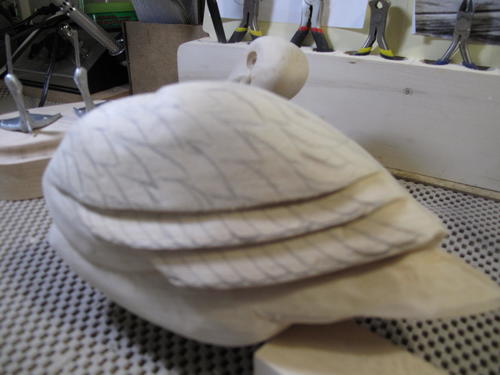
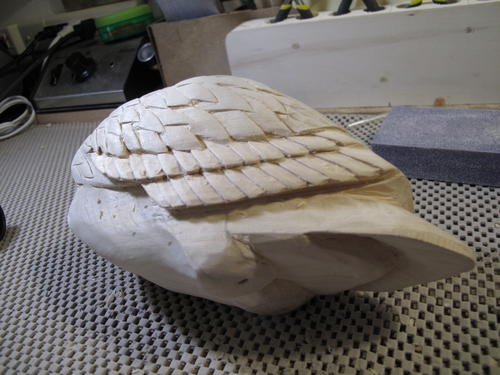
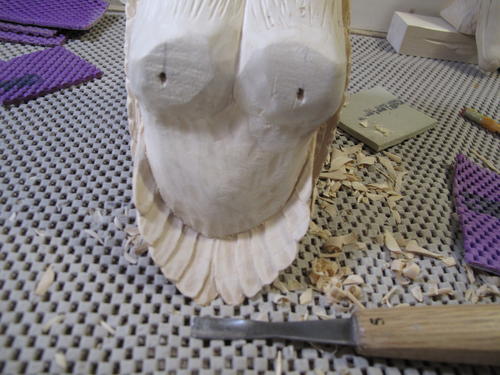
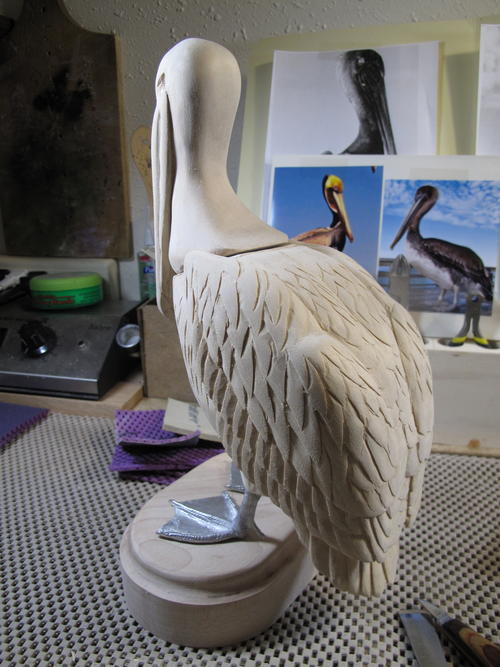
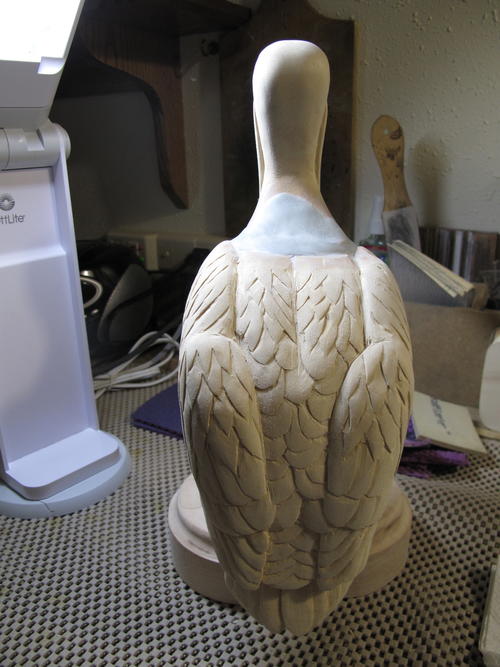
Carving the Feather Groups on the Body
-
As with the head, round over the sharp edges and contours.
-
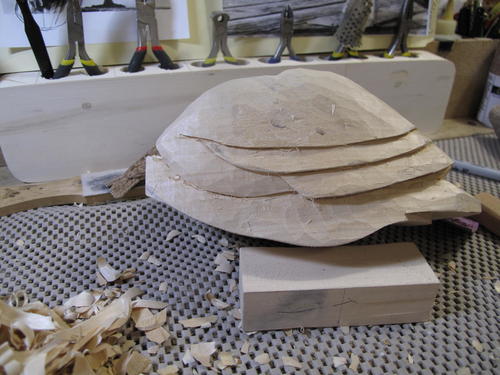
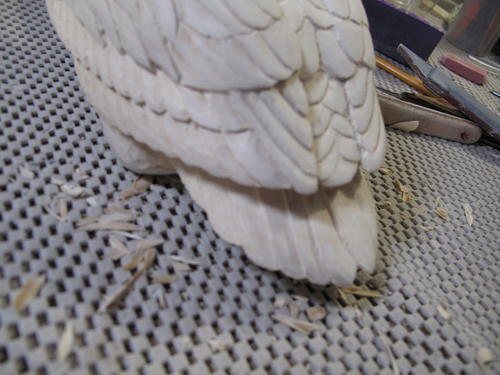
Locate and develop the major feather groups. These contain the cape, coverts, scapulars, secondaries, tertials, primaries and the tail.
-
Draw these with a pencil and use a carving knife to relieve each one. Round the sharp edges with sandpaper.
-
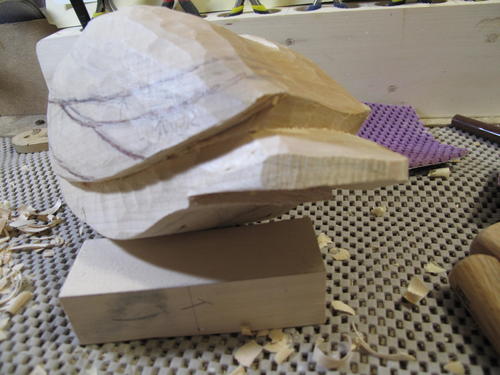
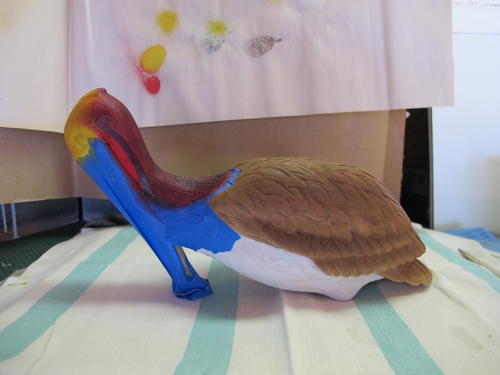
Periodically assemble the head to the body, stick the feet in, and set it on the base to get a feel for the finished look (but do not glue together).
-
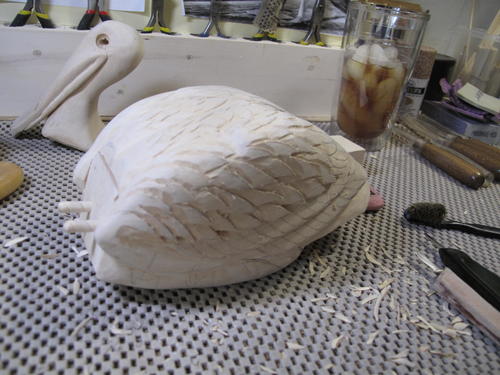
After major groups are identified and relieved, draw feather detail and begin carving individual feathers.

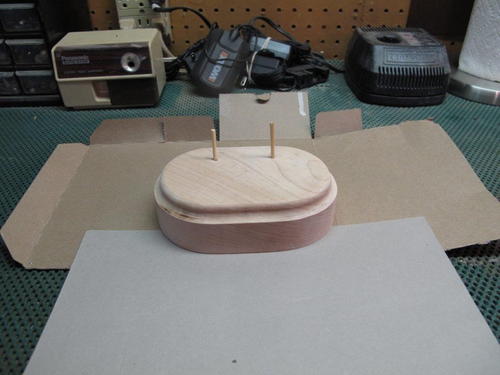
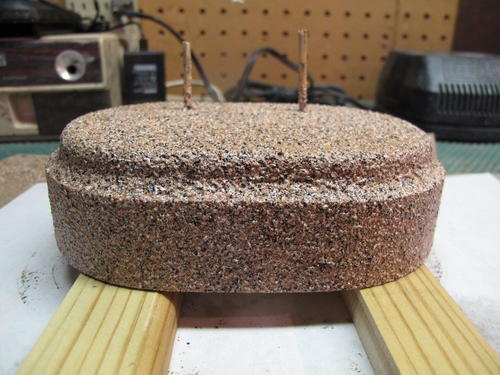
Developing the Stand
-
For the stand, you will need to choose a piece of wood with some weight to it. I chose a 1-3/4” thick block of maple, from my scrap pile.
-
Cut the block into an oval shape and sand the edges.
-
Finish the edge with a ¼” ogee bit.
-
Drill holes for foot placement and then block them with dowels so they do not get filled with the textured paint.
-
Spray with several coats of Testors CreateFX “Sand Arena” paint.
Pelican Assembly
-
Drill two ¼” dowels into the head and body to give the joint added strength. Use 2-part 5-minute apoxie to secure the two pieces together. During the carving process, the joints will require more carving and filler so they will not be seen.
-
The legs will be finished and permanently attached later on in the process.
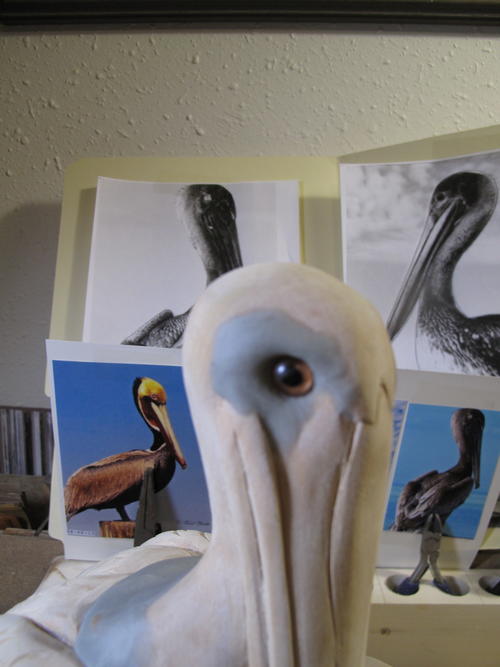
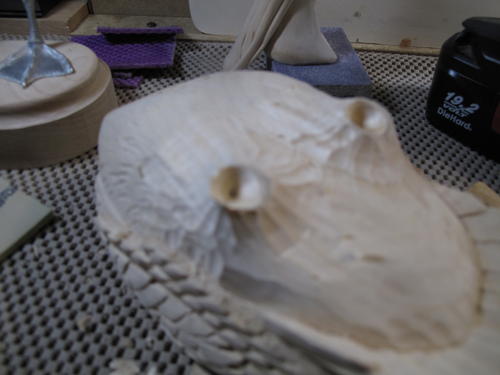
Setting the Eyes
-
Adjust the eyeholes so that they are somewhat larger than the eyes. That way you can get them aligned correctly.
-
Set the Taxidermy painted eyes, into the eyeholes, with Apoxie Sculpt. This is an important step, as if one eye is higher or more forward than the other, it will not look right.
-
Tip: Apoxie Sculpt comes in two parts. Wet your hands while working with it to keep it from sticking to your fingers. When mixed allows for approximately three hours of working time and will not shrink after curing. It can be carved, sanded, and textured and is great for covering any carving mistakes.
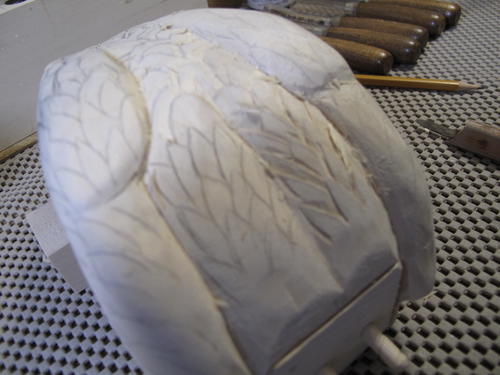
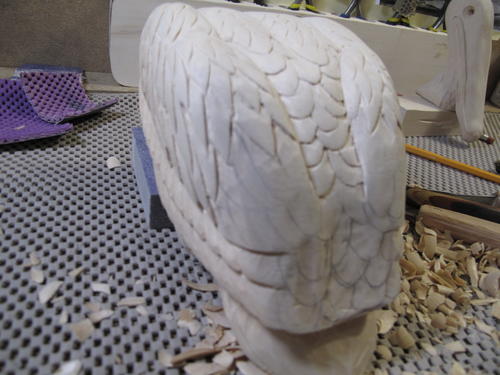
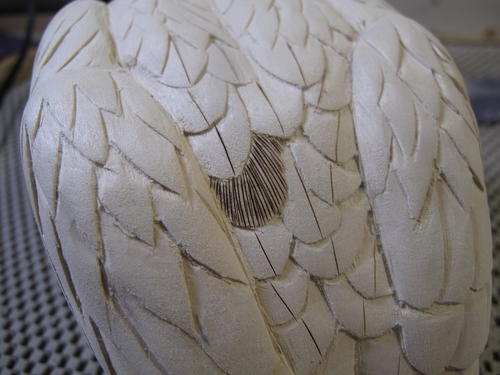
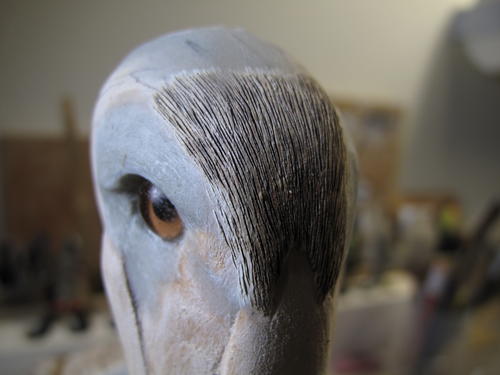
Texturing and Woodburning
-
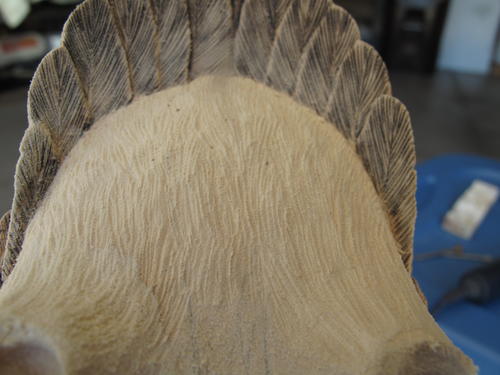
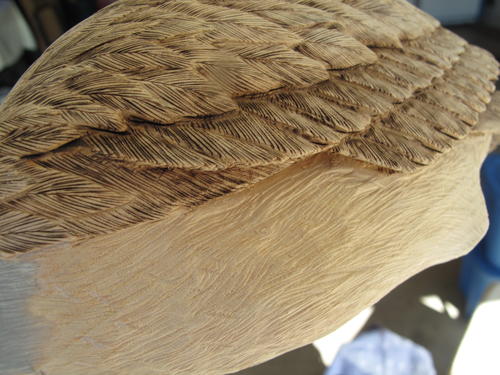
Using a woodburning tool, burn a centerline in the feather you are developing. This will represent the quill.
-
Using a woodburning tool, burn the vanes in the feathers on the upper part of the body. Make sure you sharpen your tip or your feather vanes will not burn evenly.
-
Hold the tip near the centerline and pull the tip to the edge. The vane should have a soft curve towards the tip.
-
Tip: The trick of wood burning is to sharpen the tip. Your feather vanes will not burn evenly when using a dull tip.
-
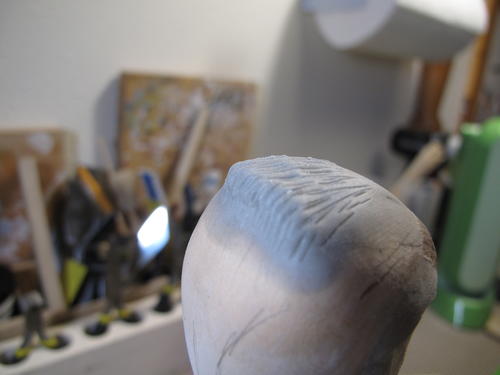
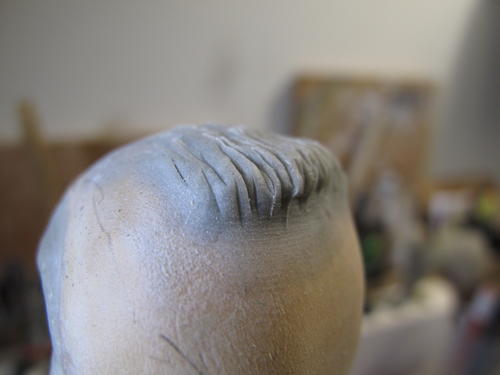
Apply Apoxie Sculpt to the head to create the fringe on the back of the birds head/neck area. Let dry.
-
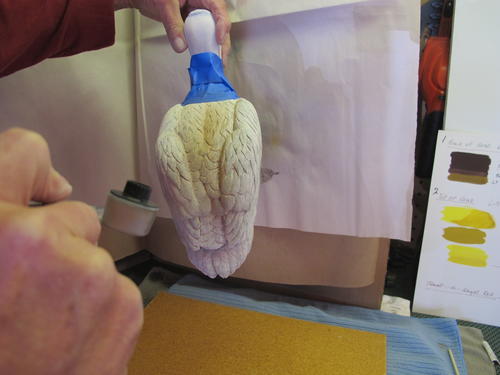
Begin texturing the head, neck, breast and lower body using a technique called stoning. Using a high-speed grinder with a diamond bit, hold the bit at a 45-degree angle to the surface and create soft curves in the shape of vanes. Cover the surface.
-
Use a small wire brush to remove the resulting sawdust and bits of wood.
-
Tip: Take your time. If this step is done right, you will achieve a look of softness when the painting is completed.
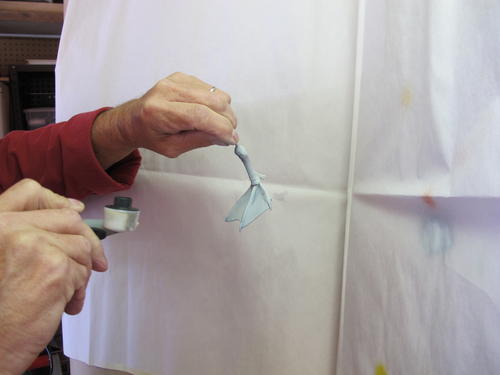
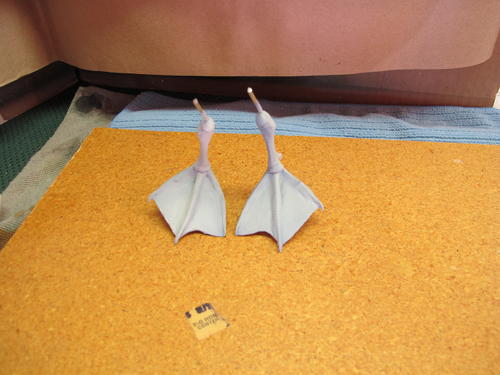
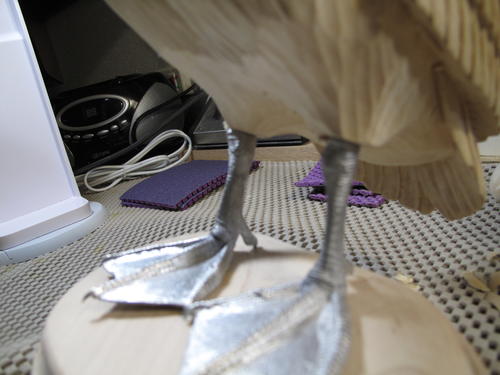
Finishing the Legs
-
Airbrush the legs with gray paint and allow to dry.
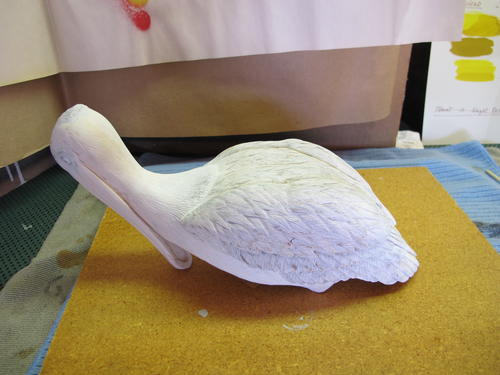
Getting the Bird Ready for Painting
-
Thin Gesso with water at a 50/50 ratio.
-
Use Testor airbrush to apply the primer.
Painting and Finishing the Pelican
-
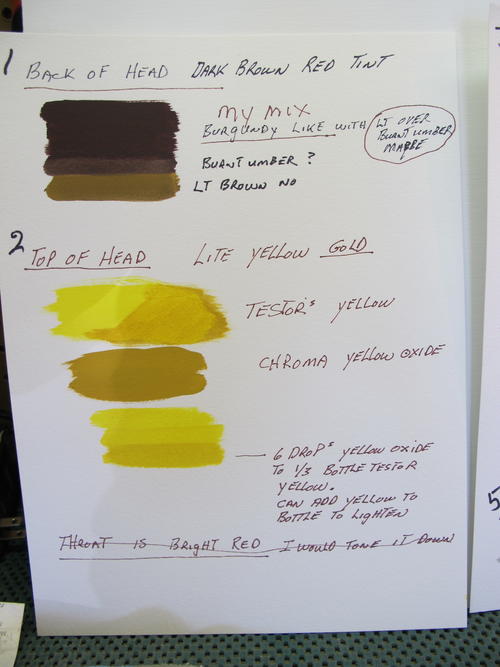
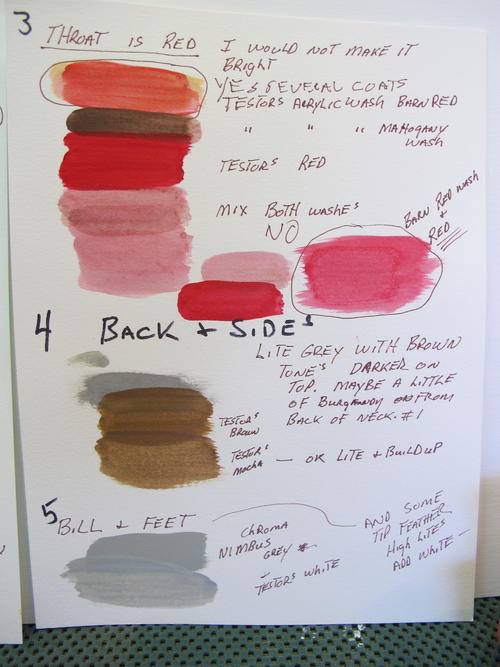
Create a color chart using the reference material from the internet, by mixing colors until you develop the appropriate color required. Paint a board or drawing pad with the white Gesso and apply the colors you develop to the board or drawing pad. Make notes of the color names and ratios used to create your colors. Ten different colors were used to develop the pelican’s markings.
-
Tip: I have found that in order to get the “nature’s shade” for wildlife painting, you need to mix colors and not use them “as is” from the tube or bottle.
-
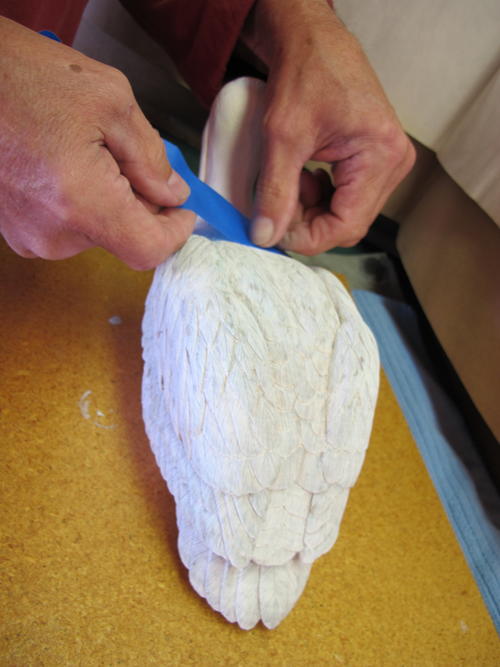
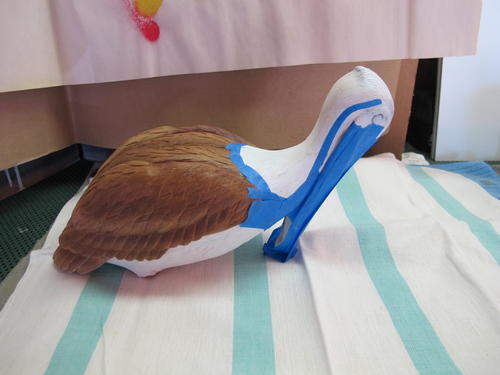
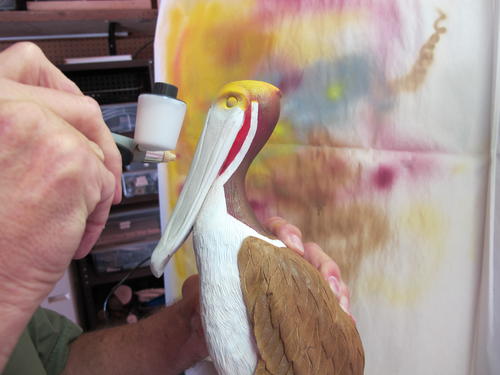
Begin by masking off the areas of the bird that you want to protect from overspray. Using the paint palette that you developed, begin to lightly airbrush paint onto the birds back feathers. Continue to apply paint, using the different colors that you developed, until you achieve the color shading and intensity that you desire. Let the paint dry and remove the tape.
-
Tip 1: I found the Aztek A470 airbrush was easy to use. The polymer resin body is light in weight and sensitive to the touch. It is also a very easy system to clean. While painting and after you completed your session, keep the airbrush clean and the needle clear. I use a three bucket method: One bucket of water mixed with cleaner, one bucket with water and one bucket filled with paper towels. Remove the paint cup from the airbrush. Dip the top of the airbrush, with nozzle attached, into the bucket with cleaner and press the trigger as you do when painting. Let the cleaner work its way through the nozzle for about 10-15 seconds. Next do the same thing in the bucket of clean water, to rinse. Finally, airbrush the remaining water solution onto the paper towels, to ensure the nozzle is clear and clean. It is important to do this as you change colors.
-
Tip 2: If the flow of paint is too thick, use flow medium or water to thin your paints. Always test spray on a piece of newsprint or other scrap paper before spraying your subject, as you can’t take the paint off once sprayed.
-
Tip 3: When painting, several light coats is better than one thick coat, as it enables you to build up the color and do shading as you go. Remember, dark eats light. If your base color is too dark, you will never get it light again.
-
Tip 4: Be sure that you let the paint dry before you attempt to remove the blue masking tape or paint will chip off!
-
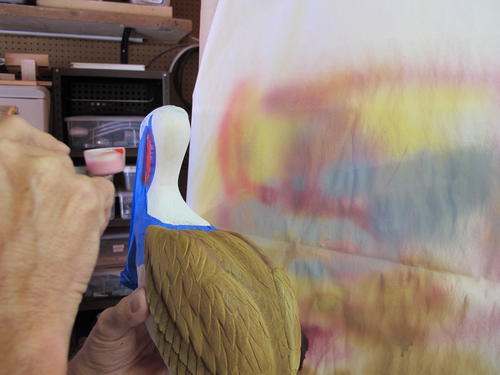
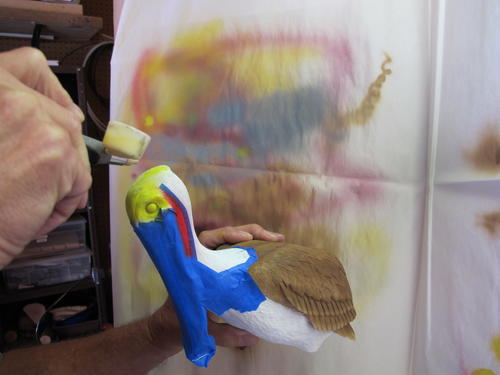
Mask off the top edge of color that was applied to the back feathers. Begin to airbrush color detail to the birds head, gular and back of neck. Once the paint has dried, remove the tape.
-
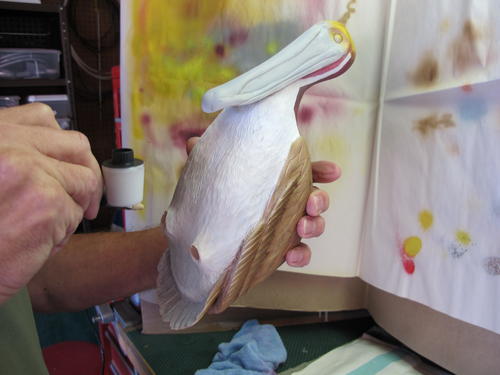
Airbrush paint onto the bird's mandible and breast.
-
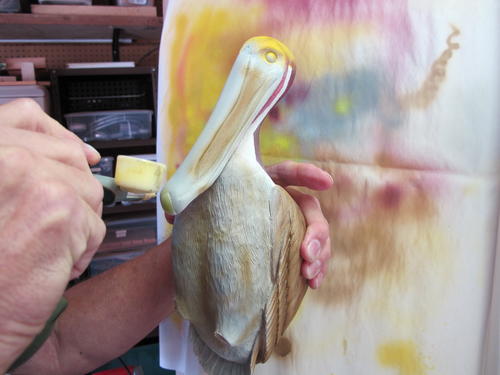
I hand painted some final detail onto the pelican, to get “the look” I was striving for. After the paint cured, I applied the Krylon clear satin spray.


Setting the Legs and Final Assembly
-
Use 2-part epoxy to set the legs into the body.
-
Once the epoxy is set use Apoxie sculpt, to finish the joint where the leg and the body meet.
-
When the mixture has set, complete the texturing.
-
Airbrush the textured Apoxie.
-
Place the pelican onto the finished stand.
Safety Tips
-
Always use safety glasses when cutting and carving wood.
-
Always wear carving gloves when carving wood.
-
Always wear a paint mask when airbrushing.
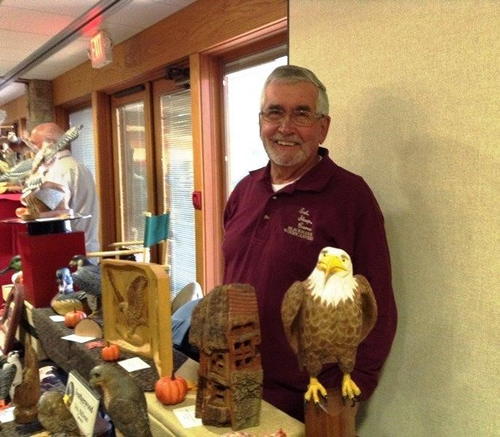
Bob Matthews
My name is Bob Matthews. I am retired and live with my wife Karen in Belvidere Illinois. We moved here in the spring of 2000 after having lived in Roselle Illinois for 24 years. I retired from United Airlines in 1998 after 40 years of service. My wife and I have two children, five grandchildren, and one great grandchild.
I have always enjoyed woodworking and wildlife. I started carving waterfowl in the fall of 1979 and I haven't stopped. My first carving was developed from a kit, it is crude, however, I still have it and it is signed and numbered. Early on I attended several seminars with master carvers to improve my skills and understanding of the craft. Today after 30 some years I am still learning and striving to improve my work. If you study one of my finished pieces, you will notice that I do not attempt to improve on Mother Nature! My goal for each carving is that it should represent the species in attitude, shape, and coloring.
Over the years I have expanded my artistic skills to include Song Birds, Birds of Prey, Relief Carvings and Cottonwood Bark Carvings. The carving of a piece of Cottonwood Bark is just fun and that there is little rhyme or reason to it. I call them whimsical. As for my Relief carving, I am just getting started and use birds for subject matter.
To see additional examples of my work, visit my website at www.featherwoodcarvings.com.
Share This Article
YOUR RECENTLY VIEWED ARTICLES
Free tutorials, expert tips, exclusive partner offers, and more straight to your inbox!
Thanks for your comment. Don't forget to share!
foxyed
![]()
![]()
![]()
![]()
![]()
Oct 07, 2019
Yes I have carved this bird in Miniature of course. It was fun and a challenge
Keithana Bradleigh
![]()
![]()
![]()
![]()
![]()
Apr 17, 2017
Love all the photos showing the process. Thanks!
Report Inappropriate Comment
Are you sure you would like to report this comment? It will be flagged for our moderators to take action.
Thank you for taking the time to improve the content on our site.
