The Littlest Falcon, Part Two: Painting The American Kestrel
In part two of this demonstration, Jeff Rechin explains how to paint the American kestrel.
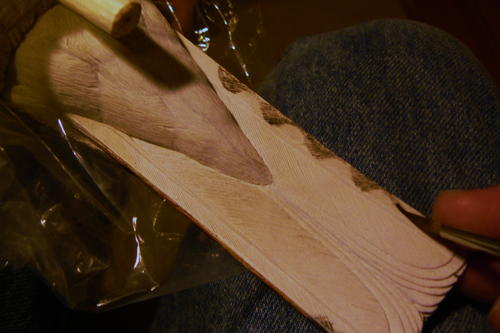
Jeff began this project and demonstrated the step by step carving process in "The Littlest Falcon" from the Winter 2014 issue.
The male American kestrel has a unique color scheme, one unlike that of any other bird of prey. That makes it easy to identify and fun to paint. When I took on the task of painting this bird I broke it down into different color sections—the back, tail, breast, wings, and head. I began by laying down base colors for each section. These base colors are tones with extra gesso in their mix. Later I applied washes of acrylic color over these bases to intensify the color tones. I hope this painting demonstration is helpful to all in the pursuit of painting this beautiful little falcon.
Jeff Rechin is recognized as an elite sculptor whose artistry and technique has garnered him two Best in World titles at the prestigious Ward World Championship.
Read the rest of this article in Wildfowl Carving Magazine’s Spring 2014 issue!
Wildfowl Carving Demonstration
For a closer look at any step or swatch, click on the image to enlarge.
Painting Swatches
-
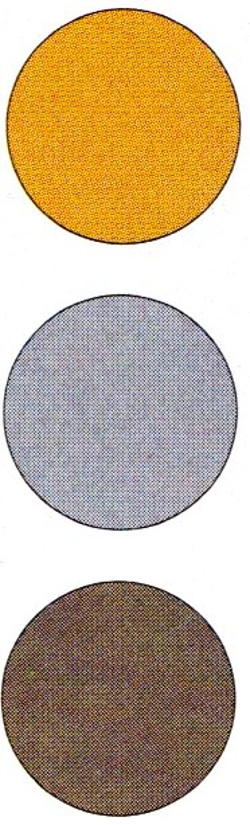
Burnt sienna and yellow oxide. For the back, tail, and top crown of the head.
-
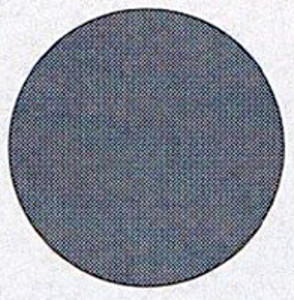
Gray gesso and white gesso. For the wings and top of the head.
-
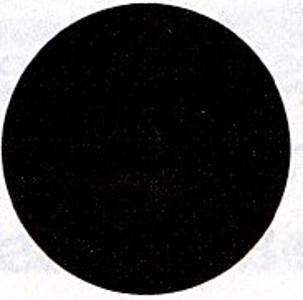
Black gesso and burnt umber. For the primaries and tail band.
-
A touch of burnt sienna and a touch of white gesso. For the breast.
-
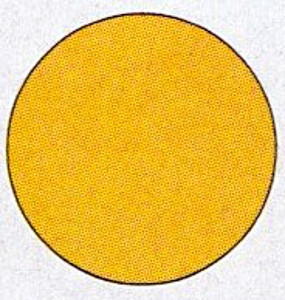
Cadmium yellow medium with a small amount of burnt sienna. For the eye ring, nostril area (cere), bill and feet.
-
These are the base colors I used to begin for the head, wings, tail and back. They are similar to the first three colors above, but with a small amount of additional white gesso added.

Full Painting Tutorial
-
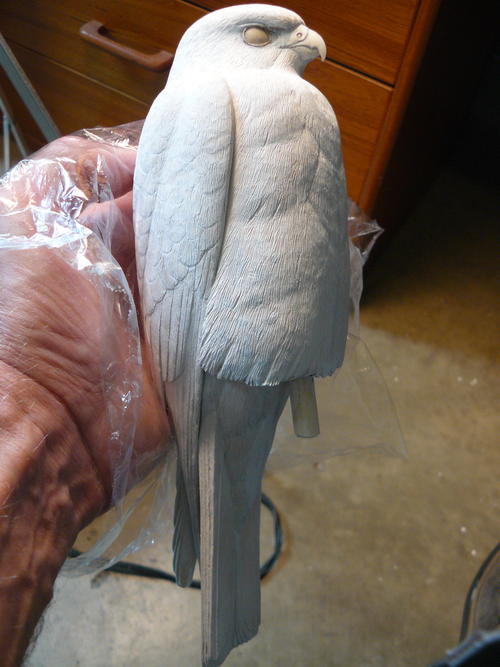
Before I begin painting, I apply a 50/50 lacquer/water seal to the finished bird. This allows me to retain the textured detail by applying gesso washes instead of straight gesso when I build up a uniform white gesso surface.
-
The bird is primed, and its gesso base is ready for acrylic painting. I tend to handle the bird with plastic wrap to keep the surface pristine thus preventing anything that would repel the acrylics from the surface.
-
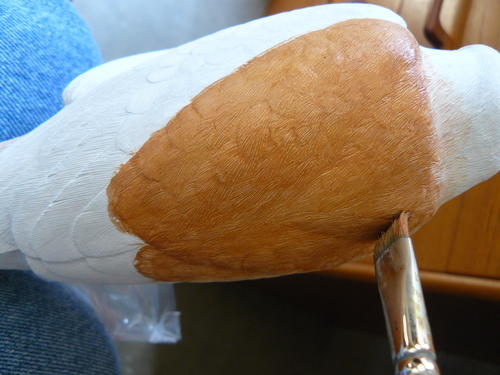
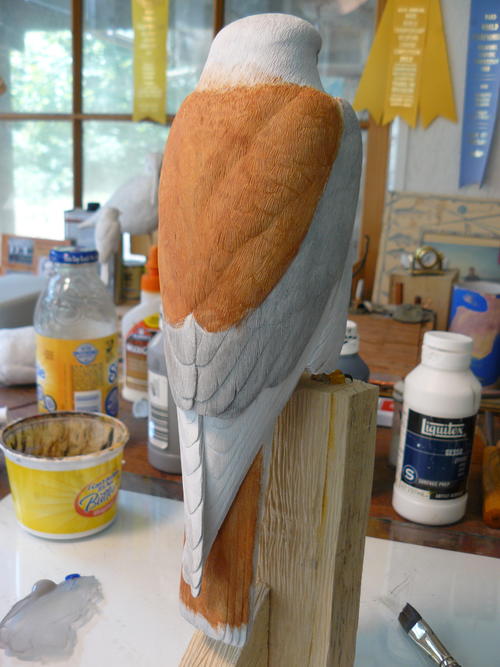
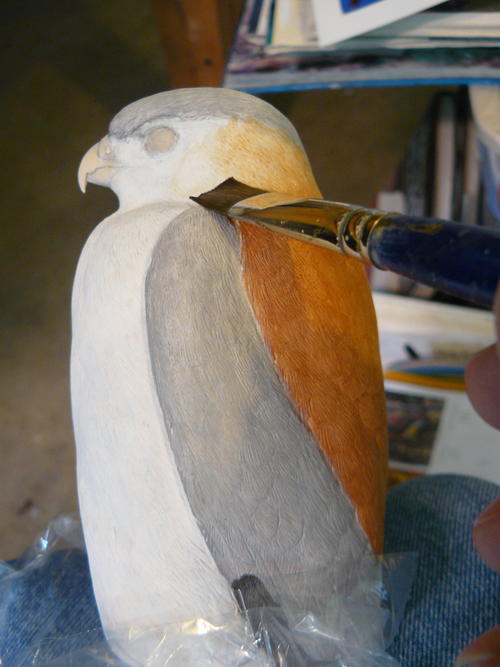
I start painting with my rust tone for the back, tail, and crown. This consists of burnt sienna, yellow oxide, and white gesso. I paint to achieve an even color tone in these areas.
-
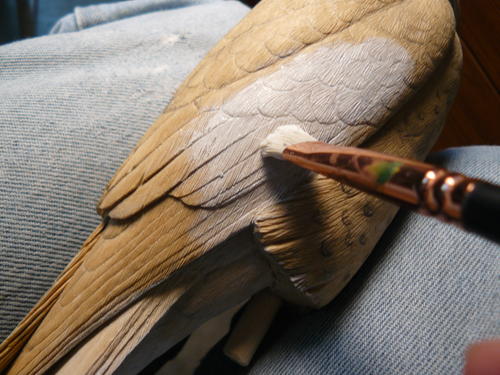
Apply the slate blue tones to wings from the shoulder (actually the wrist) to the end of secondary feather group and the top of the head. Use a mix of gray gesso, ultra marine blue, and some white gesso.
-
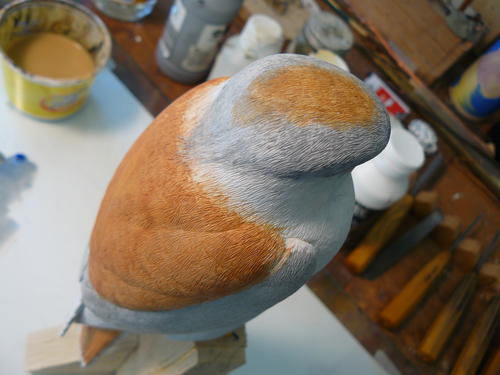
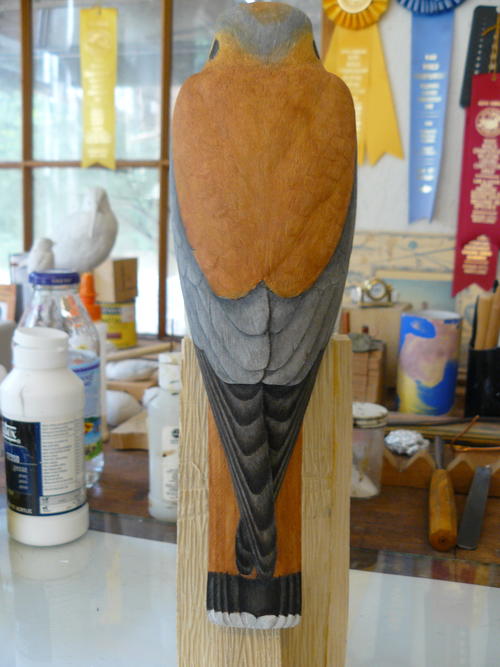
This shot shows the back, wings, and tail with their base colors applied. I still have to do the top of the head. In the beginning, these base colors look somewhat light and pastel, but I will make them richer with washes that don’t have the gesso in the mix.
-
I’ve painted the top of the head with the same slate blue I used for the wings. It trails into a V at the back of the head. The “cap” is the same value as on the back and tail.
-
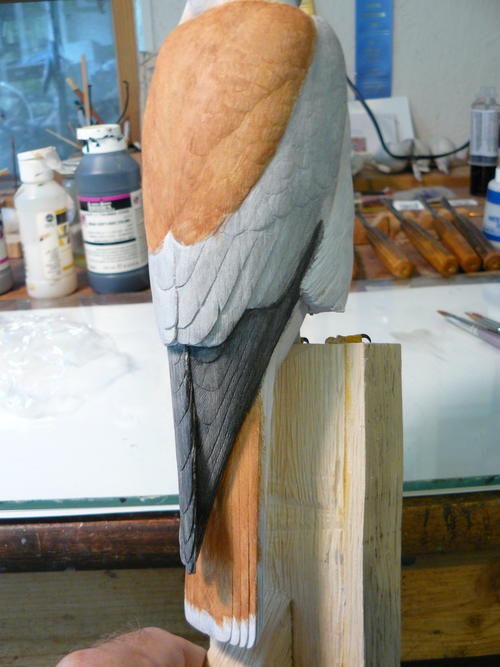
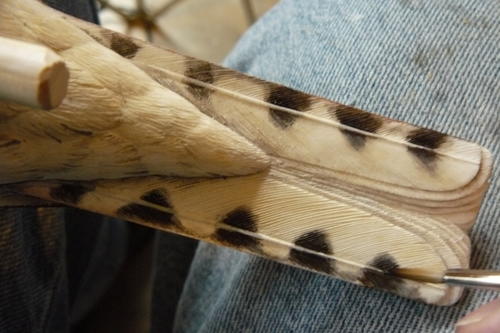
I paint the primary feather groups with a mix of black gesso, burnt umber, and gray gesso, leaving a base that will end up as the lighter value for the individual primary feathers.
-
Using the same color mix I used for the primary sets, I paint the band at the end of the tail. This tone will become the light value of each feather once I apply darker edges to create contour.
-
Apply a light value of burn sienna, yellow oxide, and white gesso to the back half of the head. This finishes the head’s base colors.
-
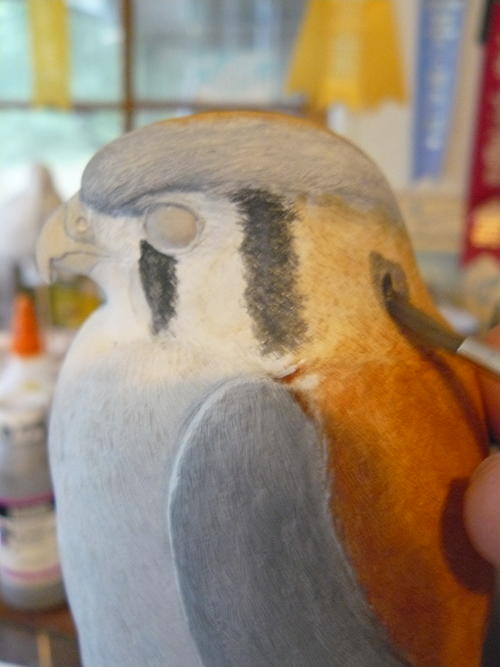
Use the same mix as that for primaries and tail band to paint the facial bands below the eyes and the back half of the head as well as what I’ll call “eye spots” on the back portion of the head.
-
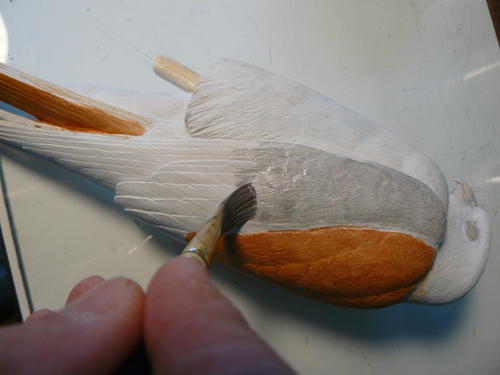
Paint the breast with the buff color, a mix of yellow oxide with a small amount of burnt sienna and white gesso. This covers about three-quarters of the breast and fades to white on the lower end of the belly.
-
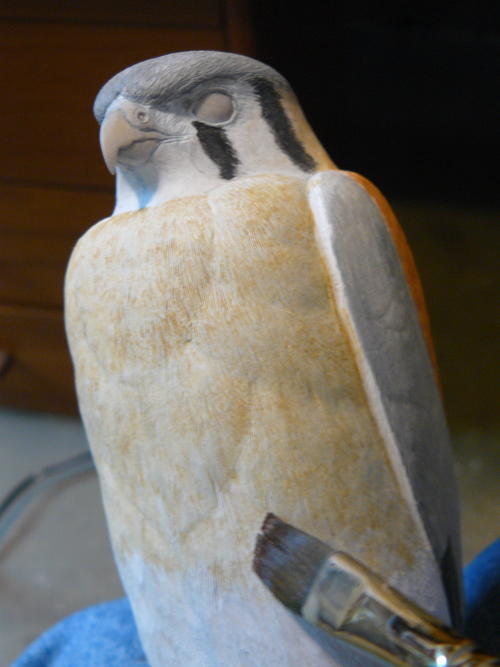
This image shows how the breast should look after I’ve applied a couple of washes of mix used in the previous step.
-
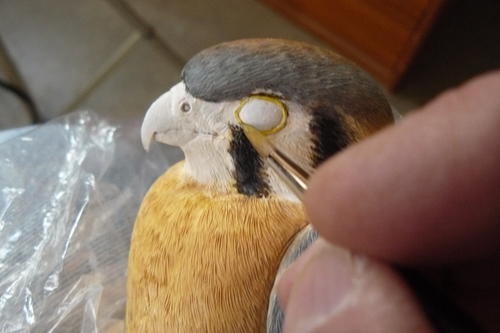
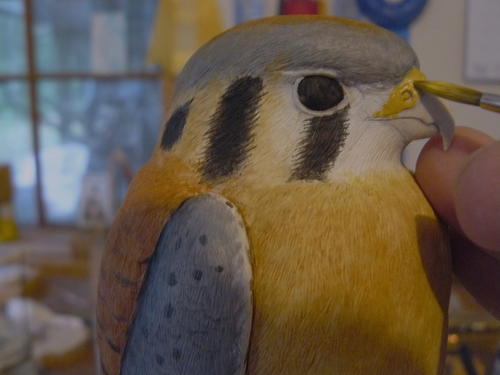
Time to finish painting the face and bill. I use a mix of cadmium yellow and a small amount of burnt sienna to paint some areas of the face, including the eye ring.
-
The eyes of the kestrel are quite dark. I carve in my eyes and paint them. Here I’ve started with a mix of black gesso and burnt umber, which creates a warmer black than straight black gesso would.
-
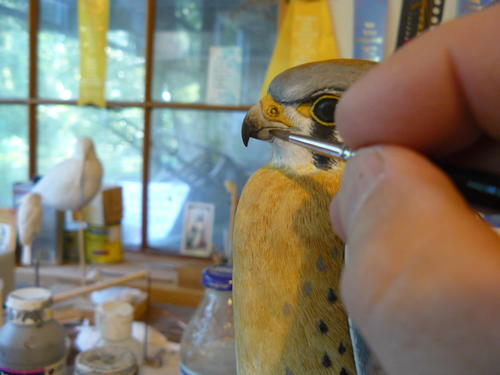
For the cere area of the bill, which contains the nostrils, I use the mix I used in step 13. You can paint the nostrils themselves using burnt umber to create dark spots.
-
The bill has a gradation of dark to light until it meets the cere. I start by putting a base color of light gray (gray and some white gesso) on the bill and then paint the bill with black gesso and burnt umber from the tip towards the cere. By tapping this dark value in, I can transition from dark to light.
-
The lower half of the eye shows some brown. Using a mix of burnt umber and a small amount of white gesso I paint a small band of this brown, leaving it dark in the center to create a pupil. I add a white gesso highlight dot in the upper top of the eye.
-
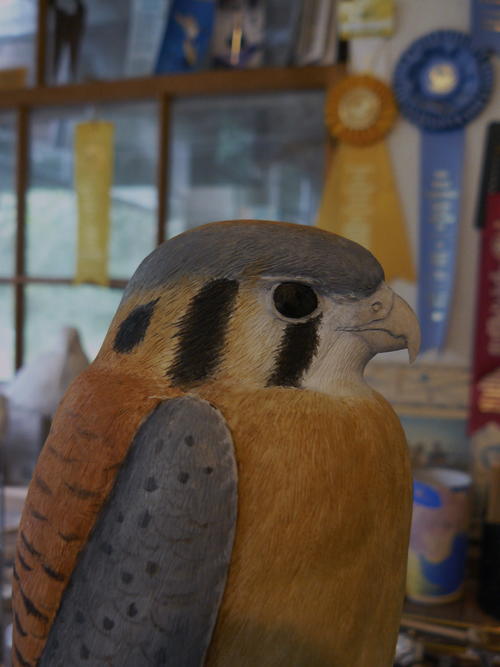
This photo shows the completed face. I say completed, but there are always little refinements you can do to make the painting even tighter. I finish the eyes and bill with acrylic gloss varnish.
-
For the secondary feathers, I use the same colors as I did in step 4 but without white gesso. I paint in shadowing using this darker mix, separating each feather.
-
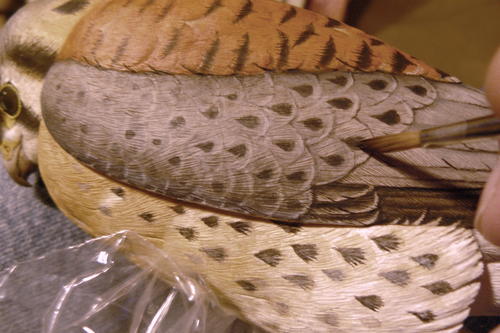
Define the secondary coverts with the mix from the previous step and in a similar fashion.
-
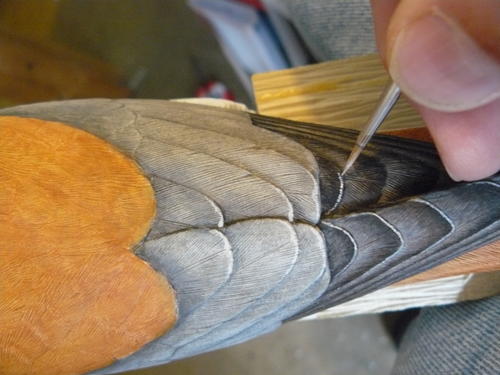
In this photo, I use a mix of black gesso with some burnt umber to paint the outer edges of the primaries. This gives definition to the individual primary feathers. Leave the lightest value of color in the front end of each feather.
-
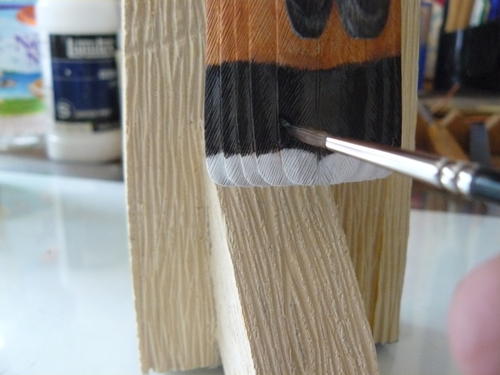
Use the same process that separates the primary feathers and the outer edges of the tail feathers within the tail band.
-
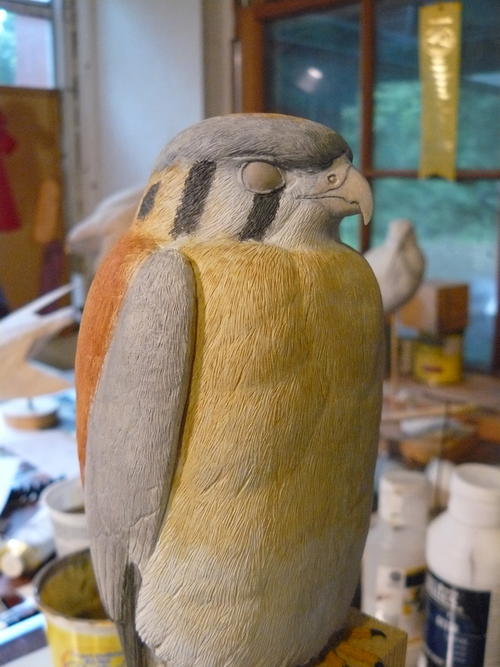
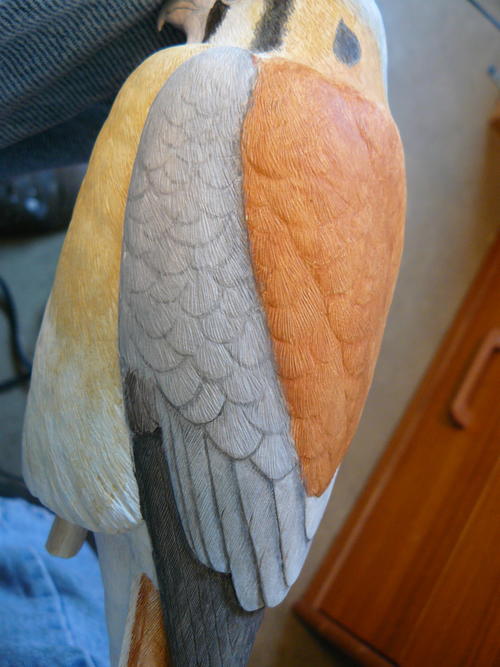
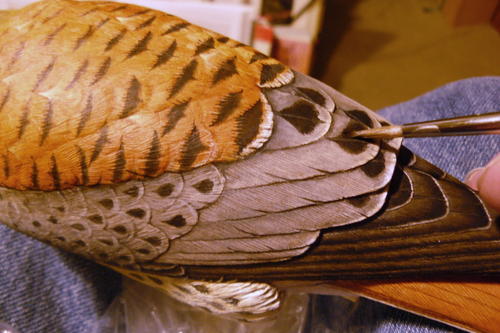
This back shot shows what has been covered so far. I can work in the banding on the back spotting feather later.
-
I apply highlight lining to primaries and have also worked the edges of the secondary feathers. For this, I usually use a #1 or #2 size round brush with mix of white gesso and a touch of yellow oxide.
-
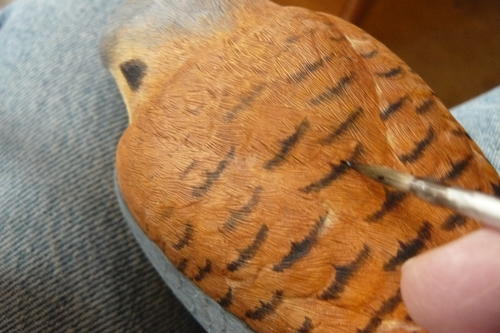
To add the barring on the back, I use a mix of black gesso and burnt umber and establish a pattern. You can use a much lighter value, such as light-gray gesso, to establish the pattern and then go back to darken the bars with the above mix.
-
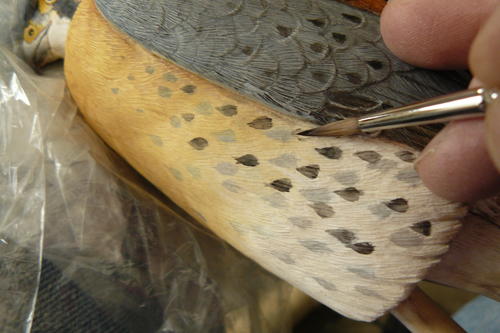
I lay out the spotting on the bird’s flanks using some light gray gesso and white gesso mix to create the light spots. I mix in some darker spots to create depth.
-
Now it’s time for the bars on the back. As you can see here, the bars tend to widen as you move down the back. I am also adding the large dark spot markings to the secondary feathers, and I’ve painted smaller spots in the center of the secondary covert feathers using the same mix used for the back barring.
-
The secondary covert feathers also have spots. I apply them all light to begin with and then darken them. I like to leave some light and others dark to create depth.
-
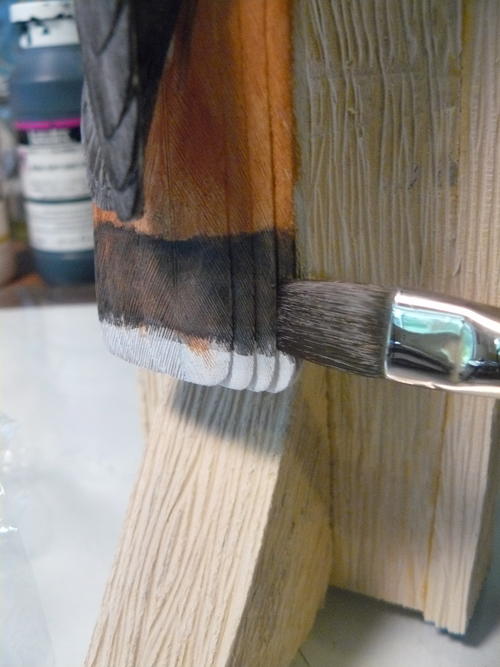
On the underside of the tail, I begin to add markings to the edges of the outer feathers, starting light in the beginning. Once I’m satisfied with their location, I can darken them with same mix I used for barring and spots.
-
The outer tail feather spots are in place. The feather quills on the undersides of the feathers tend to be a lighter value than those above. I paint these quills with white gesso mixed with a little yellow oxide.
-
You can break up the solid color of the belly by creating the appearance of under down showing through. Do this by painting small light colored Vs in the major feather groups you carved in the breast of the bird.
-
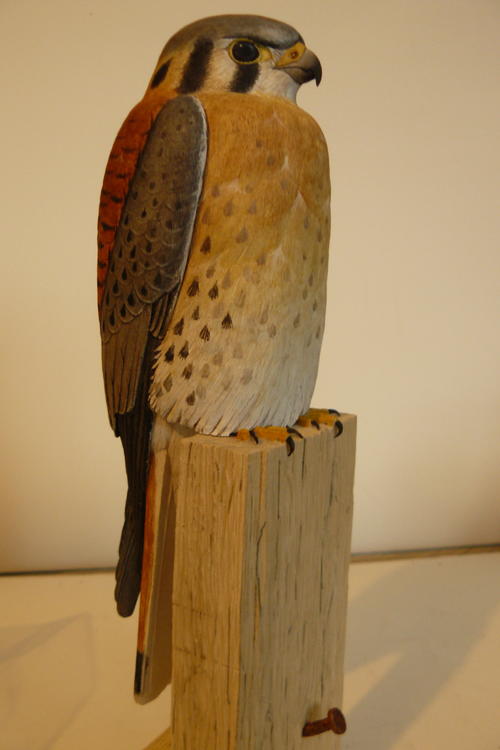
Here’s a photo of the completed kestrel. I created a simple barn-oak looking base made from tupelo and left it unpainted. This is just one many options for mounting your kestrel.