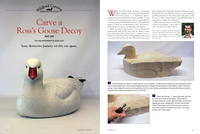
Carve a Ross’s Goose Decoy, Part One
Some distinctive features set this one apart.
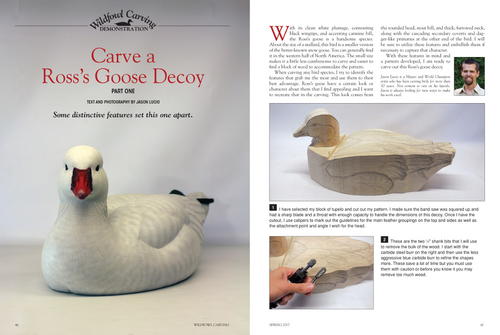
Jason Lucio is a Master and World Champion artist who has been carving birds for more than 30 years. Not content to rest on his laurels, Jason is always looking for new ways to make his work excel.
With its clean white plumage, contrasting black wingtips, and accenting carmine bill, the Ross’s goose is a handsome species. About the size of a mallard, this bird is a smaller version of the better-known snow goose. You can generally find it in the western half of North America. The small size makes it a little less cumbersome to carve and easier to find a block of wood to accommodate the pattern.
When carving any bird species, I try to identify the features that grab me the most and use them to their best advantage. Ross’s geese have a certain look or character about them that I find appealing and I want to recreate that in the carving. This look comes from the rounded head, stout bill, and thick, furrowed neck, along with the cascading secondary coverts and dagger-like primaries at the other end of the bird. I will be sure to utilize these features and embellish them if necessary to capture that character.
With these features in mind and a pattern developed, I am ready to carve out this Ross’s goose decoy.
ROSS'S GOOSE DECOY
For a closer look at each step, please click on the images to enlarge.
WILDFOWL CARVING DEMONSTRATION
-
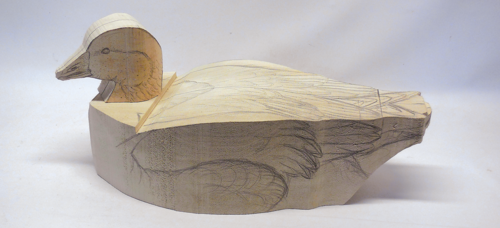
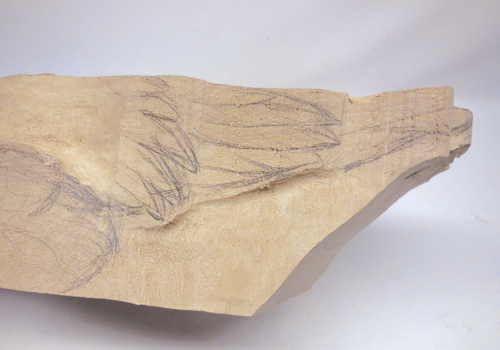
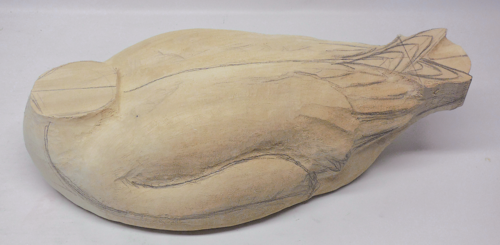
I have selected my block of tupelo and cut out my pattern. I made sure the band saw was squared up and had a sharp blade and a throat with enough capacity to handle the dimensions of this decoy. Once I have the cutout, I use calipers to mark out the guidelines for the main feather groupings on the top and sides as well as the attachment point and angle I wish for the head.
-
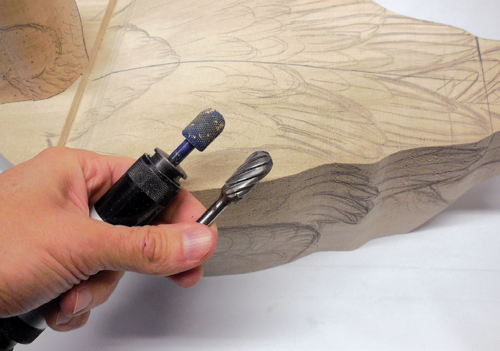
These are the two 1⁄4" shank bits that I will use to remove the bulk of the wood. I start with the carbide steel burr on the right and then use the less aggressive blue carbide burr to refine the shapes more. These save a lot of time but you must use them with caution or before you know it you may remove too much wood.
-
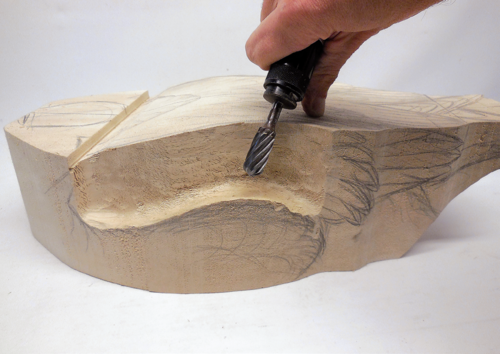
The way that I carve requires relieving the side feather group from the scapulars first. I cut in from the line that marks the top of the side feathers to the line that marks the width of the scapulars, leaving a 90-degree step-in.
-
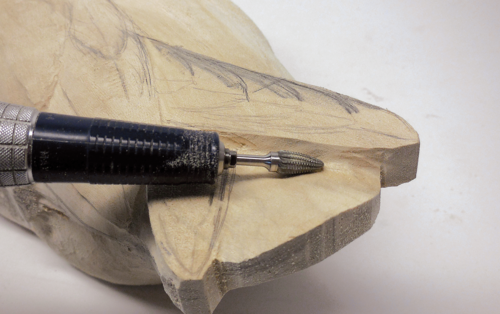
I make the same type of cut along the bottom of the tertials and draping wing coverts. On the Ross’s goose these tend to stick out wider than the rump, so that is why I have cut in below their line.
-
I will also cut the excess material around the neck down to the line of the back as it carries forward into the chest area. Using the head, I have traced the neck outline at the angle I want on the body block. I will trim up to this line, being sure to let the neck flare out as it flows into the chest feathers.
-
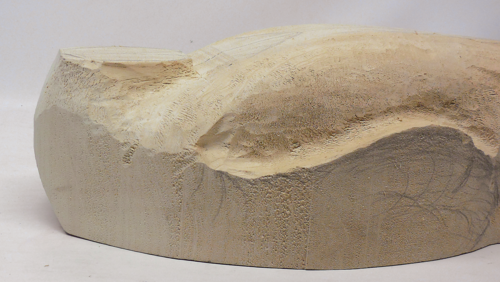
I now round the scapulars down to the top of the side feathers and to within about an inch and a half of the centerline of the back, since this area will then be recessed. I recess the center a quarter-inch down, starting at the cape and ending where the tertials cross over the centerline.
-
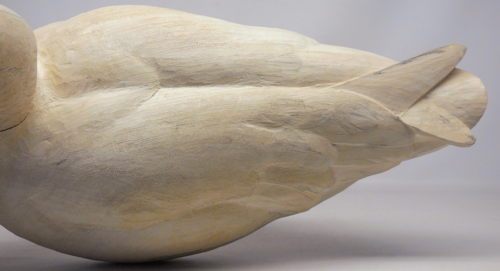
This view from the back shows the amount of rounding I’ve done to this point.
-
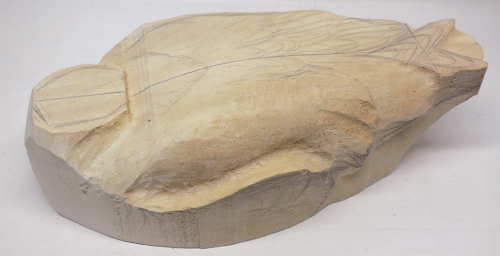
I mark the widest point along the sides and up the chest to the neck. I will now round off the areas above and below the line. I know that I will refine this area and the scapulars more so I am not going for the final shape here—just getting rid of the bulk of the wood. I also round the chest area into the neck and the rump under the tail.
-
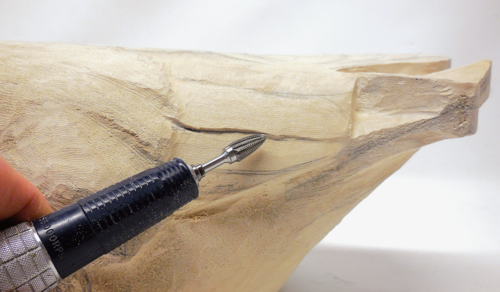
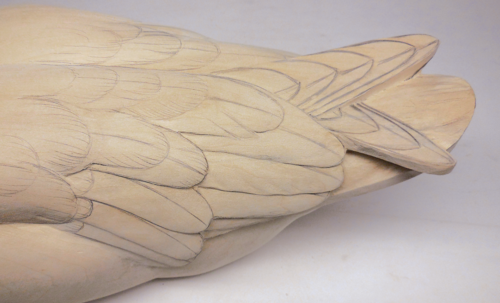
At this point I re-sketch the tertials and greater wing coverts. Using my Gesswein and a coarse carbide stump cutter with a 1⁄8" shank, I start to outline the individual feathers as well as incorporate any larger splits. This bit is the one that I will use for the majority of my refinement carving, including feather outlining, splits, individual feather rolling, and head and bill carving. It is a versatile bit and I strongly recommend it.
-
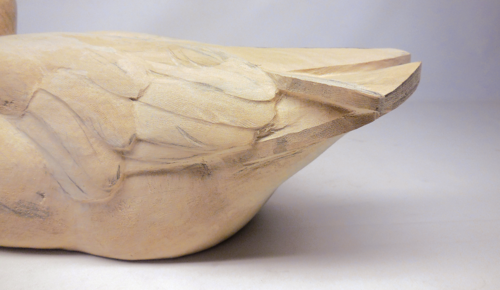
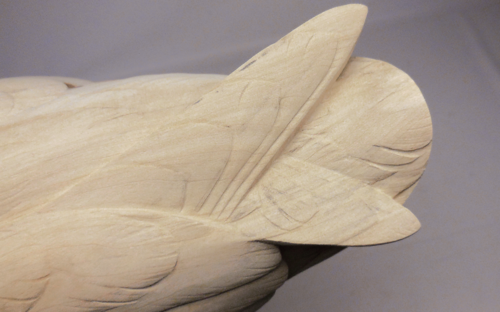
The primaries need to look like they originate from under the side feathers. I begin to slope them under the tertials and curve the tips slightly downward. I also carve the upper tail surface, giving it the needed curvature. The lower primary will need to be recessed and touch the surface of the upper tail. If you aren’t familiar with waterfowl anatomy or how the wings fold and arrange themselves, you may want to take the time to investigate this more.
-
I have further refined the wing tips and tail area. Trim down the tail edge and the primary tips so they are sturdy but not bulky. The rump has been rounded more and the lower-tail coverts have been carved in. With a little more carving on the tertials, this area will be pretty much ready for sanding.
-
The general body form is complete. I’ve defined the cape and rounded all shapes to a nice, pleasing form, leaving no flat areas. I will move to the head at this point but still need to make the final refinements to the wing and tail feather edges before sanding.
-
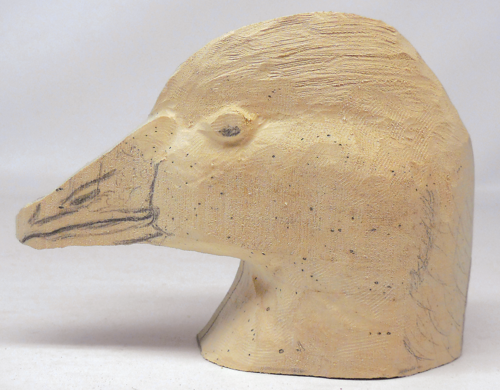
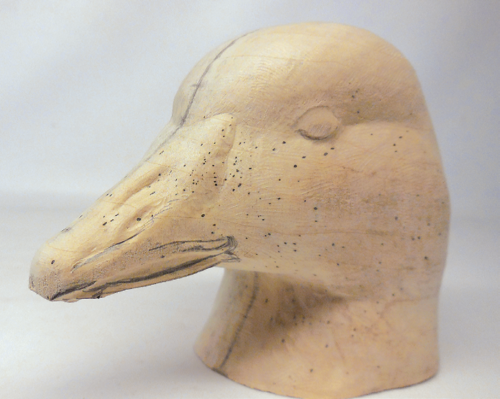
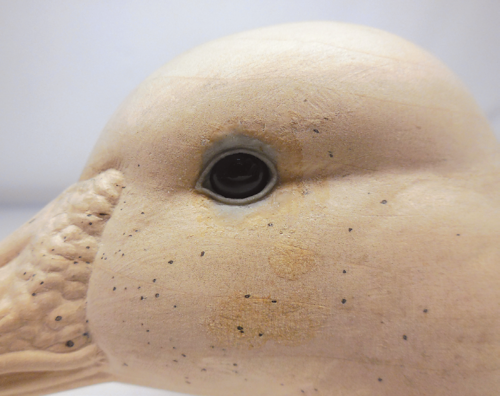
I always seem to start with the body and then move to the head. That’s what works for me, but it is certainly no hard-and-fast rule. I sketch out the head details (as seen in step 1) and then establish the eye channel and narrow the crown to the guidelines marked on the top. Then I round the top of the cheek, the front of the neck, and the crest. I tend not to drill out the eye holes until I have carved the entire head. I find that when I cut out the eye holes too early I tend to round the shapes down into them rather than follow the eye channel.
-
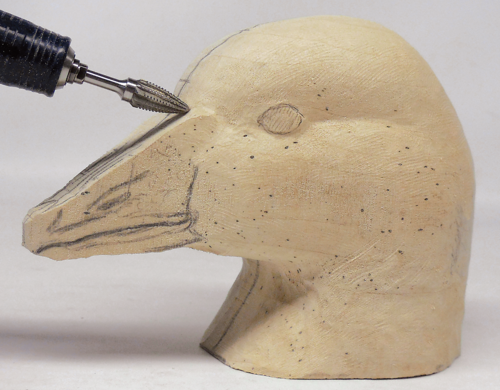
The crown has been rounded and the cheeks and neck are more complete. I begin to relieve the bill.
-
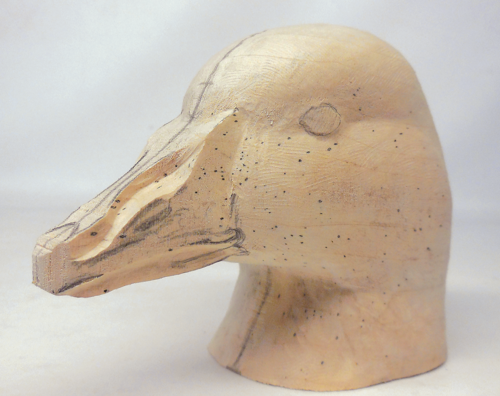
If you have access to a study bill, it will be very helpful at this stage. Like my cuts on the body, I make the cuts for the areas around the nostrils at angles of 90 degrees. I don’t do this for every bill but it works with the pronounced details on the Ross’s. I have also stepped in the lower mandible.
-
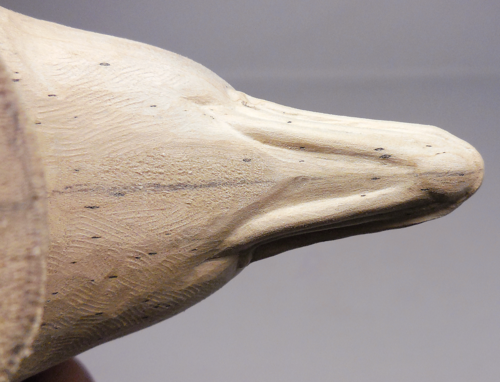
Here you can see how I’ve shaped the pronounced nostrils and top ridge of the bill. The upper culmen of the Ross’s is covered in warty protuberances, so I make sure to leave this area oversized. This will let me carve in the details of the warts and not end up with a narrow bill.
-
Since this will be a gunning/smoothie-style decoy, there aren’t a lot of details to add to the underbill.
-
I’ve carved the nail of the bill and the bill edges. Round off these areas carefully and keep the shapes puffy to get the look of a fleshy bill. I use a small flame diamond or white stone cutter to define the warts. They can be even more pronounced than they are here. I add the nostril holes (nares) with a small steel ball cutter. A little fine sanding and this bill is finished.
-
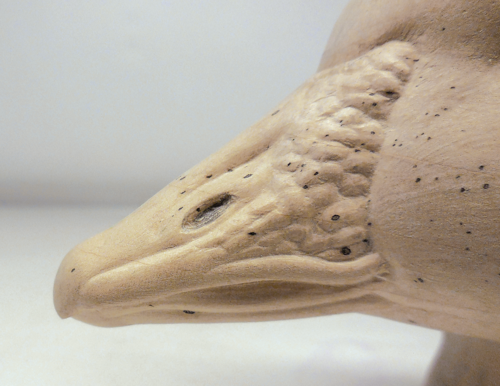
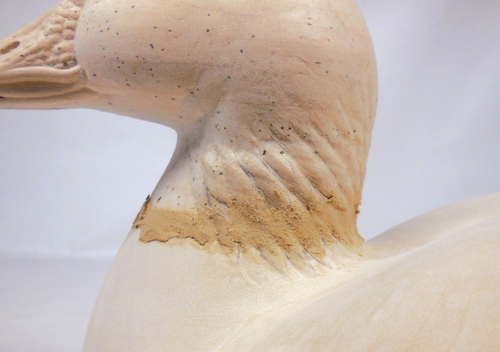
I temporarily attach the head with hot glue and carve the neck into the body. The Ross’s goose has a fairly thick neck so I want to be sure not to go too thin. I will also need room to carve the neck rolls, which are a nice accent point on the finished decoy. Take the time to study these and get their flow right. They flow gracefully on a downward angle to the back and aren’t in perfect symmetrical rows—instead, they converge and diverge with each other. I carve these initially with the carbide stump cutter I mentioned previously and then refine them with various diamond cutters.
-
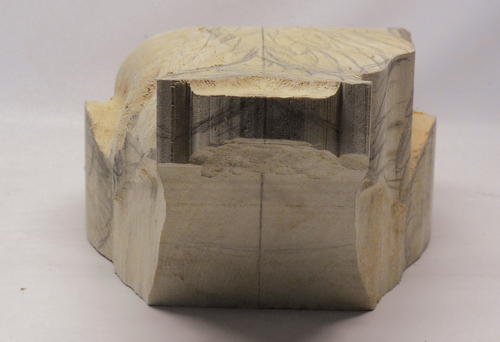
Bring the head to its final shape. I keep going back to my reference as I do this until I am satisfied that I have achieved the Ross’s look. I add a few feather bumps to the cheeks and sharpen the transition from the bill to the head before fine sanding. Using a coarse diamond ball bit, I cut out the holes for the eyes. I will first mark out the diameter of the hole I want, which is 1 mm larger than the glass eye, and then cut to that size. This bird has 9 mm brown eyes.
-
I test fit the eyes to make sure they sit deep enough and to see if I like how the cheeks round into this area. Once satisfied, I set the eyes with Aves Apoxie Sculpt. I let this set for 15 minutes and then mix some additional material for the eyelids. Roll out the Apoxie into a snake and place it around the eye. Using water and a paintbrush, burning pen tip, and other small implements, I shape the lids. Be sure to keep the eye opening somewhat small. This goose doesn’t have an overly large eye. Painting the lids will add to the overall diameter.
-
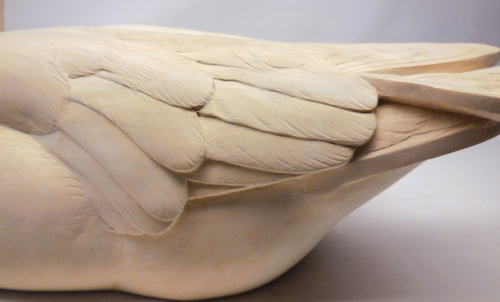
Back to the body. I finalize the edges of the tertials and greater wing coverts and add a few more splits and feather ripples as needed. I round over the trailing edge of the scapulars that overlaps the tertials and greater wing coverts and add some splits here and to the cape as well. I sand the entire body smooth with 320-grit sandpaper.
-
The individual primaries and tail feathers need to be stepped in as well. I carve the feather splits with the tip of the stump cutter or a white ball stone by softly running the cutter from the edge toward the feather shaft.
-
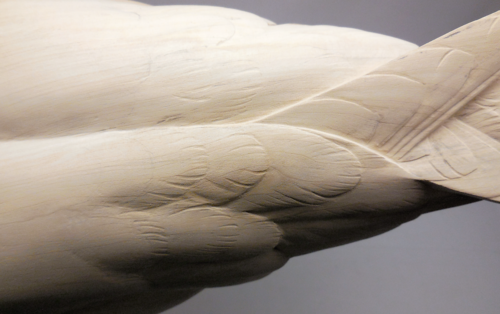
Here’s a detail shot showing the added texture and splits of the tail, primary, and tertial feathers.
-
Some tertial details.
-
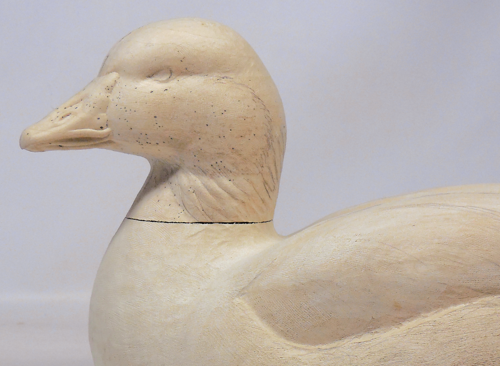
I give the decoy a good once-over. When I am satisfied with everything, I attach the head. I score the two mating surfaces and then glue the head on with five-minute epoxy. I apply pressure as I wait for the glue to begin hardening. I will cut away any spillover of epoxy once it is set. Be sure that the neck rolls you carved earlier on the head and body align properly.
-
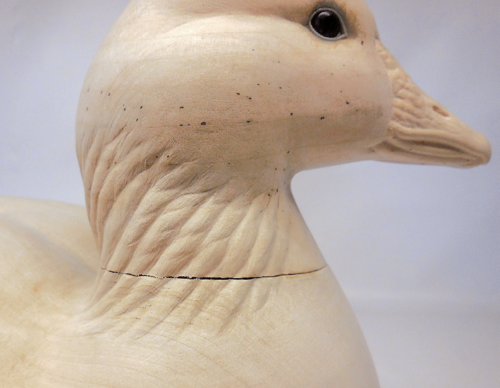
I fill in the joint with LePage Plastic Wood filler. I apply it carefully and use a small paintbrush to smooth it out as I go, dipping the brush frequently in acetone to keep the filler workable. Once it dries, I grind away the excess filler and put back details of the neck rolls. Then I sand with 320-grit sandpaper. I may need to fill a little more until the joint line is well hidden.
-
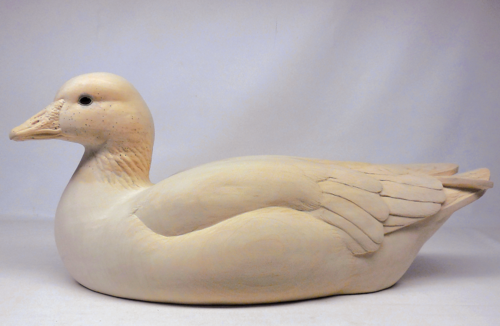
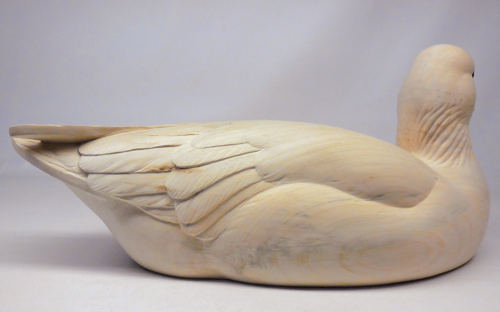
The neck joint is finished and all the carving is done. This decoy is ready for paint.

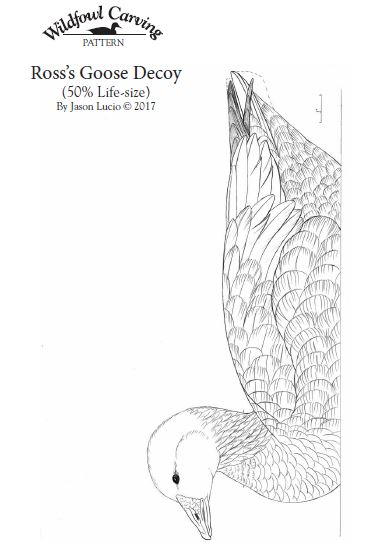
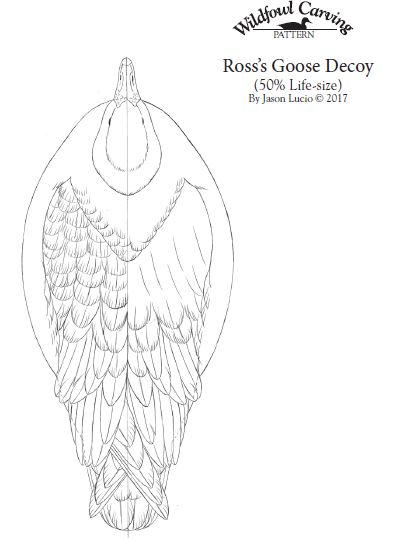
ROSS'S GOOSE DECOY PATTERN
50% life-size pattern by Jason Lucio © 2017